
This is a post by Paul Williams.
Posted Monday, March 18, 2024
Making Simple Robots That Anyone Can Build (Pt. 2)
This is a post by Paul Williams.
Posted Monday, March 18, 2024
So, we’ll continue from where we left on last a little while ago with our bot building blog posts. We’d got to the MK IV if memory serves… Next on the list of things to do is to make our bot interface page nice and pretty.
Because we’re using a very simple webserver on the Raspbery Pi Pico W and because the code handily returned from our generateHTML() function is effectively the page that’s served by the websever; we know this is a good place to add a little customisation for our robot - make our page a little prettier.
When prototyping, it’s always much more satisfying to see the changes happen quickly, as opposed to editing our generateHTML() function, uploading to the bot, connecting to our bot, visiting the url… it’s a lot of steps - so, to make this a bit easier we’re going to use a nice tool called CodePen, our first step is to rip out the HTML from the generateHTML() function and paste it into the HTML window, like so: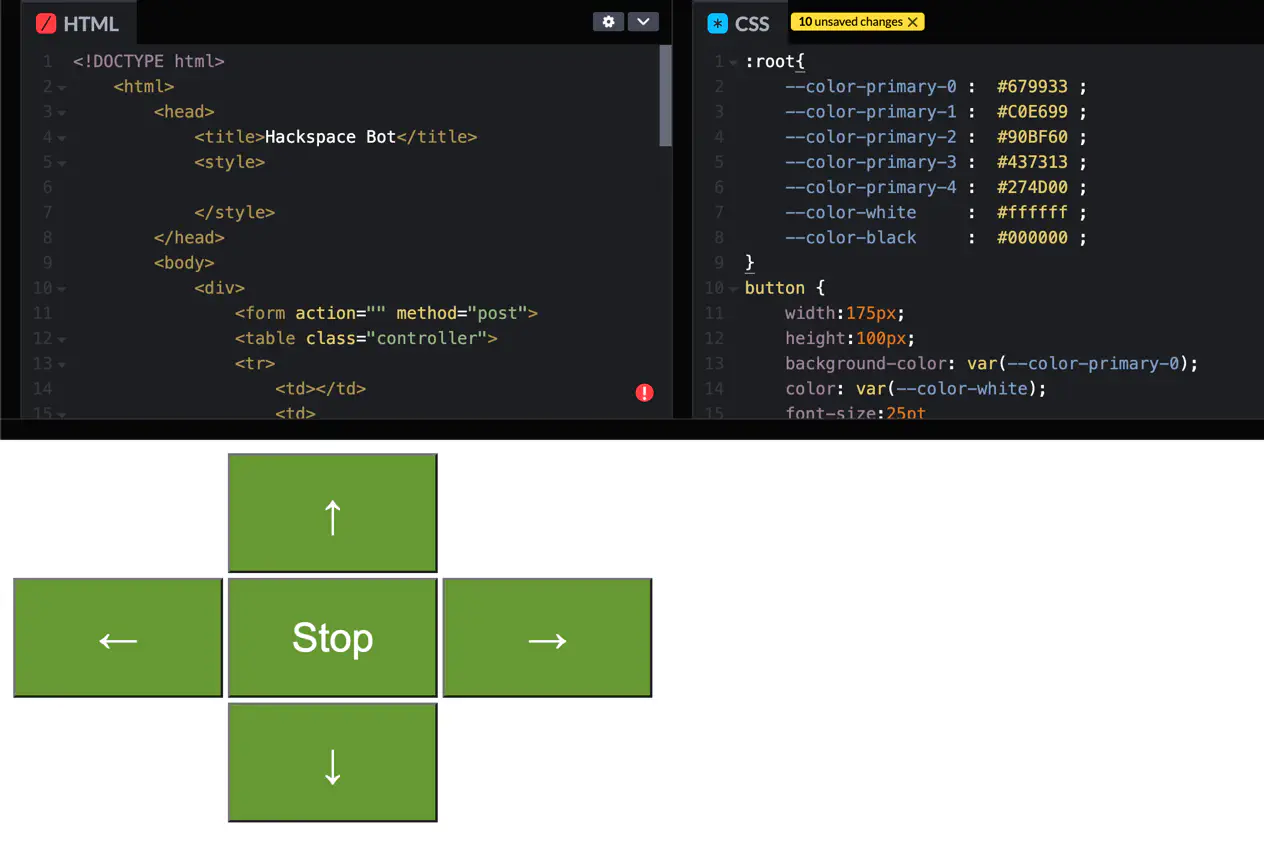
generateHTML() function to make it easier to work with CSS:
html = f"""
    <!--Snip-->
    <style>{style}</style>
    <!--Snip-->"""
return html
The above code is snipped to keep things simple, but what it does is use python’s string format functionality to add the variable style with the the style we read into the variable from the style.css file (more on that a little later).
We’ve also moved generateHTML() into its own file (html.py) and used parameters to drop in from the main program; we import the function into main.py by adding the following code to the top of our main.py:
from html import generateHTML
This allows us to call generateHTML() like we did previously, it’s just tidied away in its own file now… We’ve also added the following code to the beginning of the function - which will allow us to use an exteral style sheet (see I told you more on that later):
style = ""
with open("./style.css","r") as f:
    style = f.read()
Now, once we’re done with making the code look pretty in CodePen we can just drop the code from the CSS window into the style.css file and it will make the controller page all nice and pretty too! Great Stuff!
A good place to grab some colours that go well together is Paletton, For the purposes of this guide however we’re only going to pick a primary colour but don’t let that stop you from adding a little extra flare, pick a colour you like the look of like so: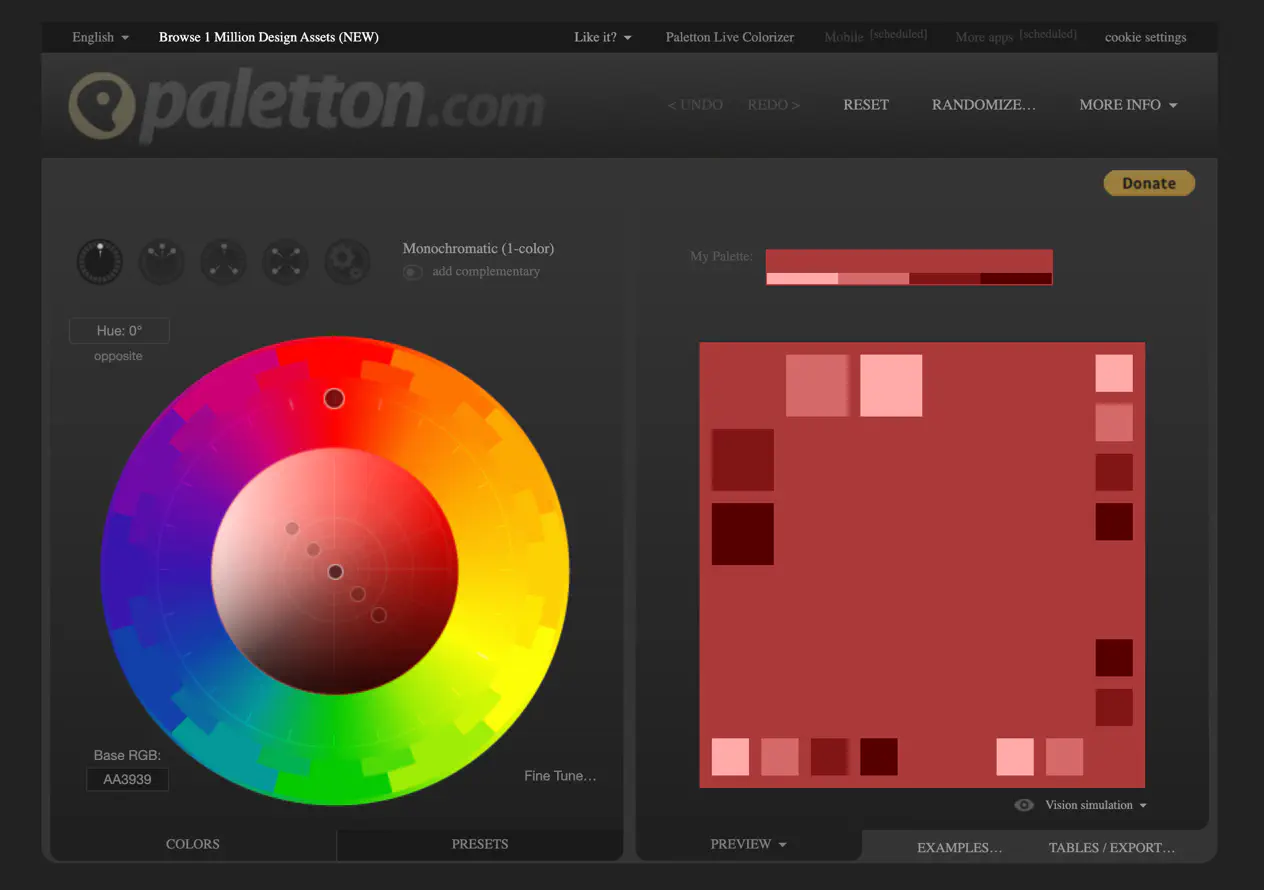
Then, once you’re happy with your colourcscheme - go to the export and select as CSS:
style.css file:
:root{
    --color-primary-0 :  #679933 ;
    --color-primary-1 :  #C0E699 ;
    --color-primary-2 :  #90BF60 ;
    --color-primary-3 :  #437313 ;
    --color-primary-4 :  #274D00 ;
    --color-white     :  #ffffff ;
    --color-black     :  #000000 ;
}
button {
    width:175px;
    height:100px;
    background-color: var(--color-primary-0);
    color: var(--color-white);
    font-size:25pt
}
Where the :root selector contains the variable namnes used for the colours - you don’t have to do it exactly like this but it’s done here for clarity.
Once you’re finished, you should end up with something like this in your generateHTML() function:
def generateHTML():
style = ""
with open("./style.css","r") as f:
style = f.read()
html = f"""<!DOCTYPE html>
<html>
<head>
<title>Hackspace Bot</title>
<style>
{style}
</style>
</head>
<body>
<div>
<form action="" method="post">
<table class="controller">
<tr>
<td></td>
<td>
<button type="submit" formaction="forwards">↑</button>
</td>
<td></td>
</tr>
<tr>
<td><button type="submit" formaction="left">←</button></td>
<td>
<button type="submit" formaction="stop">Stop</button>
</td>
<td>
<button type="submit" formaction="right">→</button>
</td>
</tr>
<tr>
<td></td>
<td>
<button type="submit" formaction="backwards" >↓</button>
</td>
<td></td>
</tr>
</table>
</div>
"""
# this bit is for debugging we can remove in finished branch
html = html + f"""
<div>
<table>
<tr>
<td>SSID</td>
<td>PASSWORD</td>
<td>IP</td>
</tr>
<tr>
<td>{ssid}</td>
<td>{password}</td>
<td>{ap.ifconfig()}</td>
</tr>
</table>
</div>
</form>
</body>
</html>
"""
return html
Note: we already have the external stylesheet file stlye.css generated which the code opens and reads the contents into the style variable, this, in turn is replaced using python’s format string functionality we talked about earlier. We write the code in this way as it allows us to easily change the style of our buttons simply by replacing the colours in the style.css
The secrets.py file is where we, well… store our secrets - sounds pretty obvious right?
The benefit of doing it this way is that we only need to make changes to the one file and they’ll be reflected everywhere, which is a common theme in programming sometimes referred to as the DRY Principle.
Our secrets.py should look something like this:
secrets = {
    'ssid': 'Hackbots_Demo',
    'pw': 'Really_Insecure_Password!',
    }
That’s it just a simple python dictionary in a file! The beauty of this approach is that we can import this file (much like we did with the html.py) and access the settings easily, a brief example is shown below:
from secrets import secrets # This imports the `secrets.py` code as `secrets` into the current file
### We can then read the values into variables
### using the 'key' from the dictionary like so:
ssid = secrets['ssid']
password = secrets['pw']
Using this approach allows us to make changes to the configuration easily simply by changing the values in the dictionary and saving it to the device. which will help later on!
Once we’ve saved our configuration and other files, pushed them to the Pico W we can visit the url (by default it’s http://192.168.4.1) and we’ll see the page we designed earlier all nice and pretty!
Thanks for reading! - Stay tuned for part 3 where we’ll go through the wiring up and building of the bot. PW
Leigh Hackspace is open to all.
Being a member gives you access to our space, tools, and community.