
This is a post by Andrew K.
Posted Monday, March 4, 2024
Building a NAS from an old chassis

This is a post by Andrew K.
Posted Monday, March 4, 2024
As it turns out this is a little more complicated than I expected, even when you start with a larger chassis. My drive to do this, a combination of power requirements, storage space and actually can it be done!
I have several of these from an older project
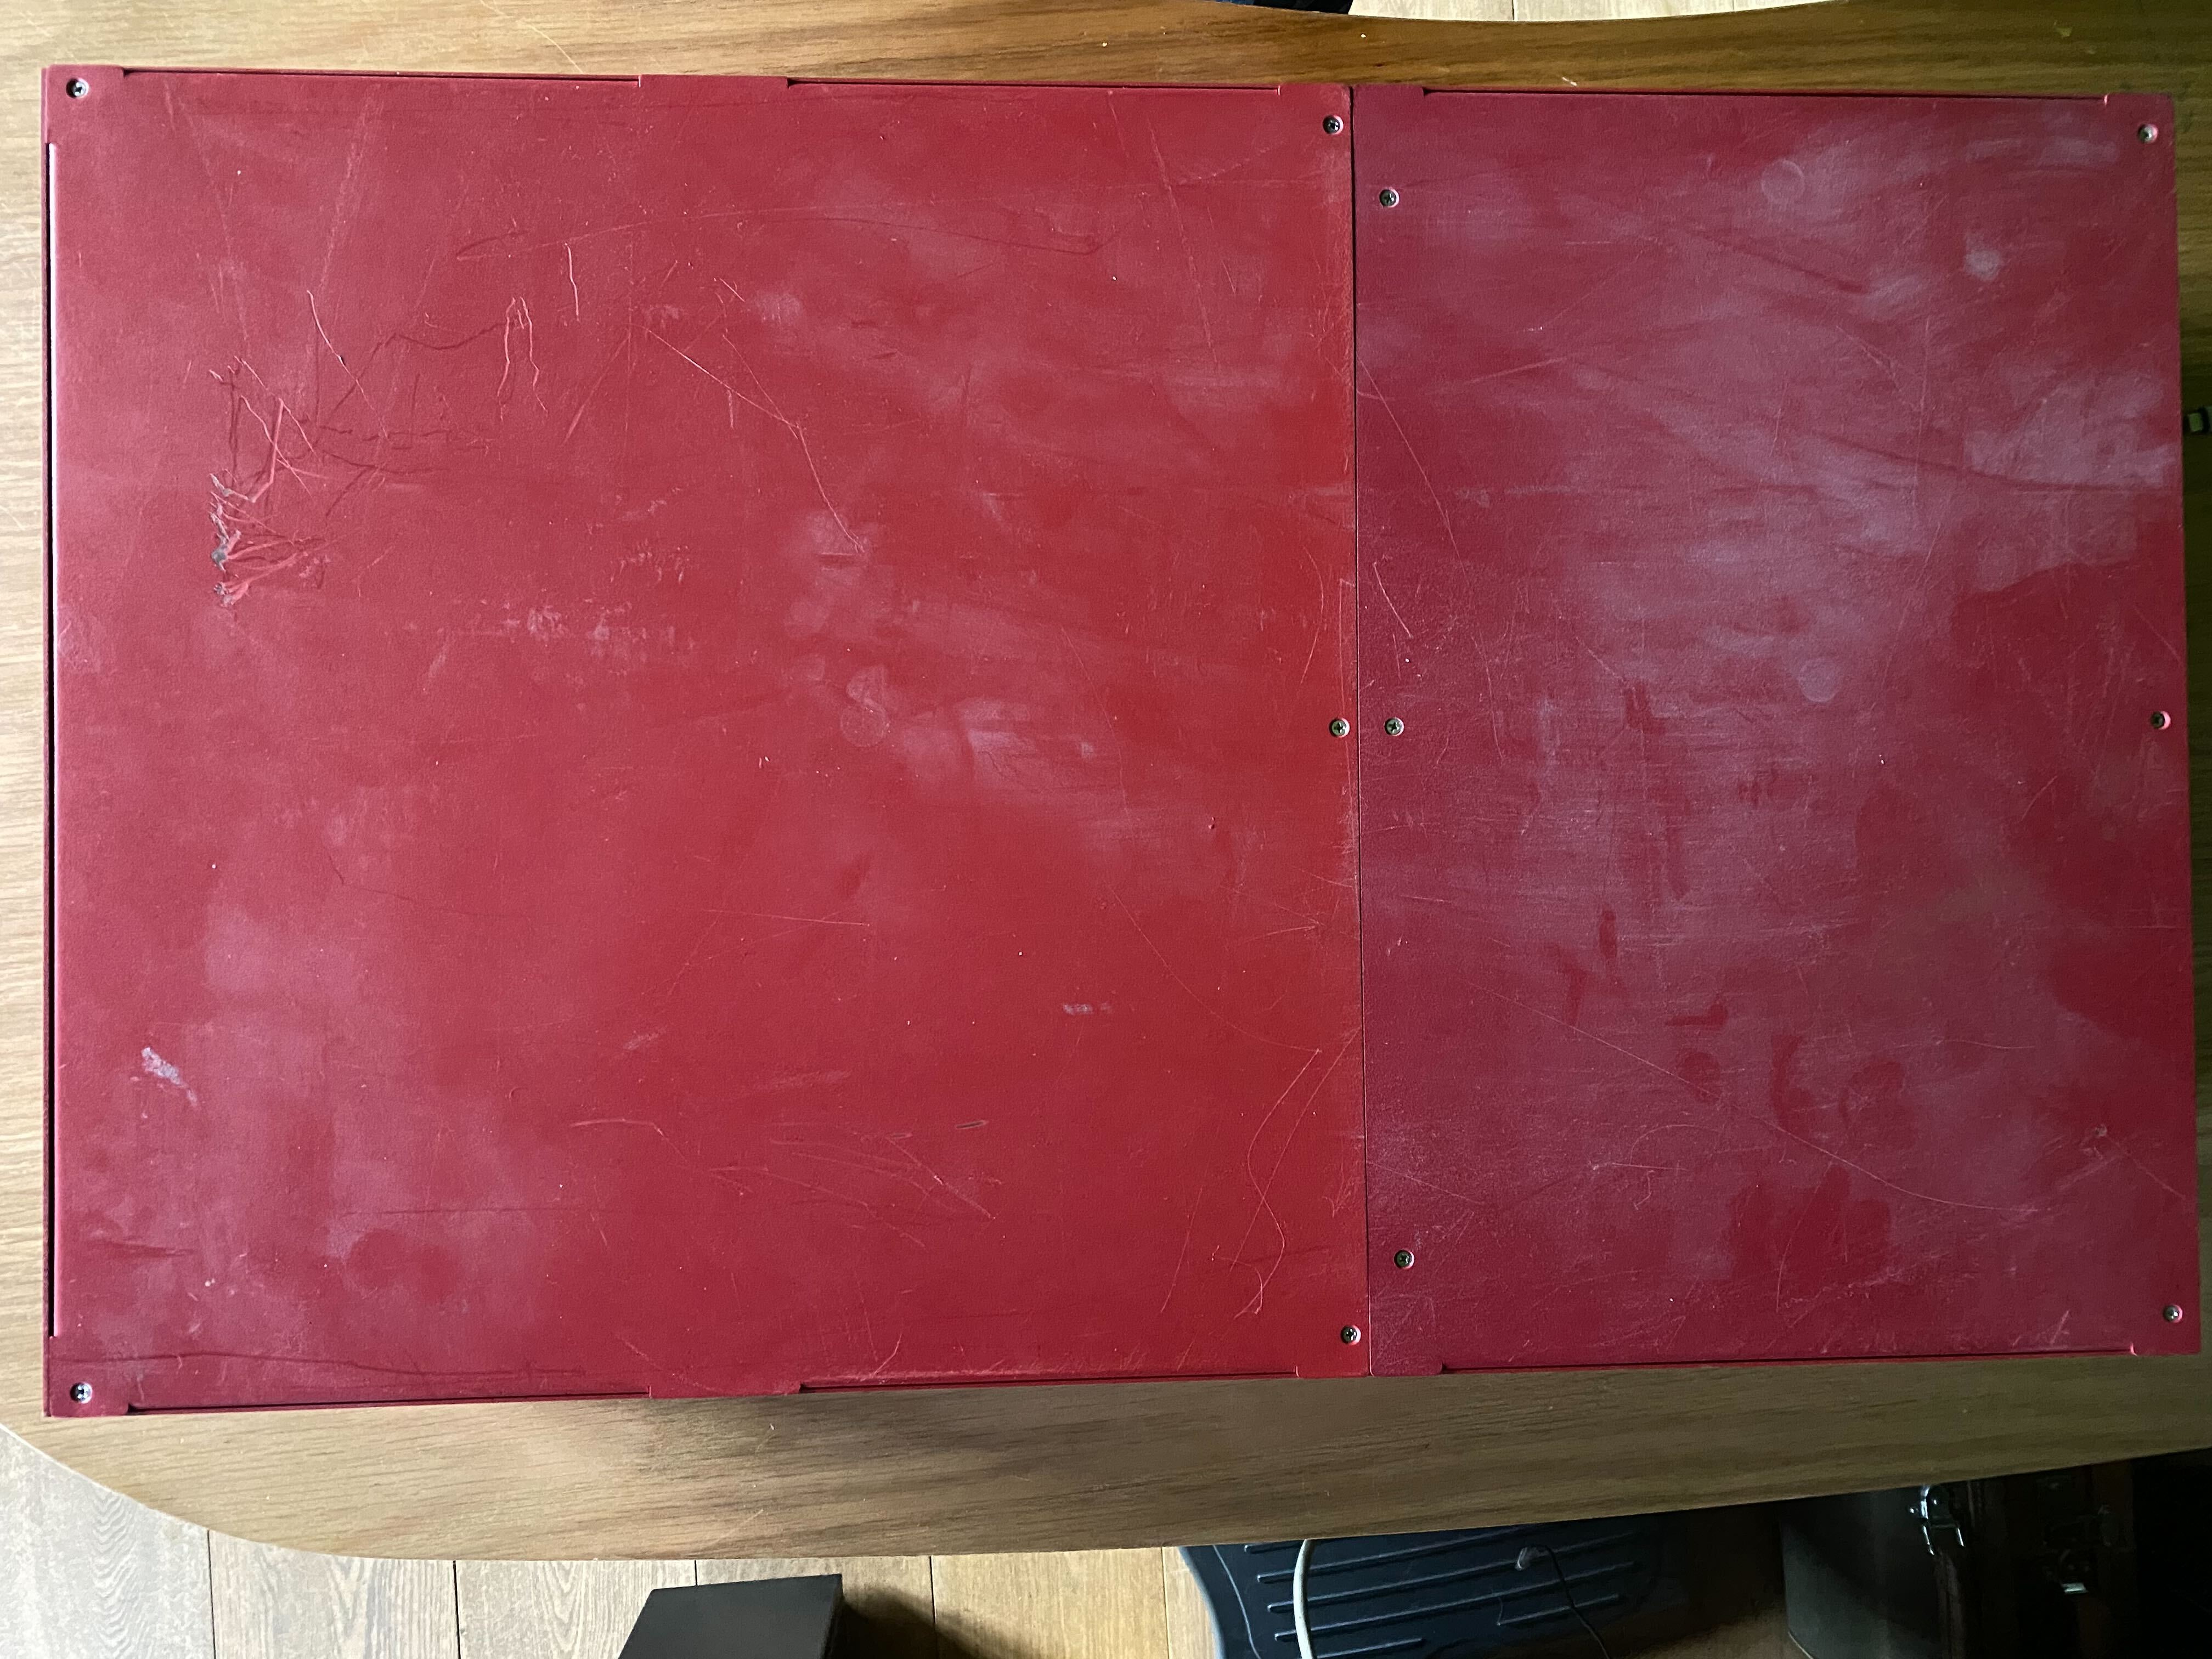
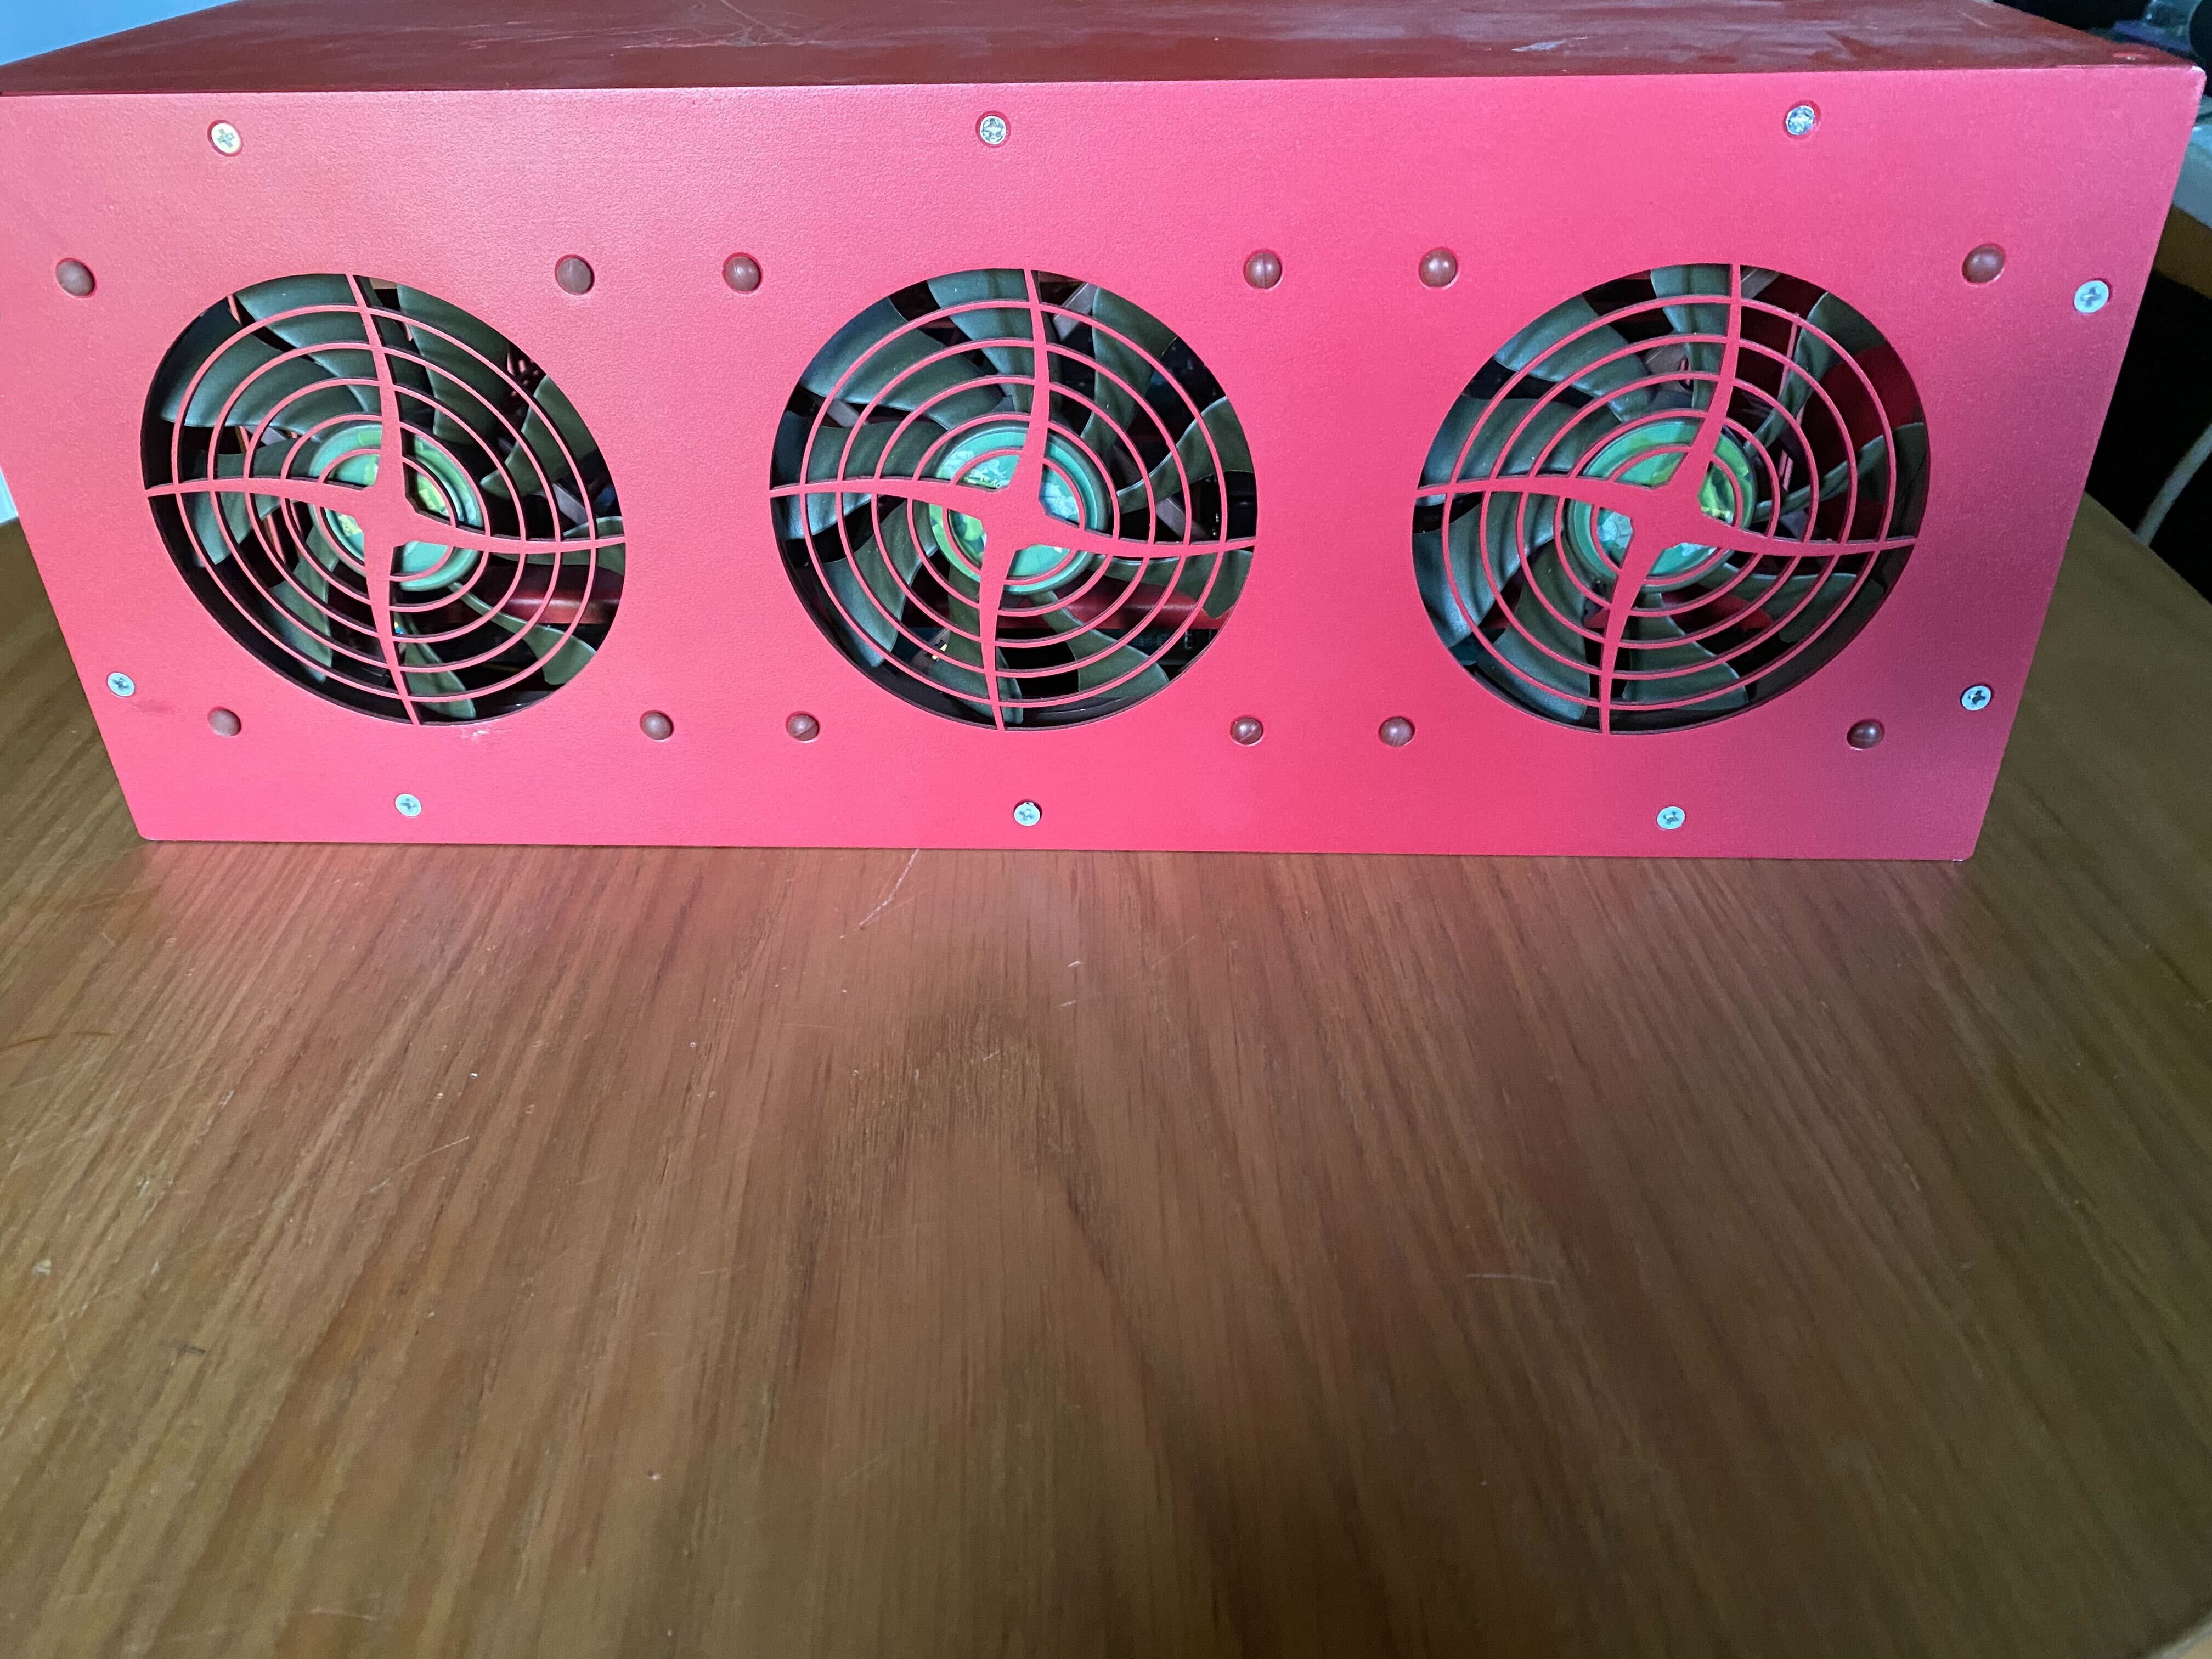
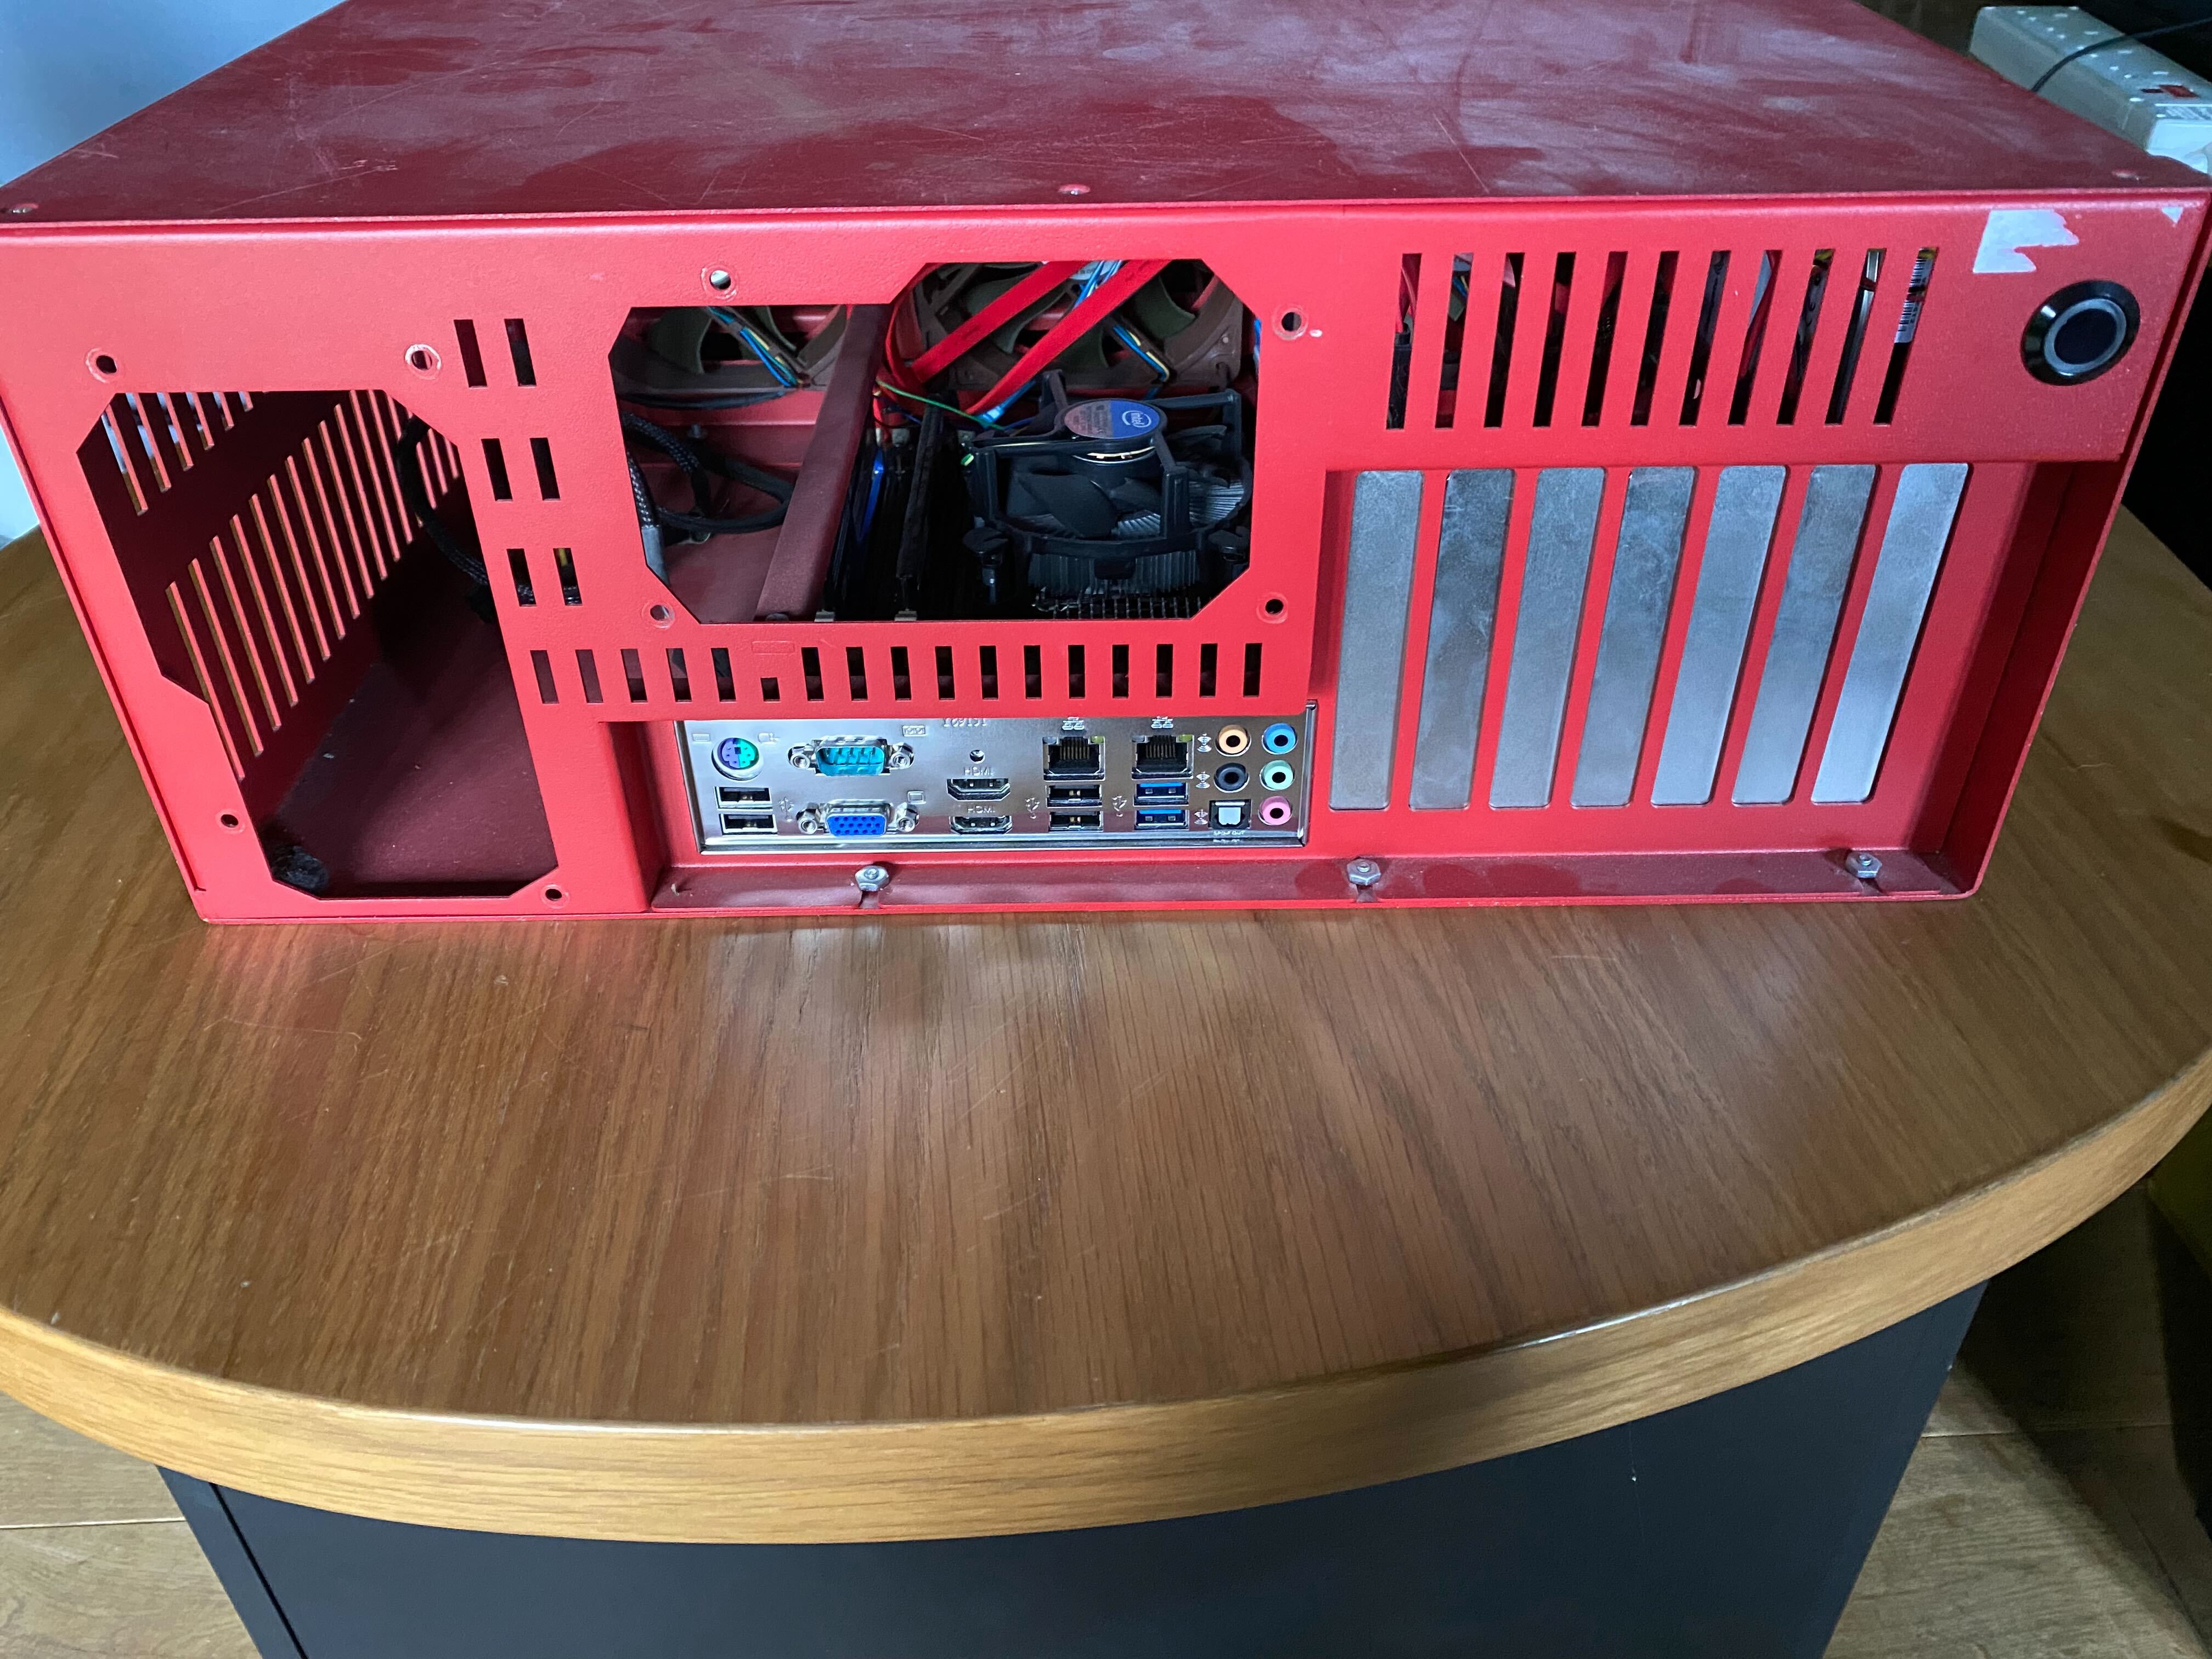
These are 4RU in height, wide and deep enough to sit on a 19" rack shelf and cabinet and are quite old now, >10 years. They were bought for a project which did not get much passed the development stage.
They came from here BackBlaze and I believe you can still order the chassis although no longer sold as a working solution, such that you have to outfit them yourself.
I have put them on ebay on more than one occasion but never got the price I thought they were worth, so just kept them. In all seriousness I probably should have sold them, however I have 3 that were fitted out and 2 empty chassis. There are some covers missing from one, but I digress a litle.
If you open the large cover you find it has a location for 3 1/2 45 disks, see the link above, it goes into plenty of detail.
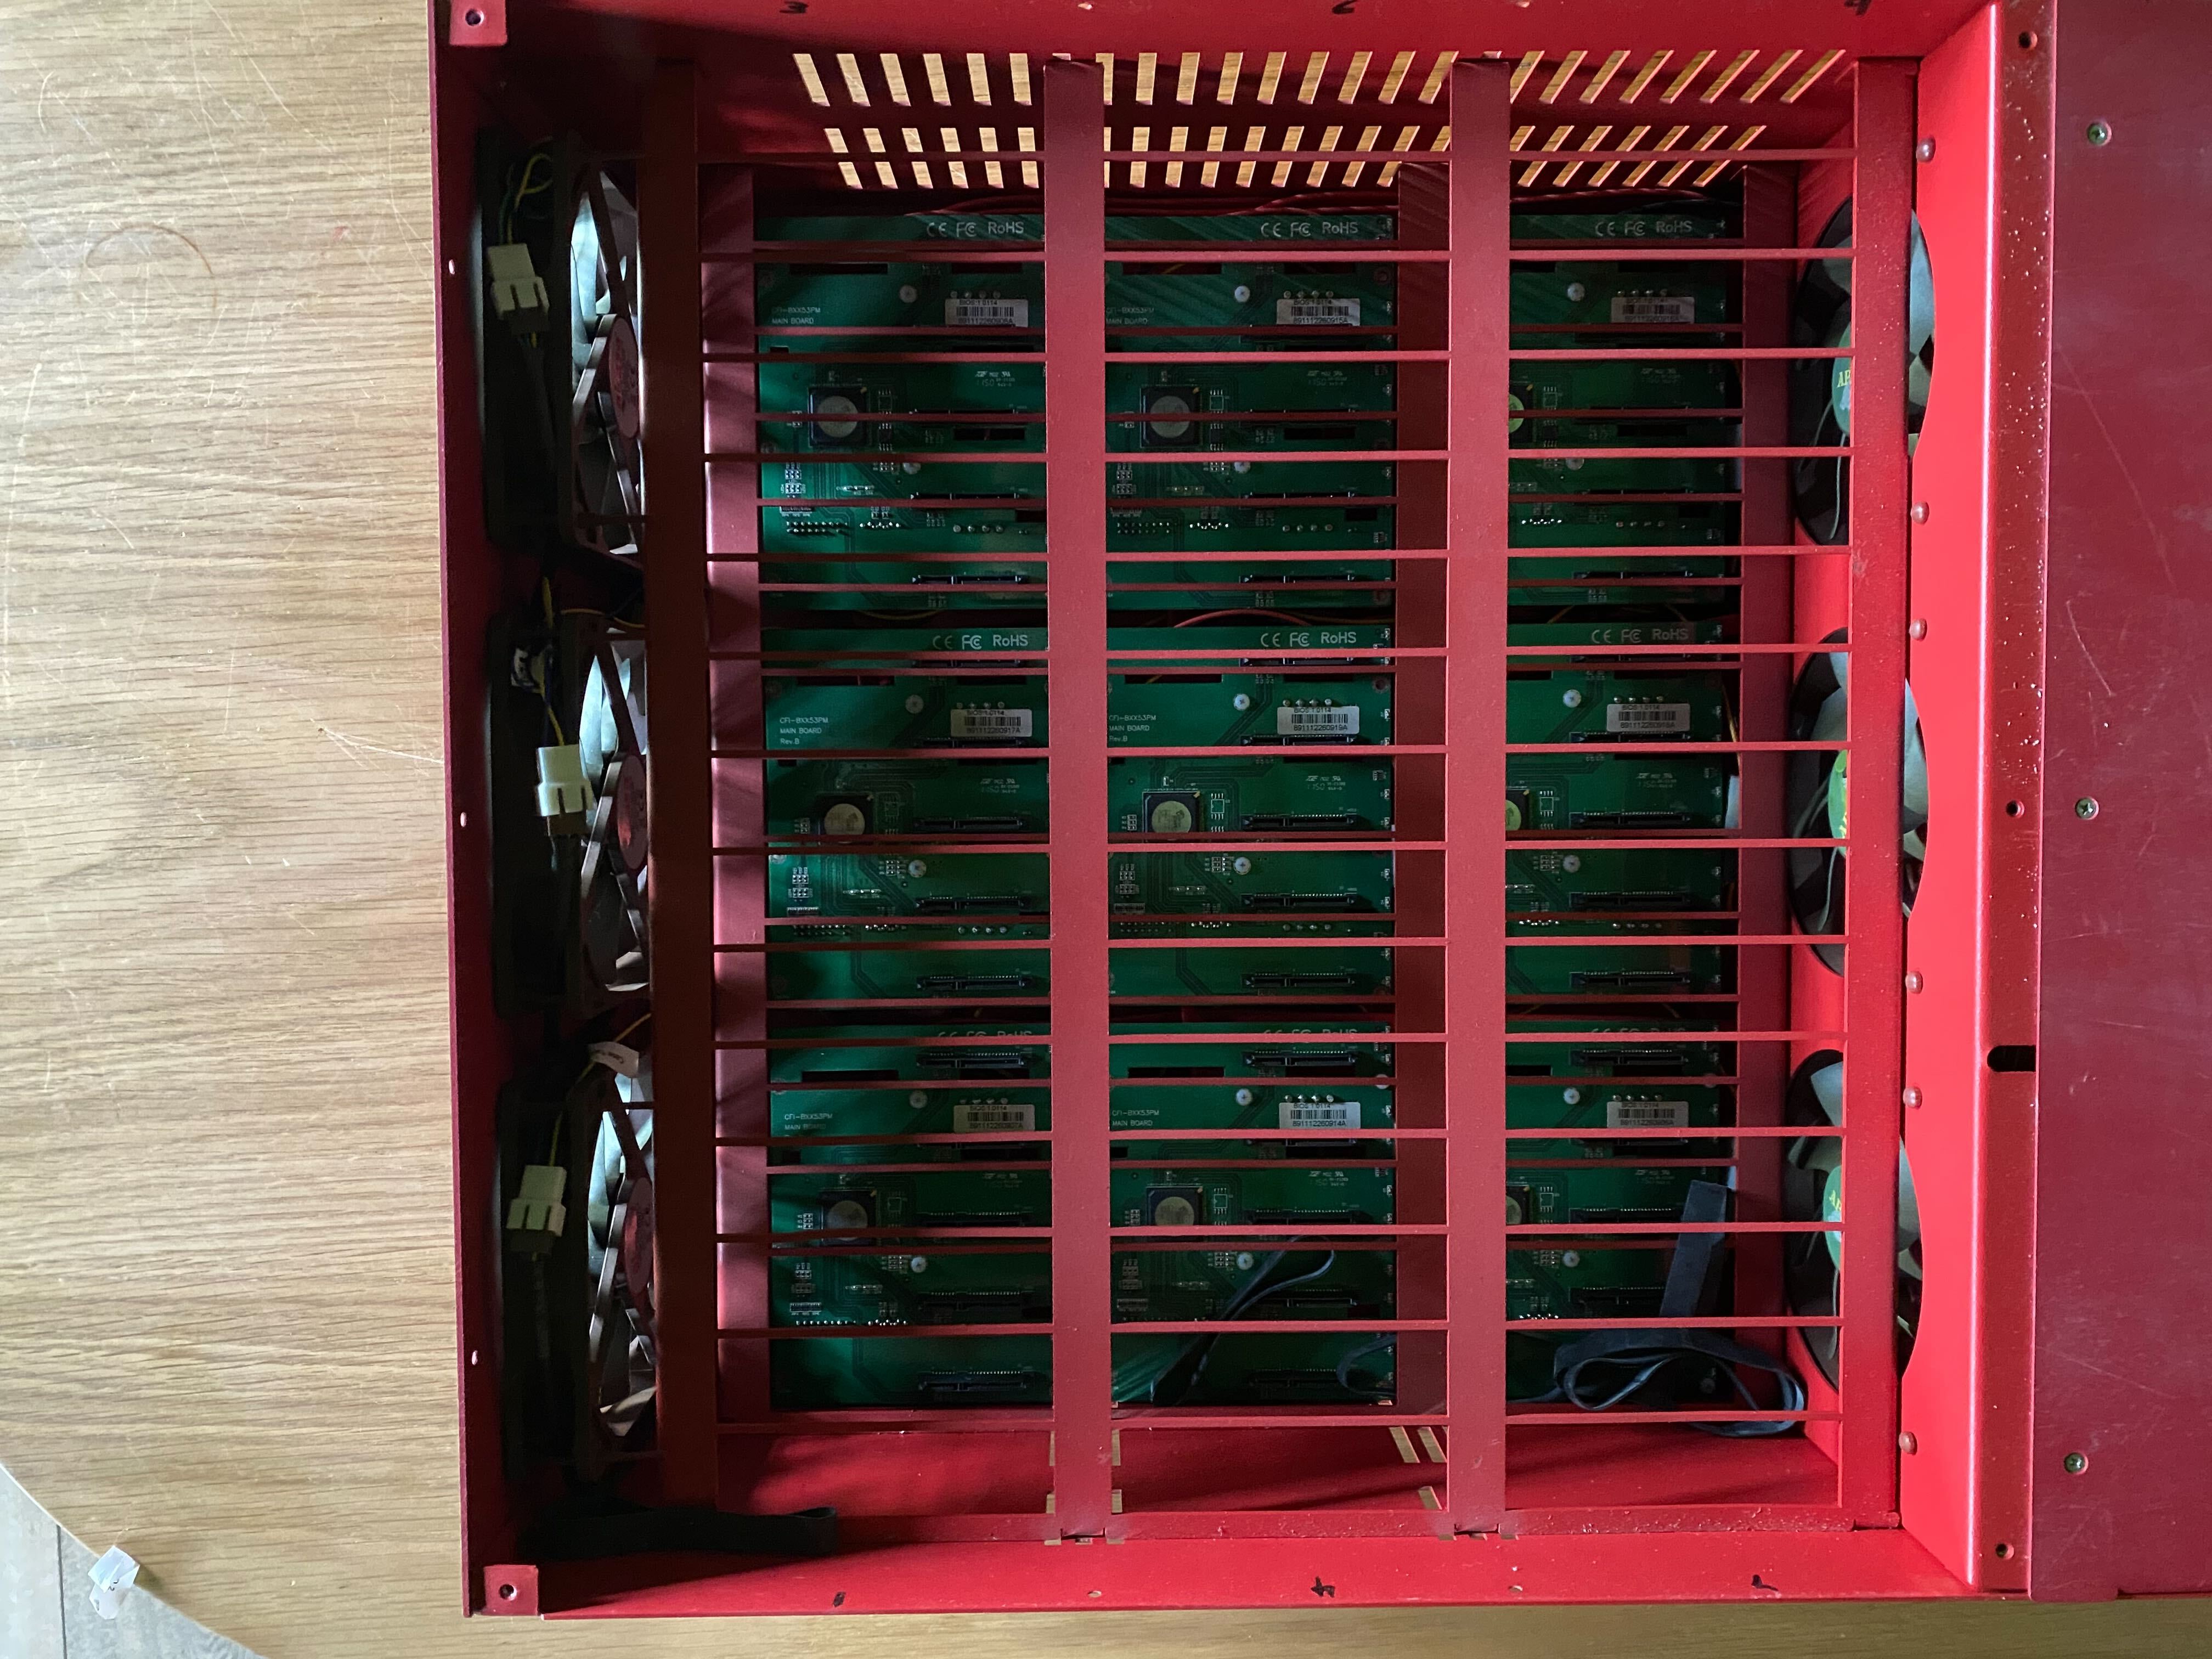
The drives sit in the grid and the vibration of the disks spinning is dampened by some rubber bands, you can see a couple in the picture.
The drives are hot swappable and plug directly into a PCB, of which there are 9, each controlling 5 drives. The controller cards are actually just SATA port expanders, and in comparison to many port expanders work relatively well.
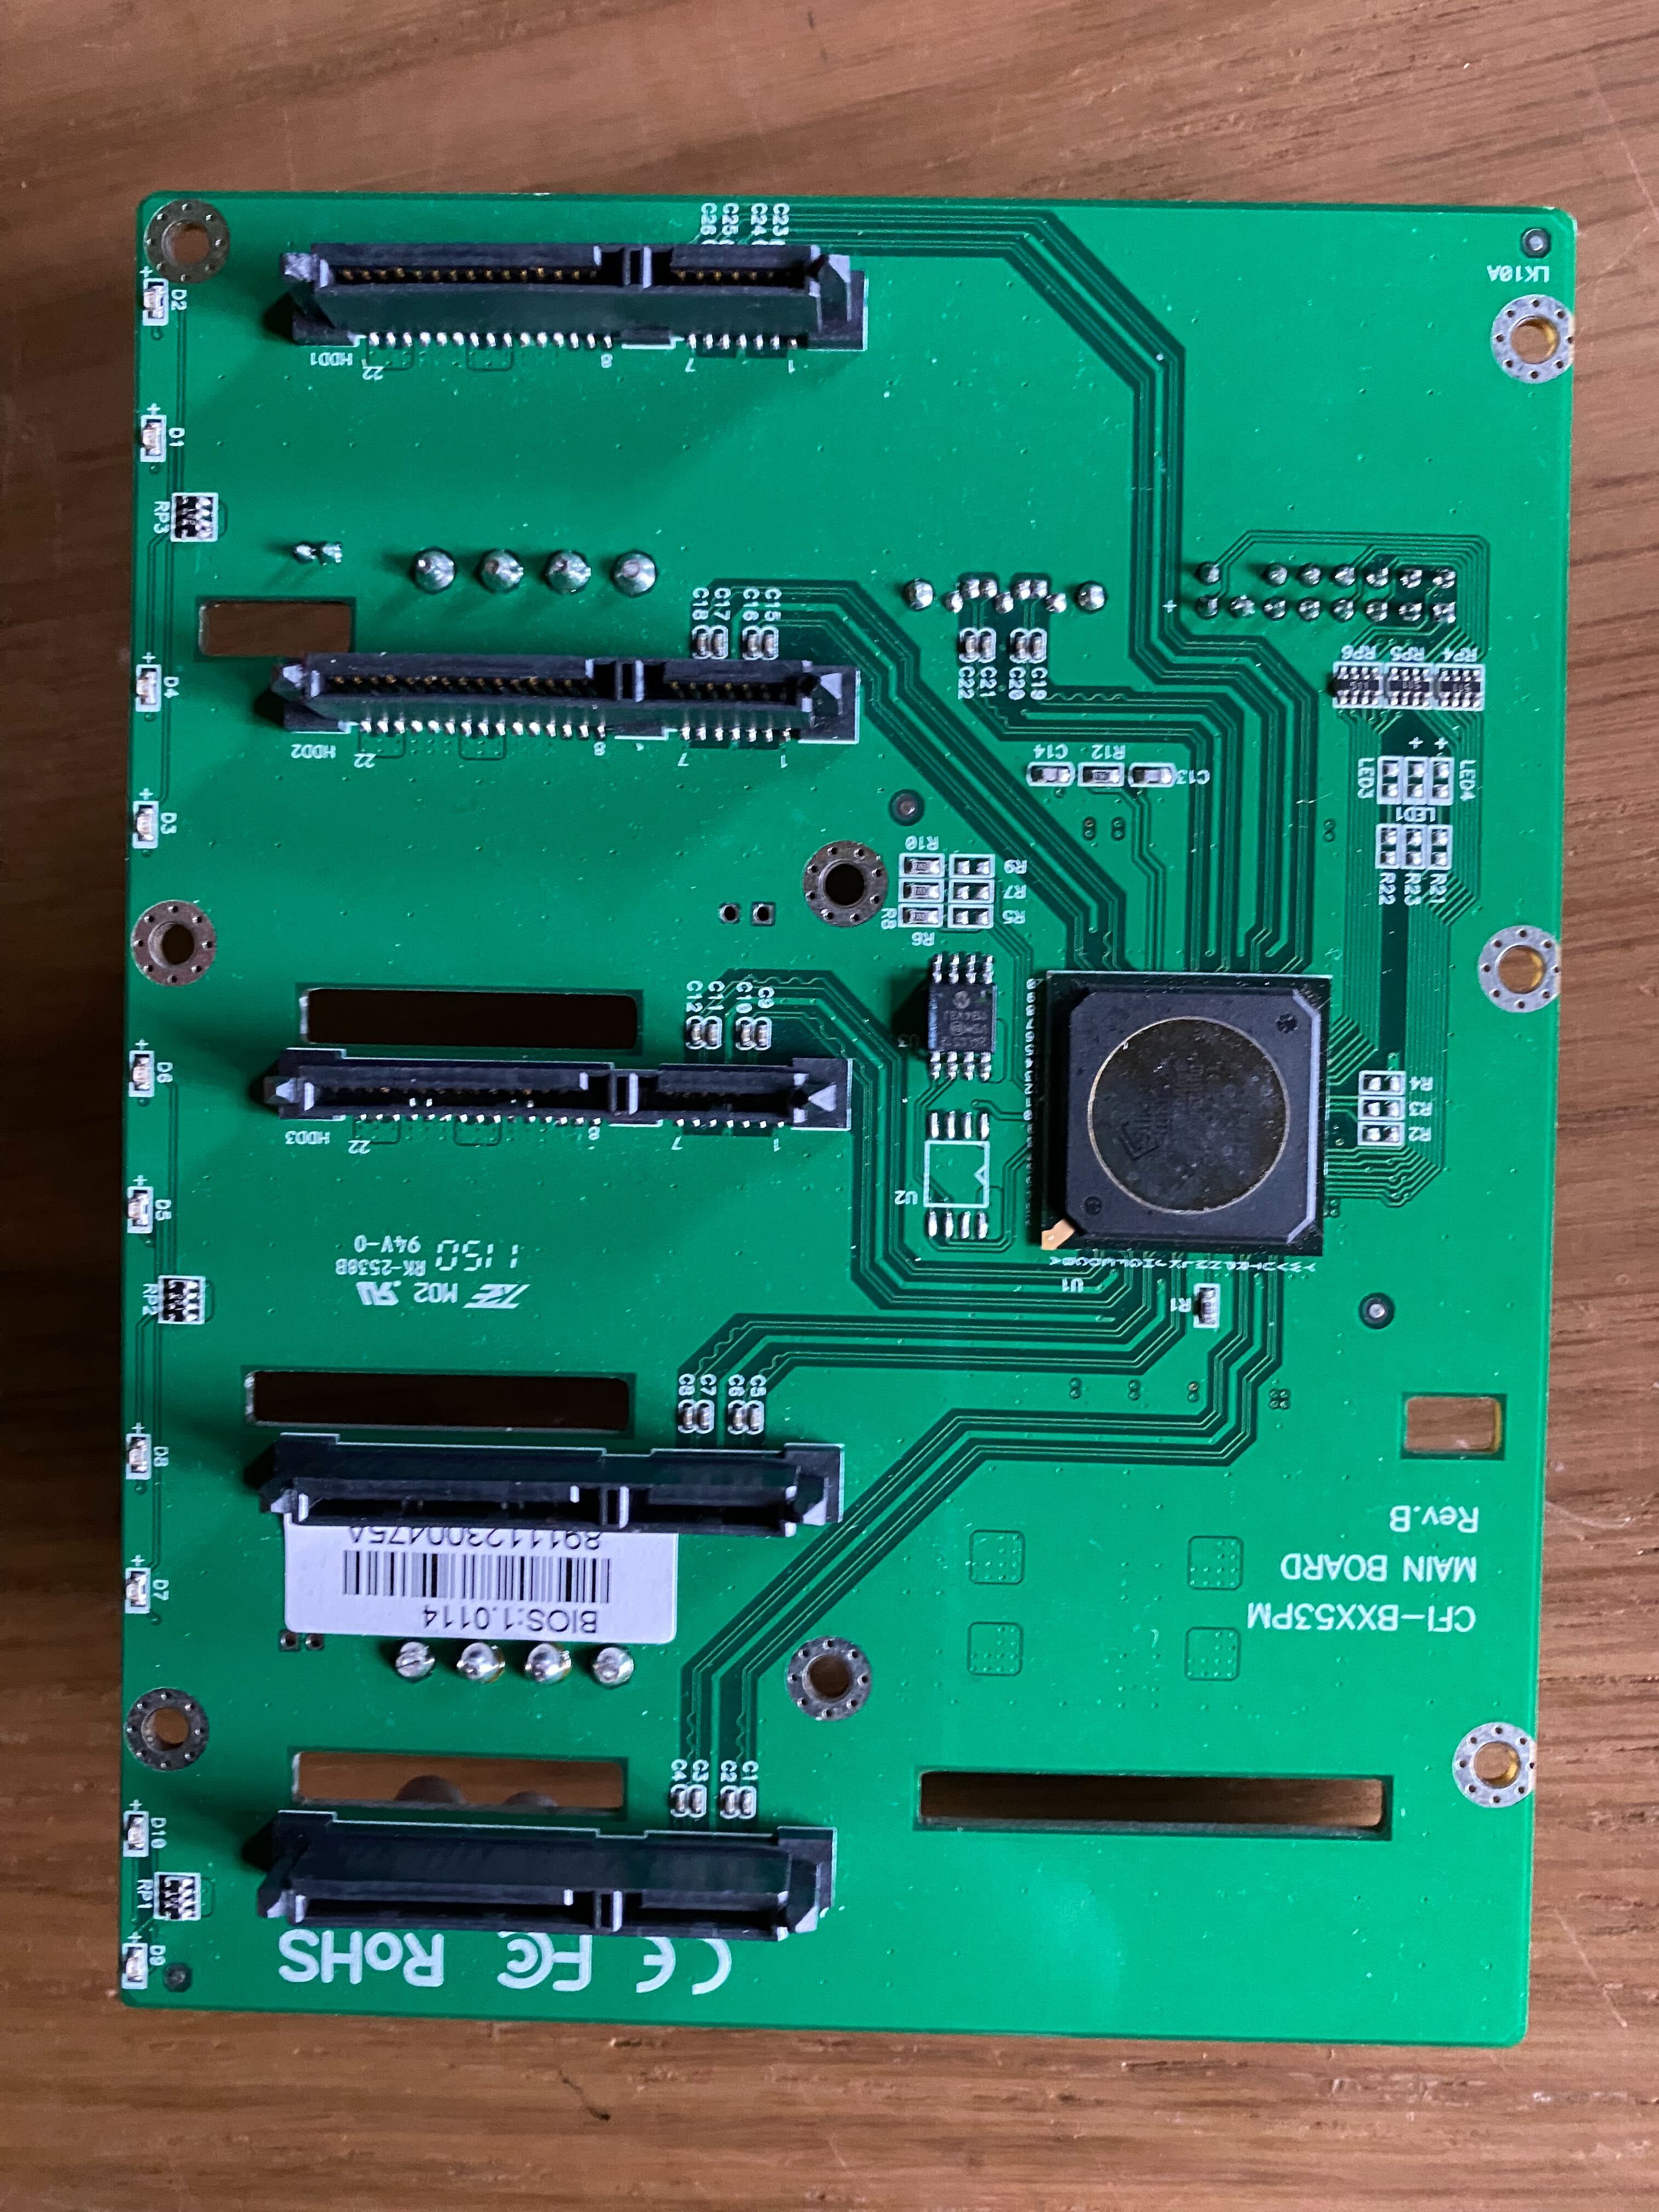
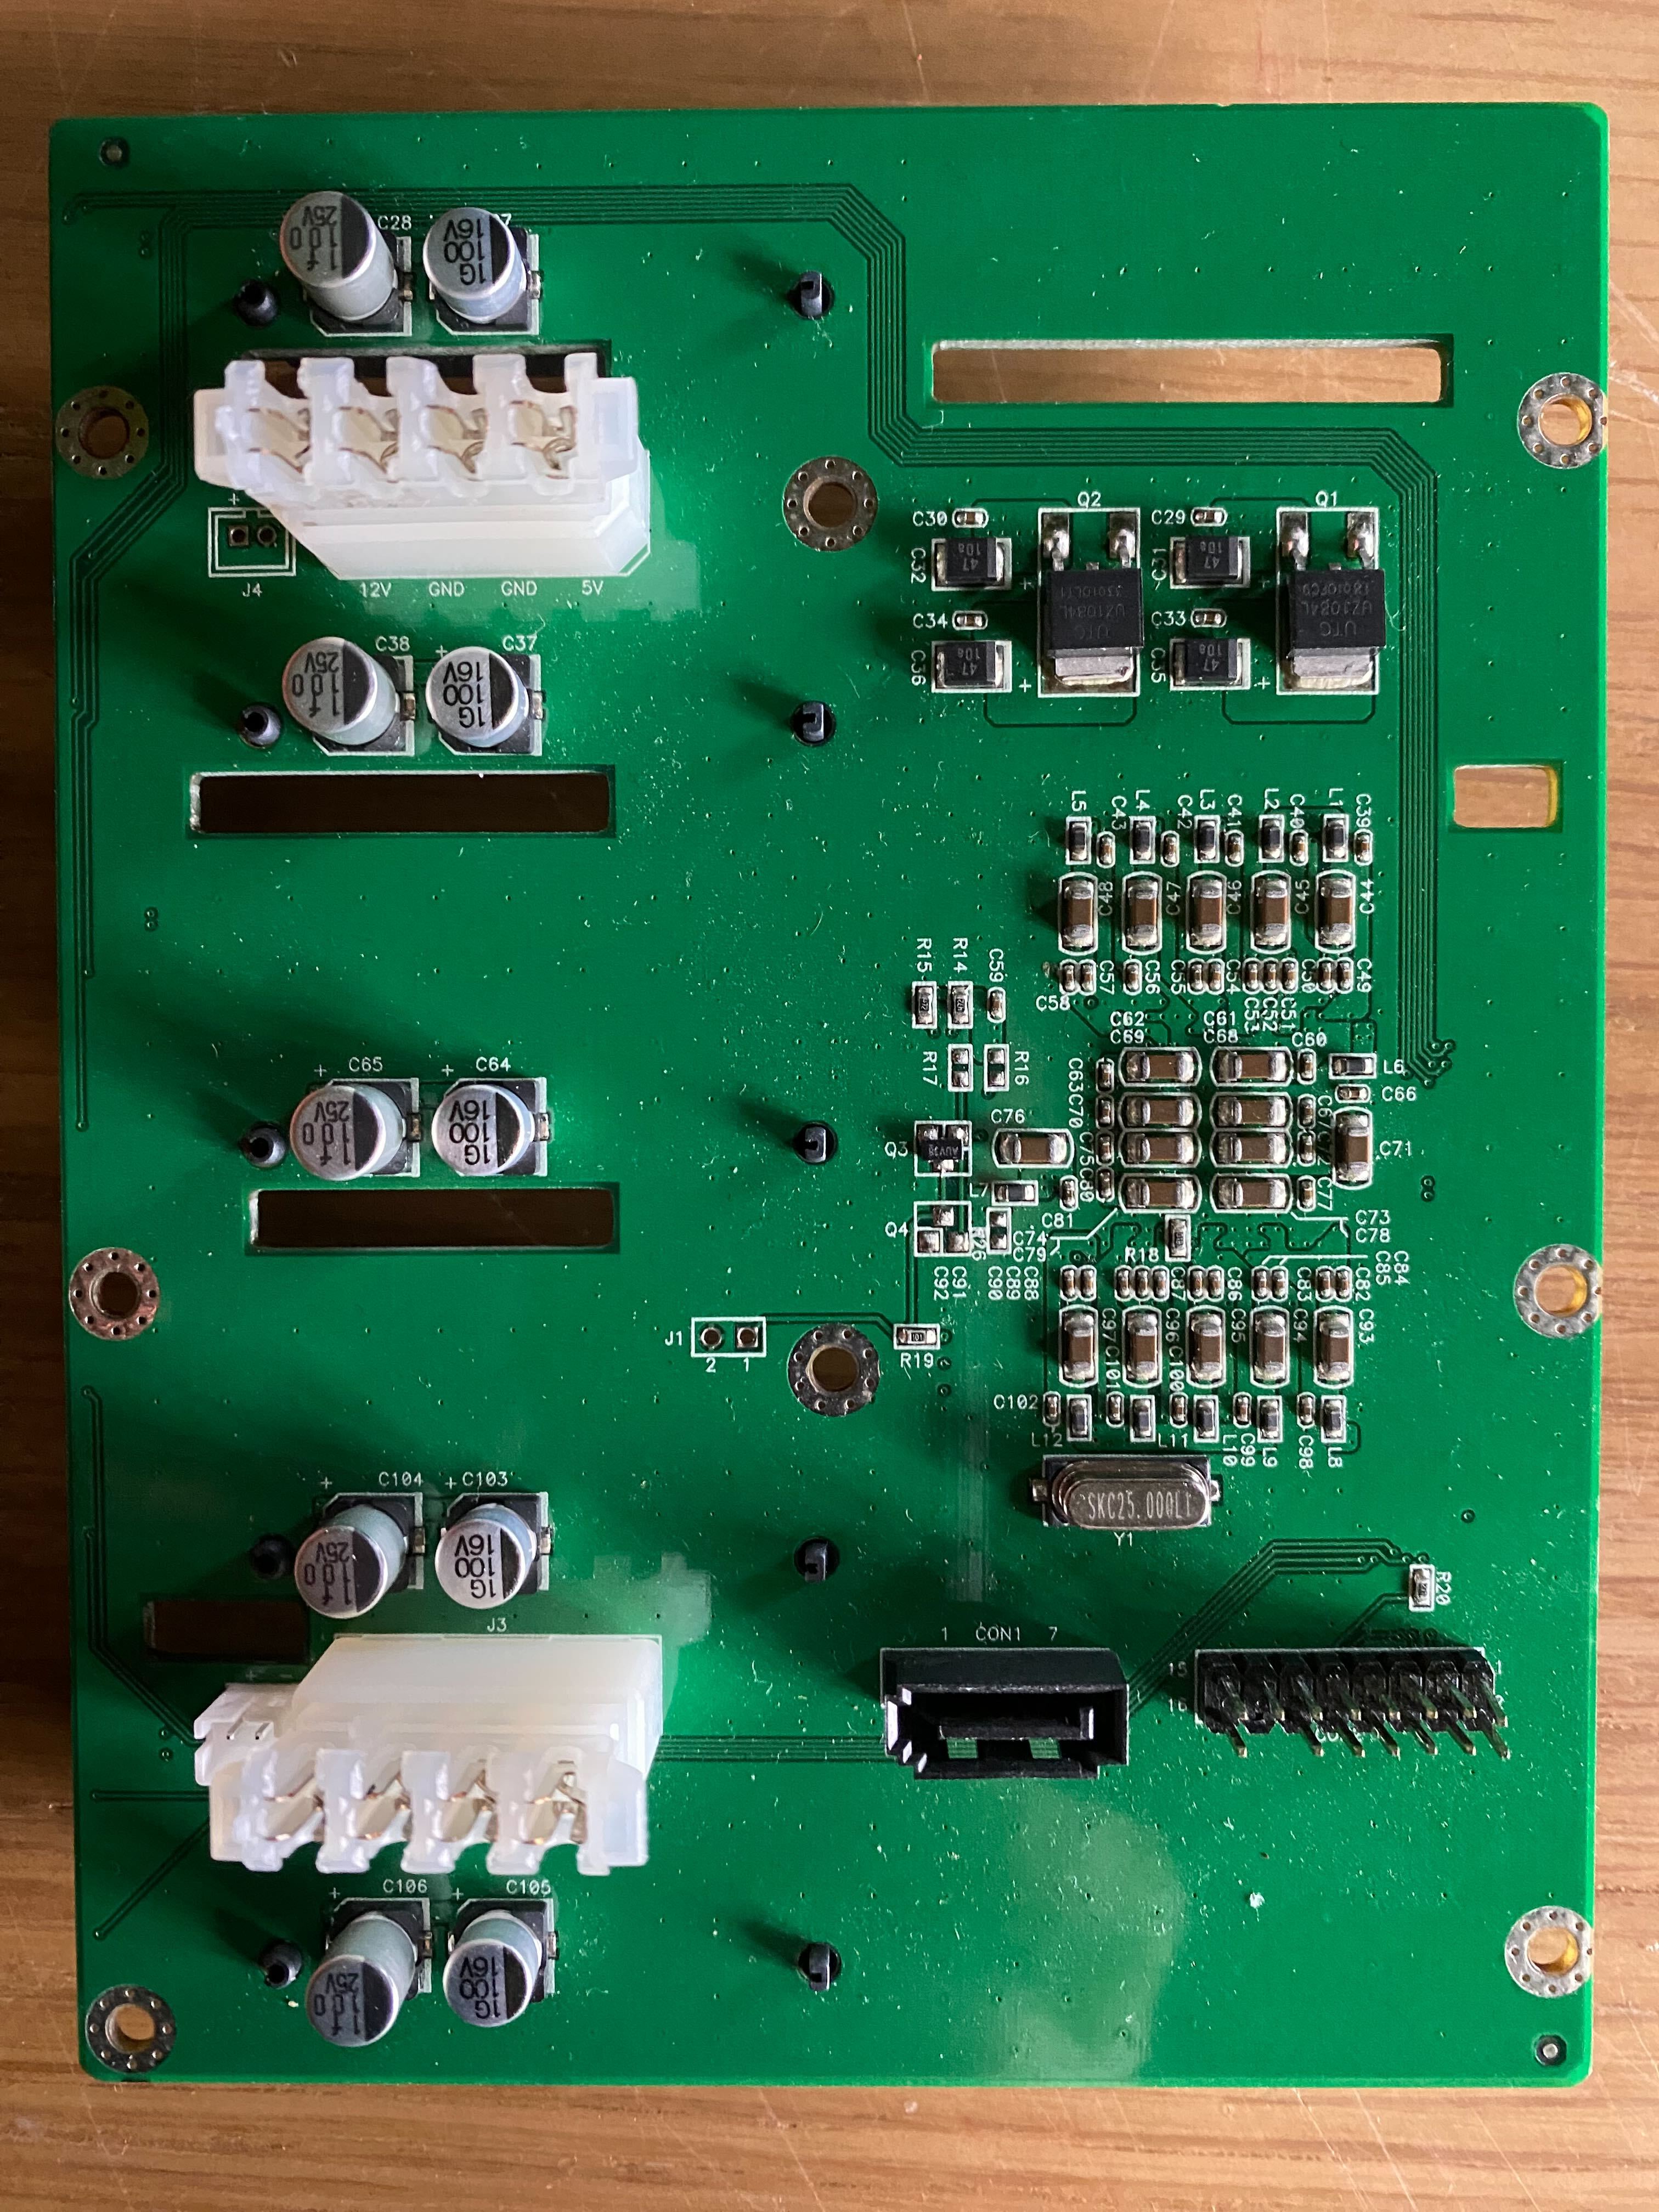
Unfortunately these can not be re-used in this project as we need the locations they are in to put new disks, and more of them. One thing these do provide are the screw locations for the underneath. To be discussed more later.
I stripped out all the port expanders and all wiring to go with them and you can see it here, so just an empty chassis
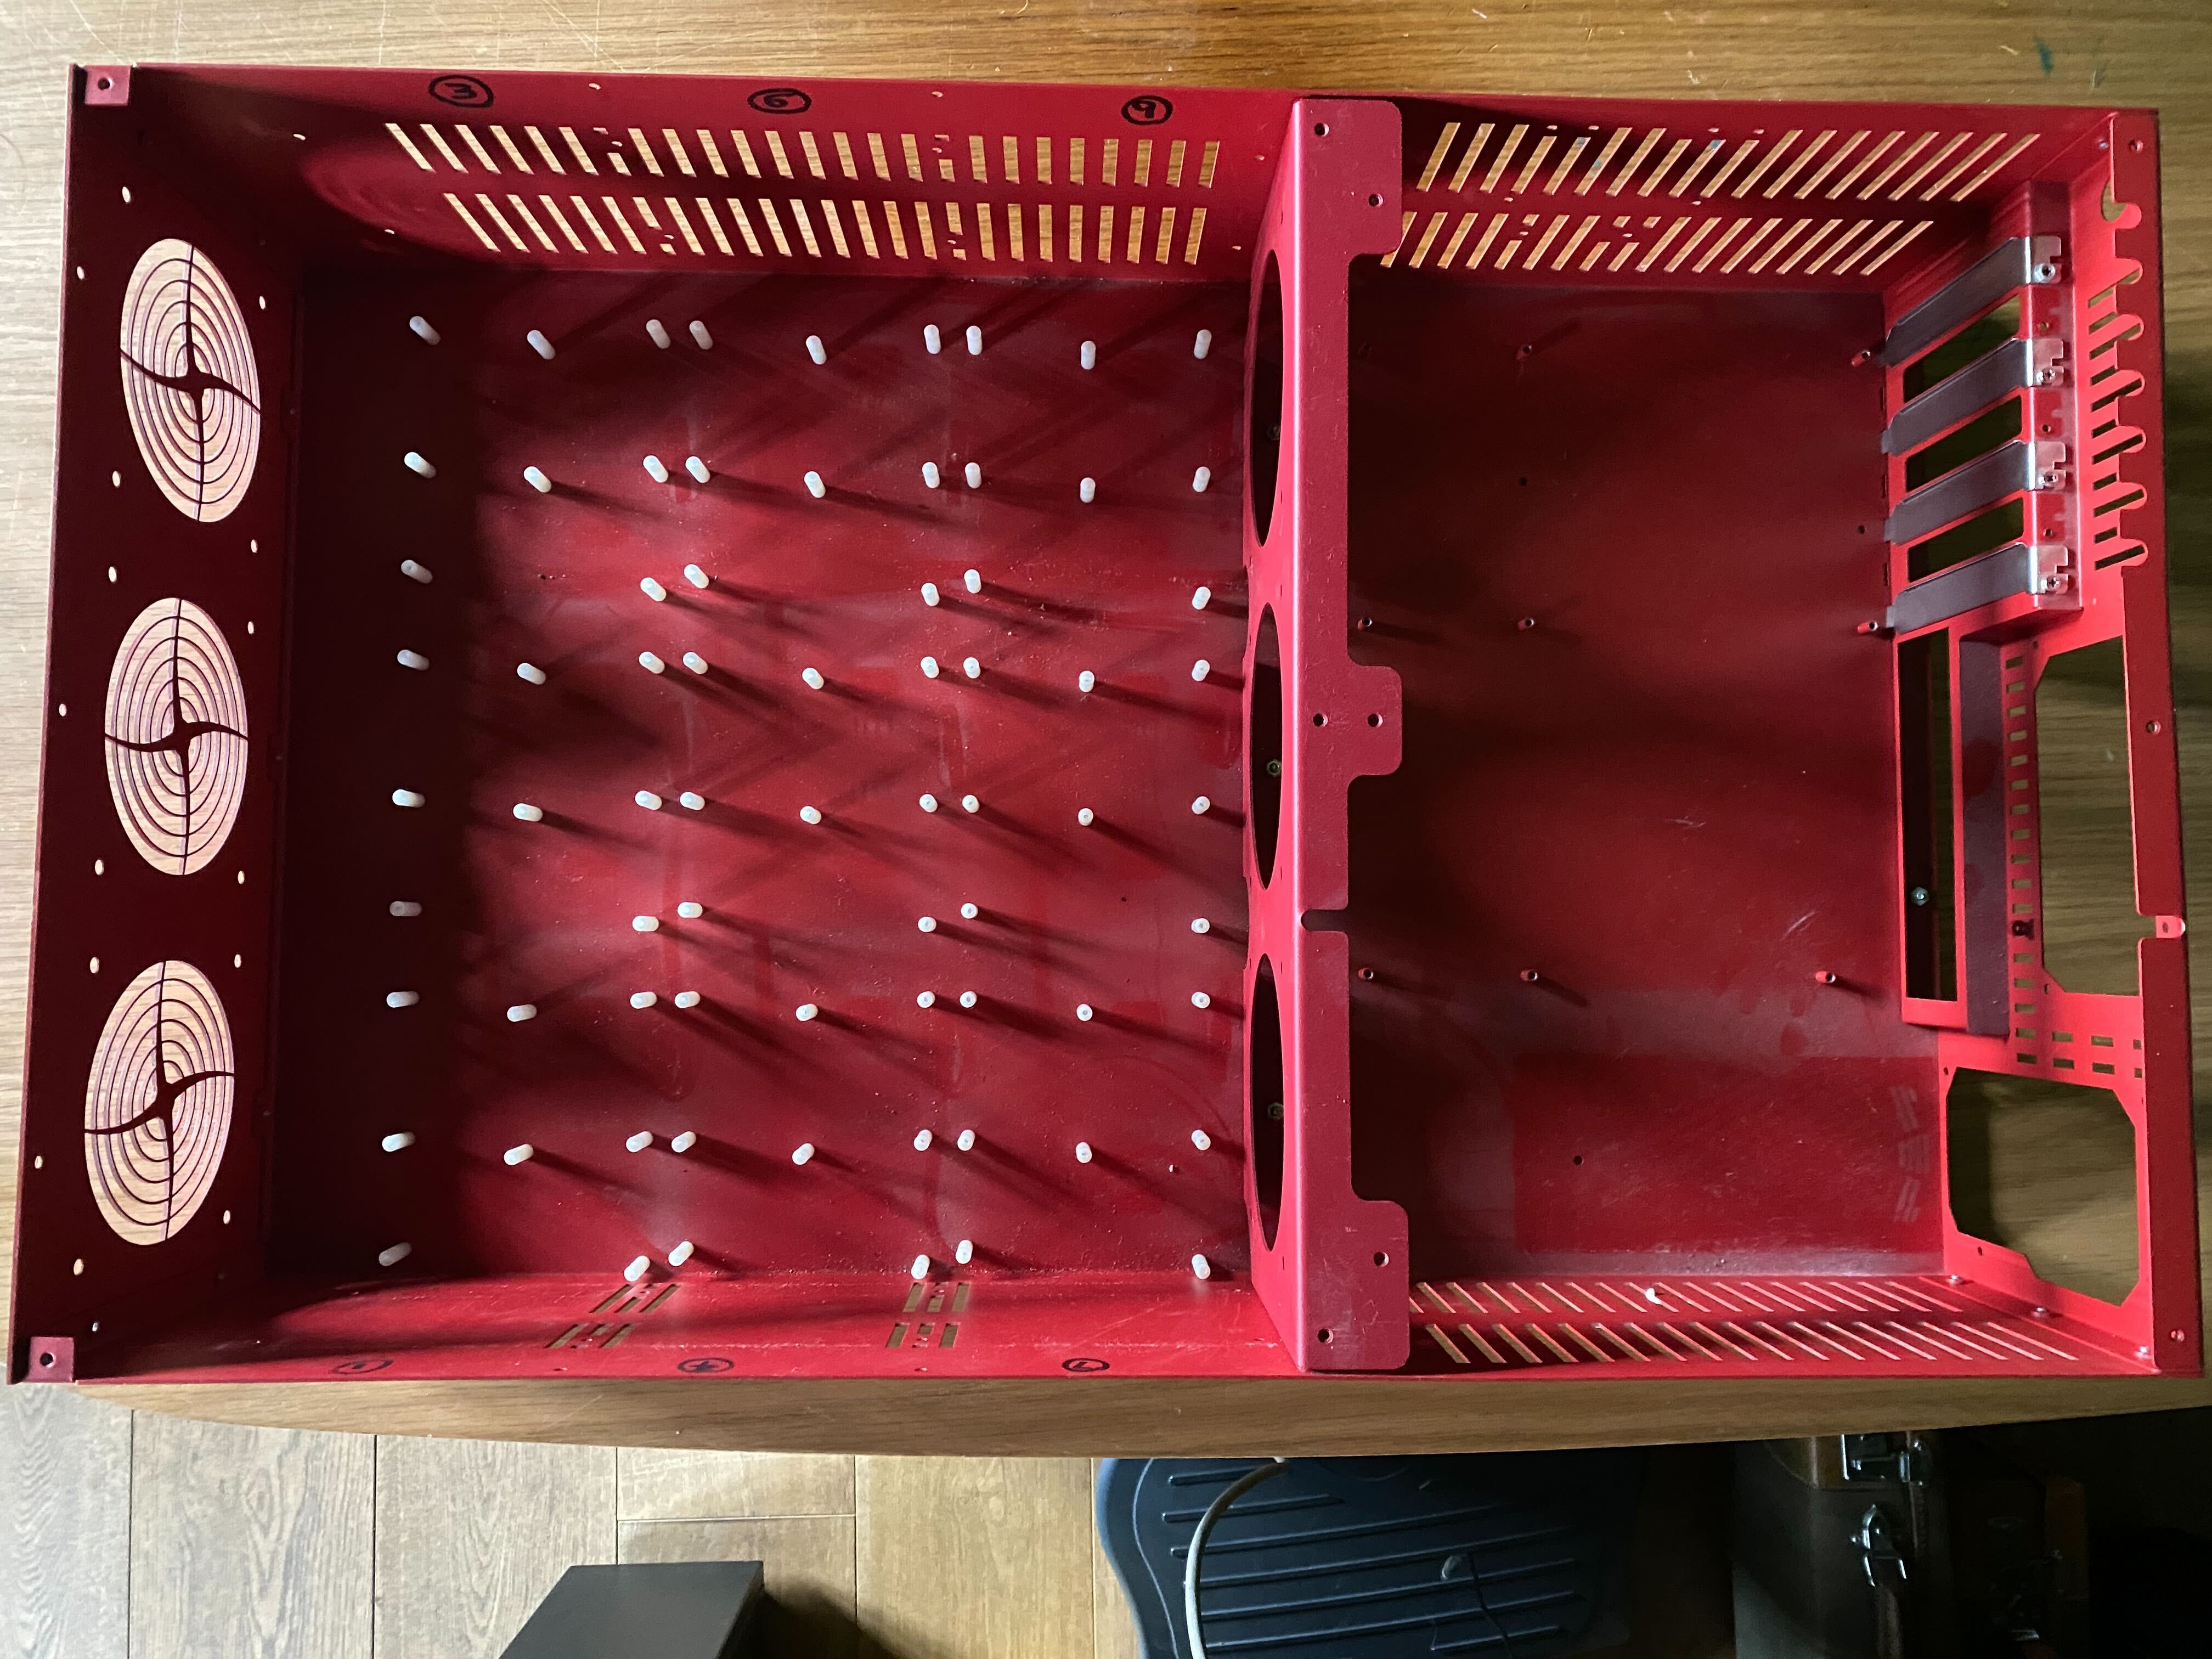
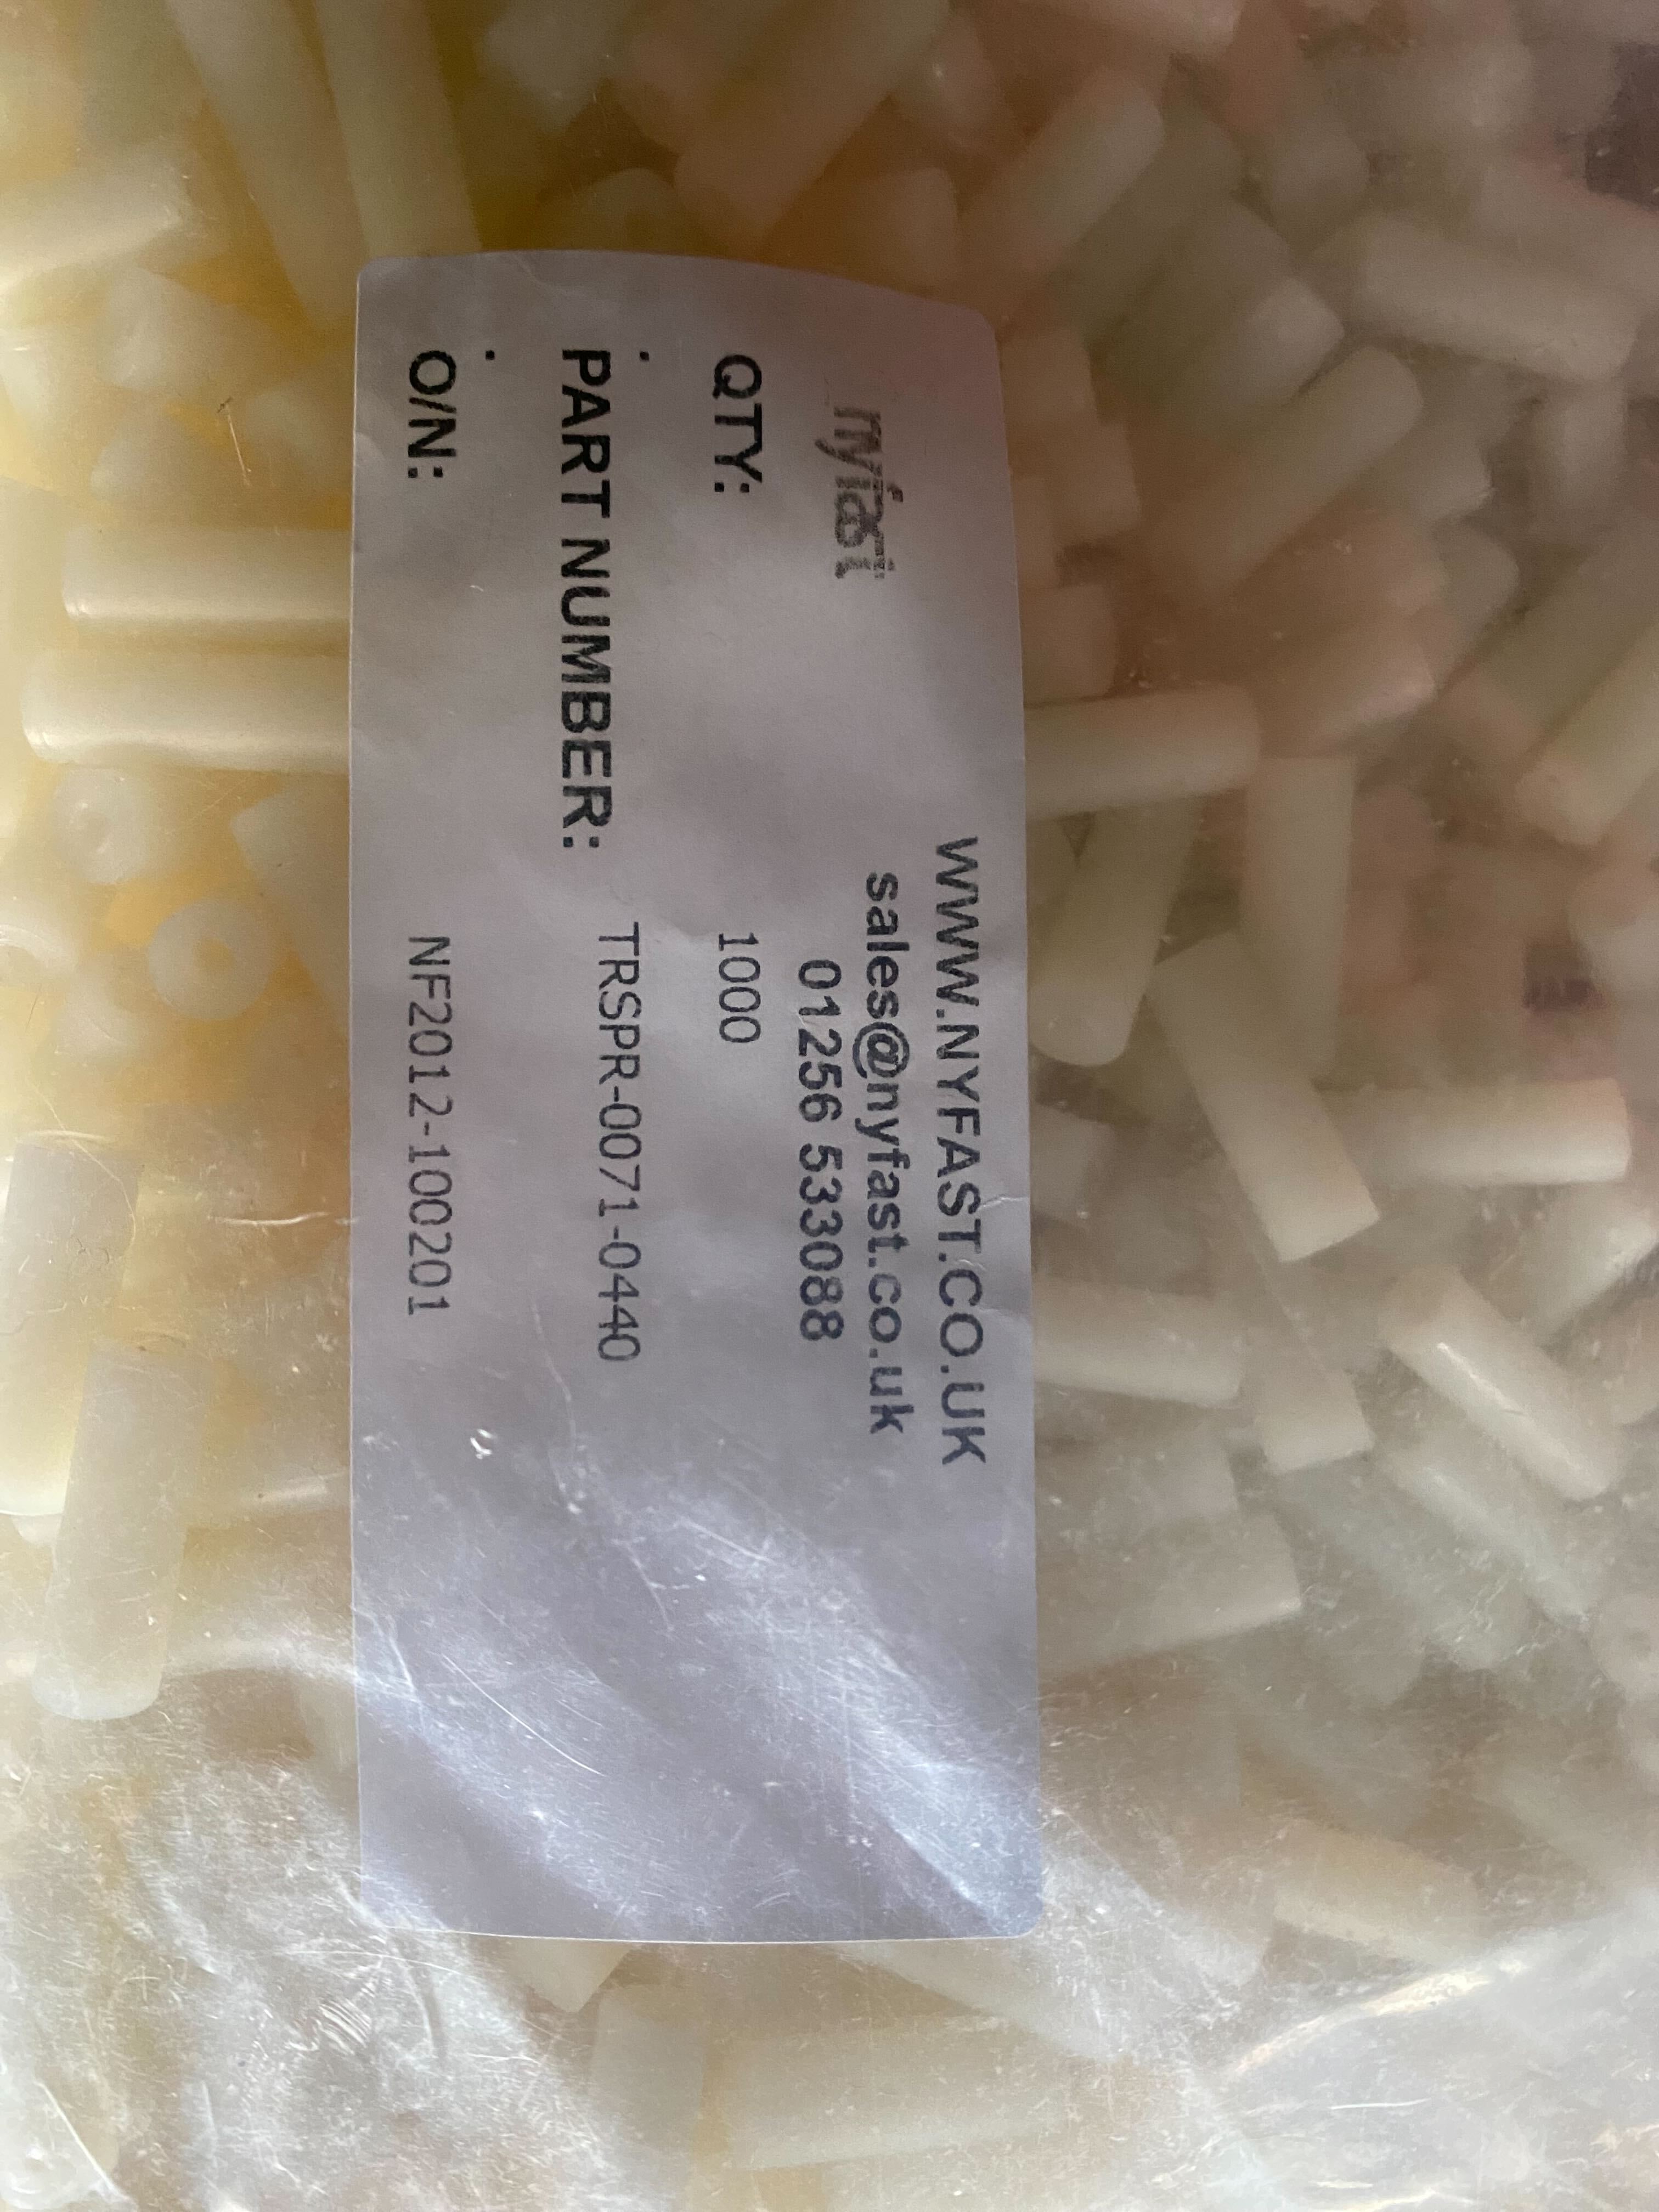
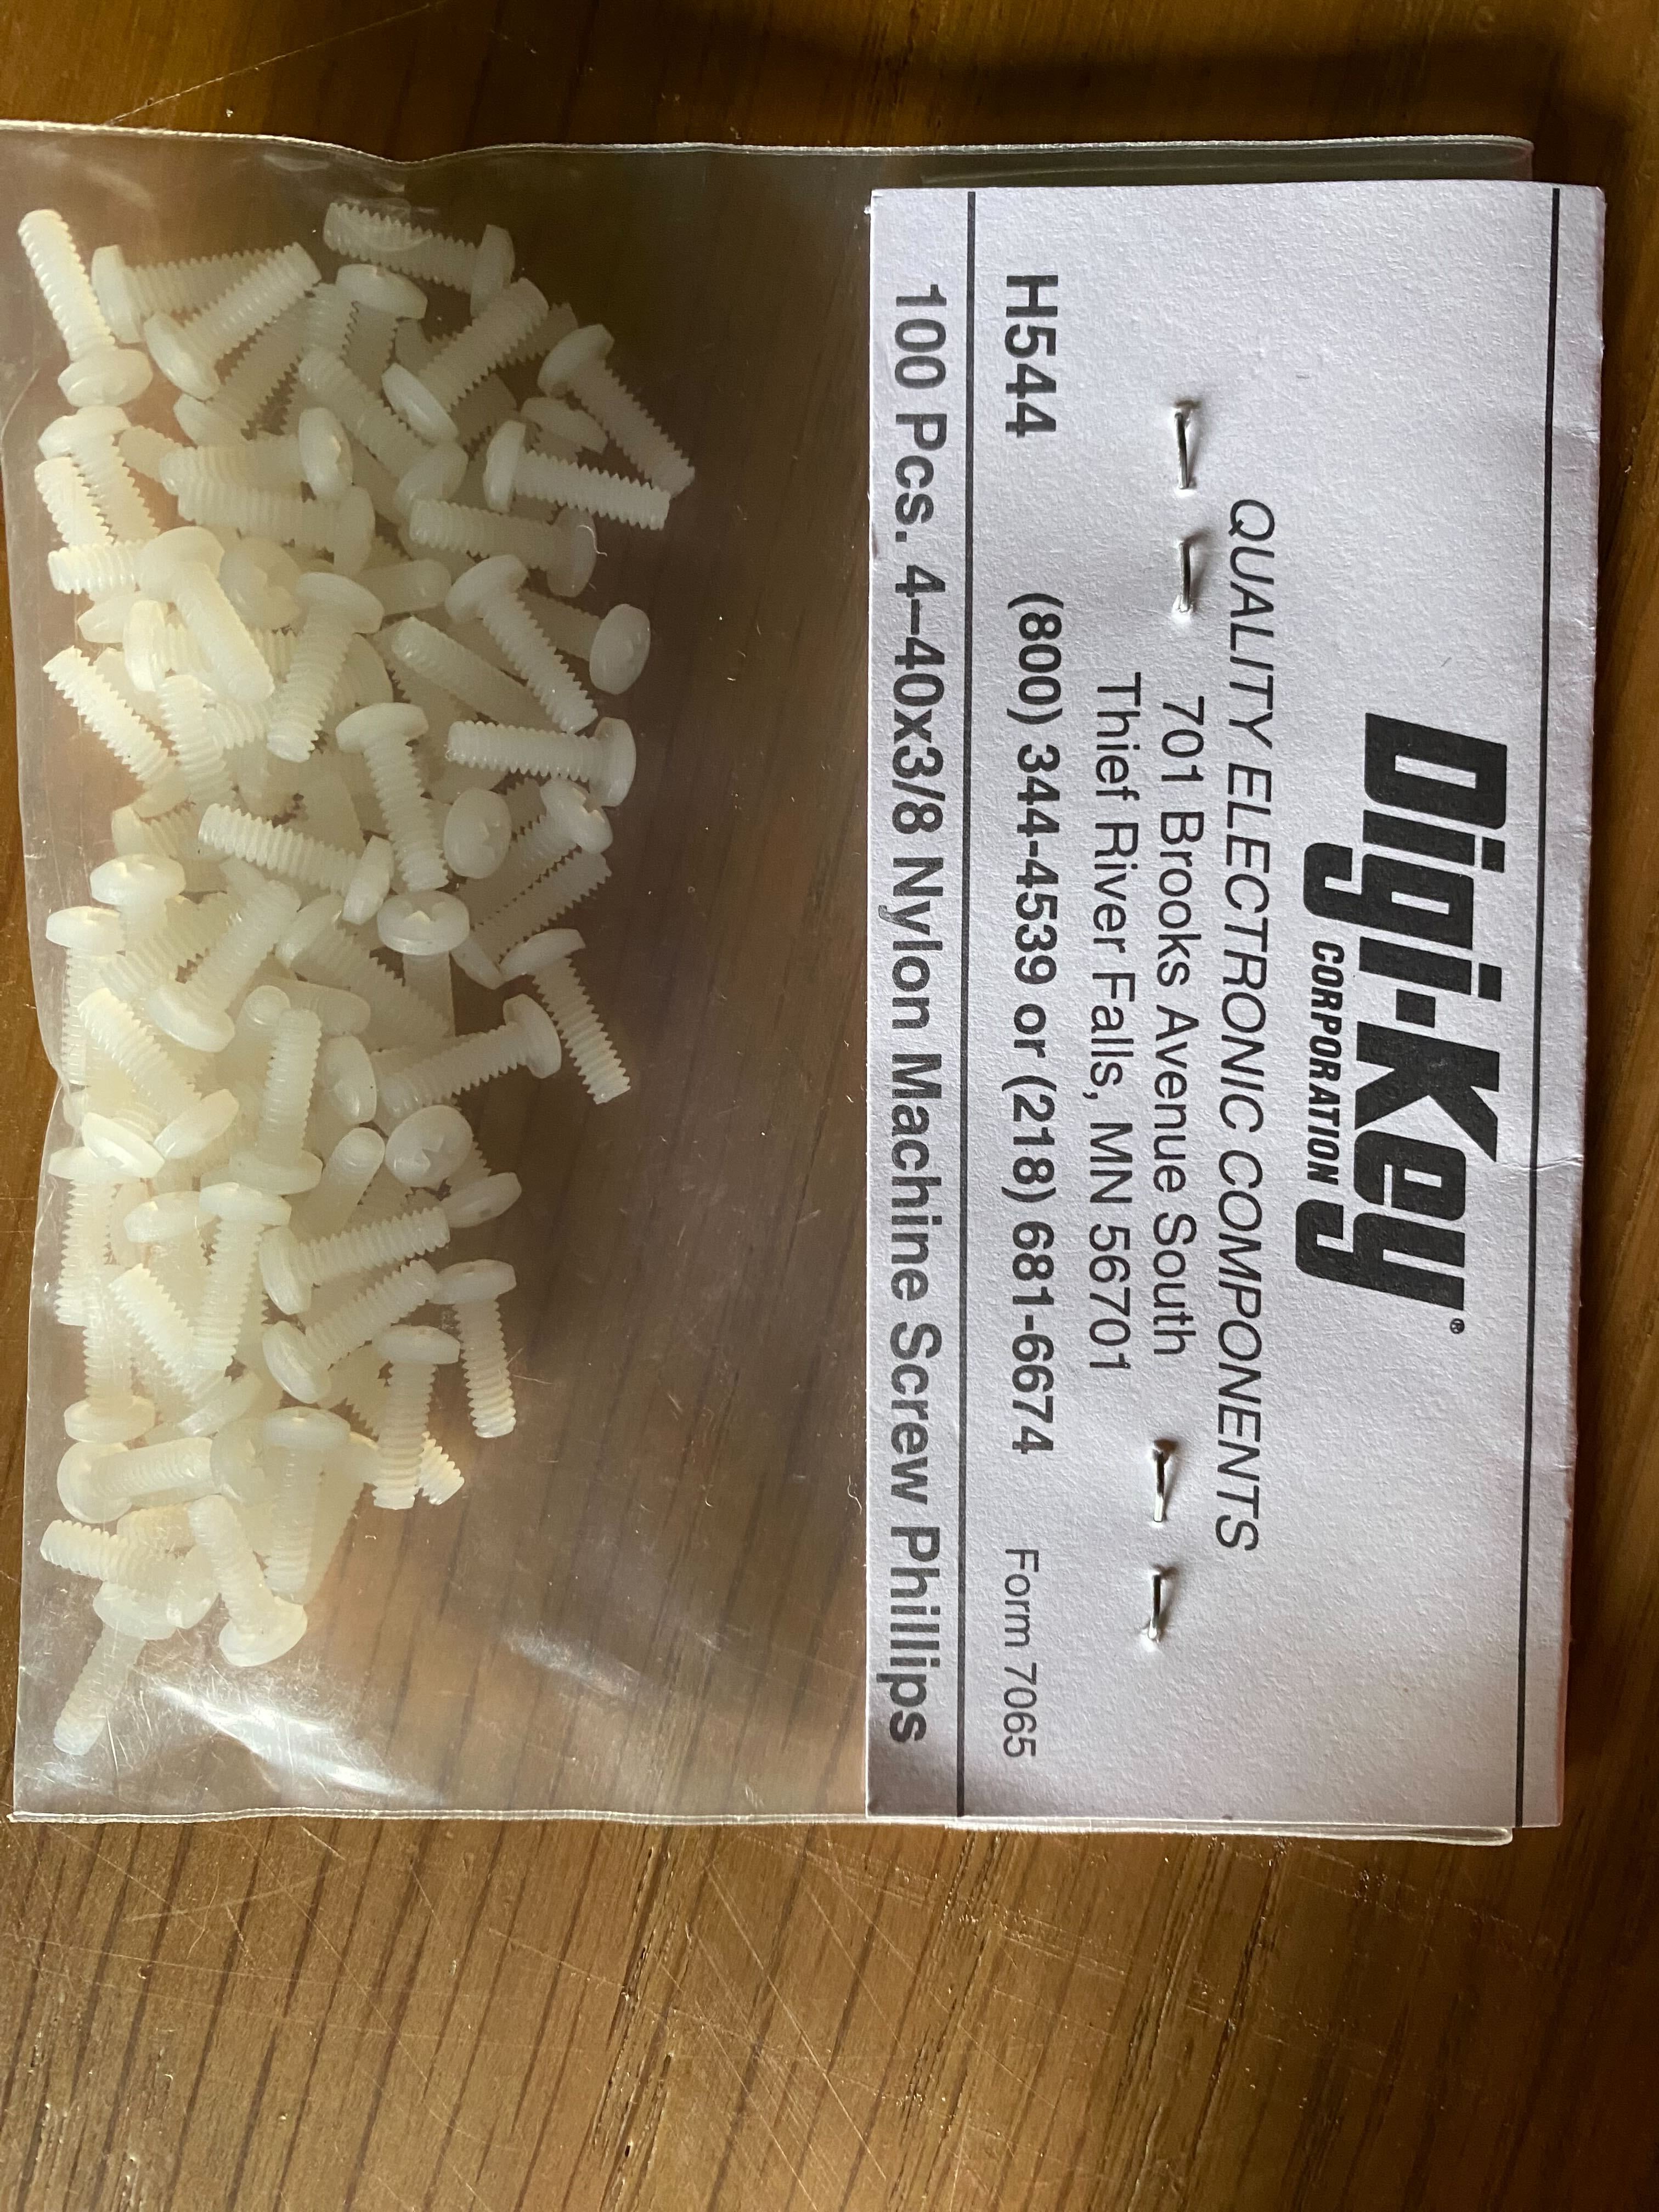
I left the nylon posts in place as they are threaded and allow the nylon screws, they were holding in the port exanpders, to be used.
If you do have one of these chassis and need the nylon posts and the screws, both are still available to buy
I am going to reuse the motherboard and as many components, fans, cables etc as possible. The motherboard is a supermicro X9SAE-V.

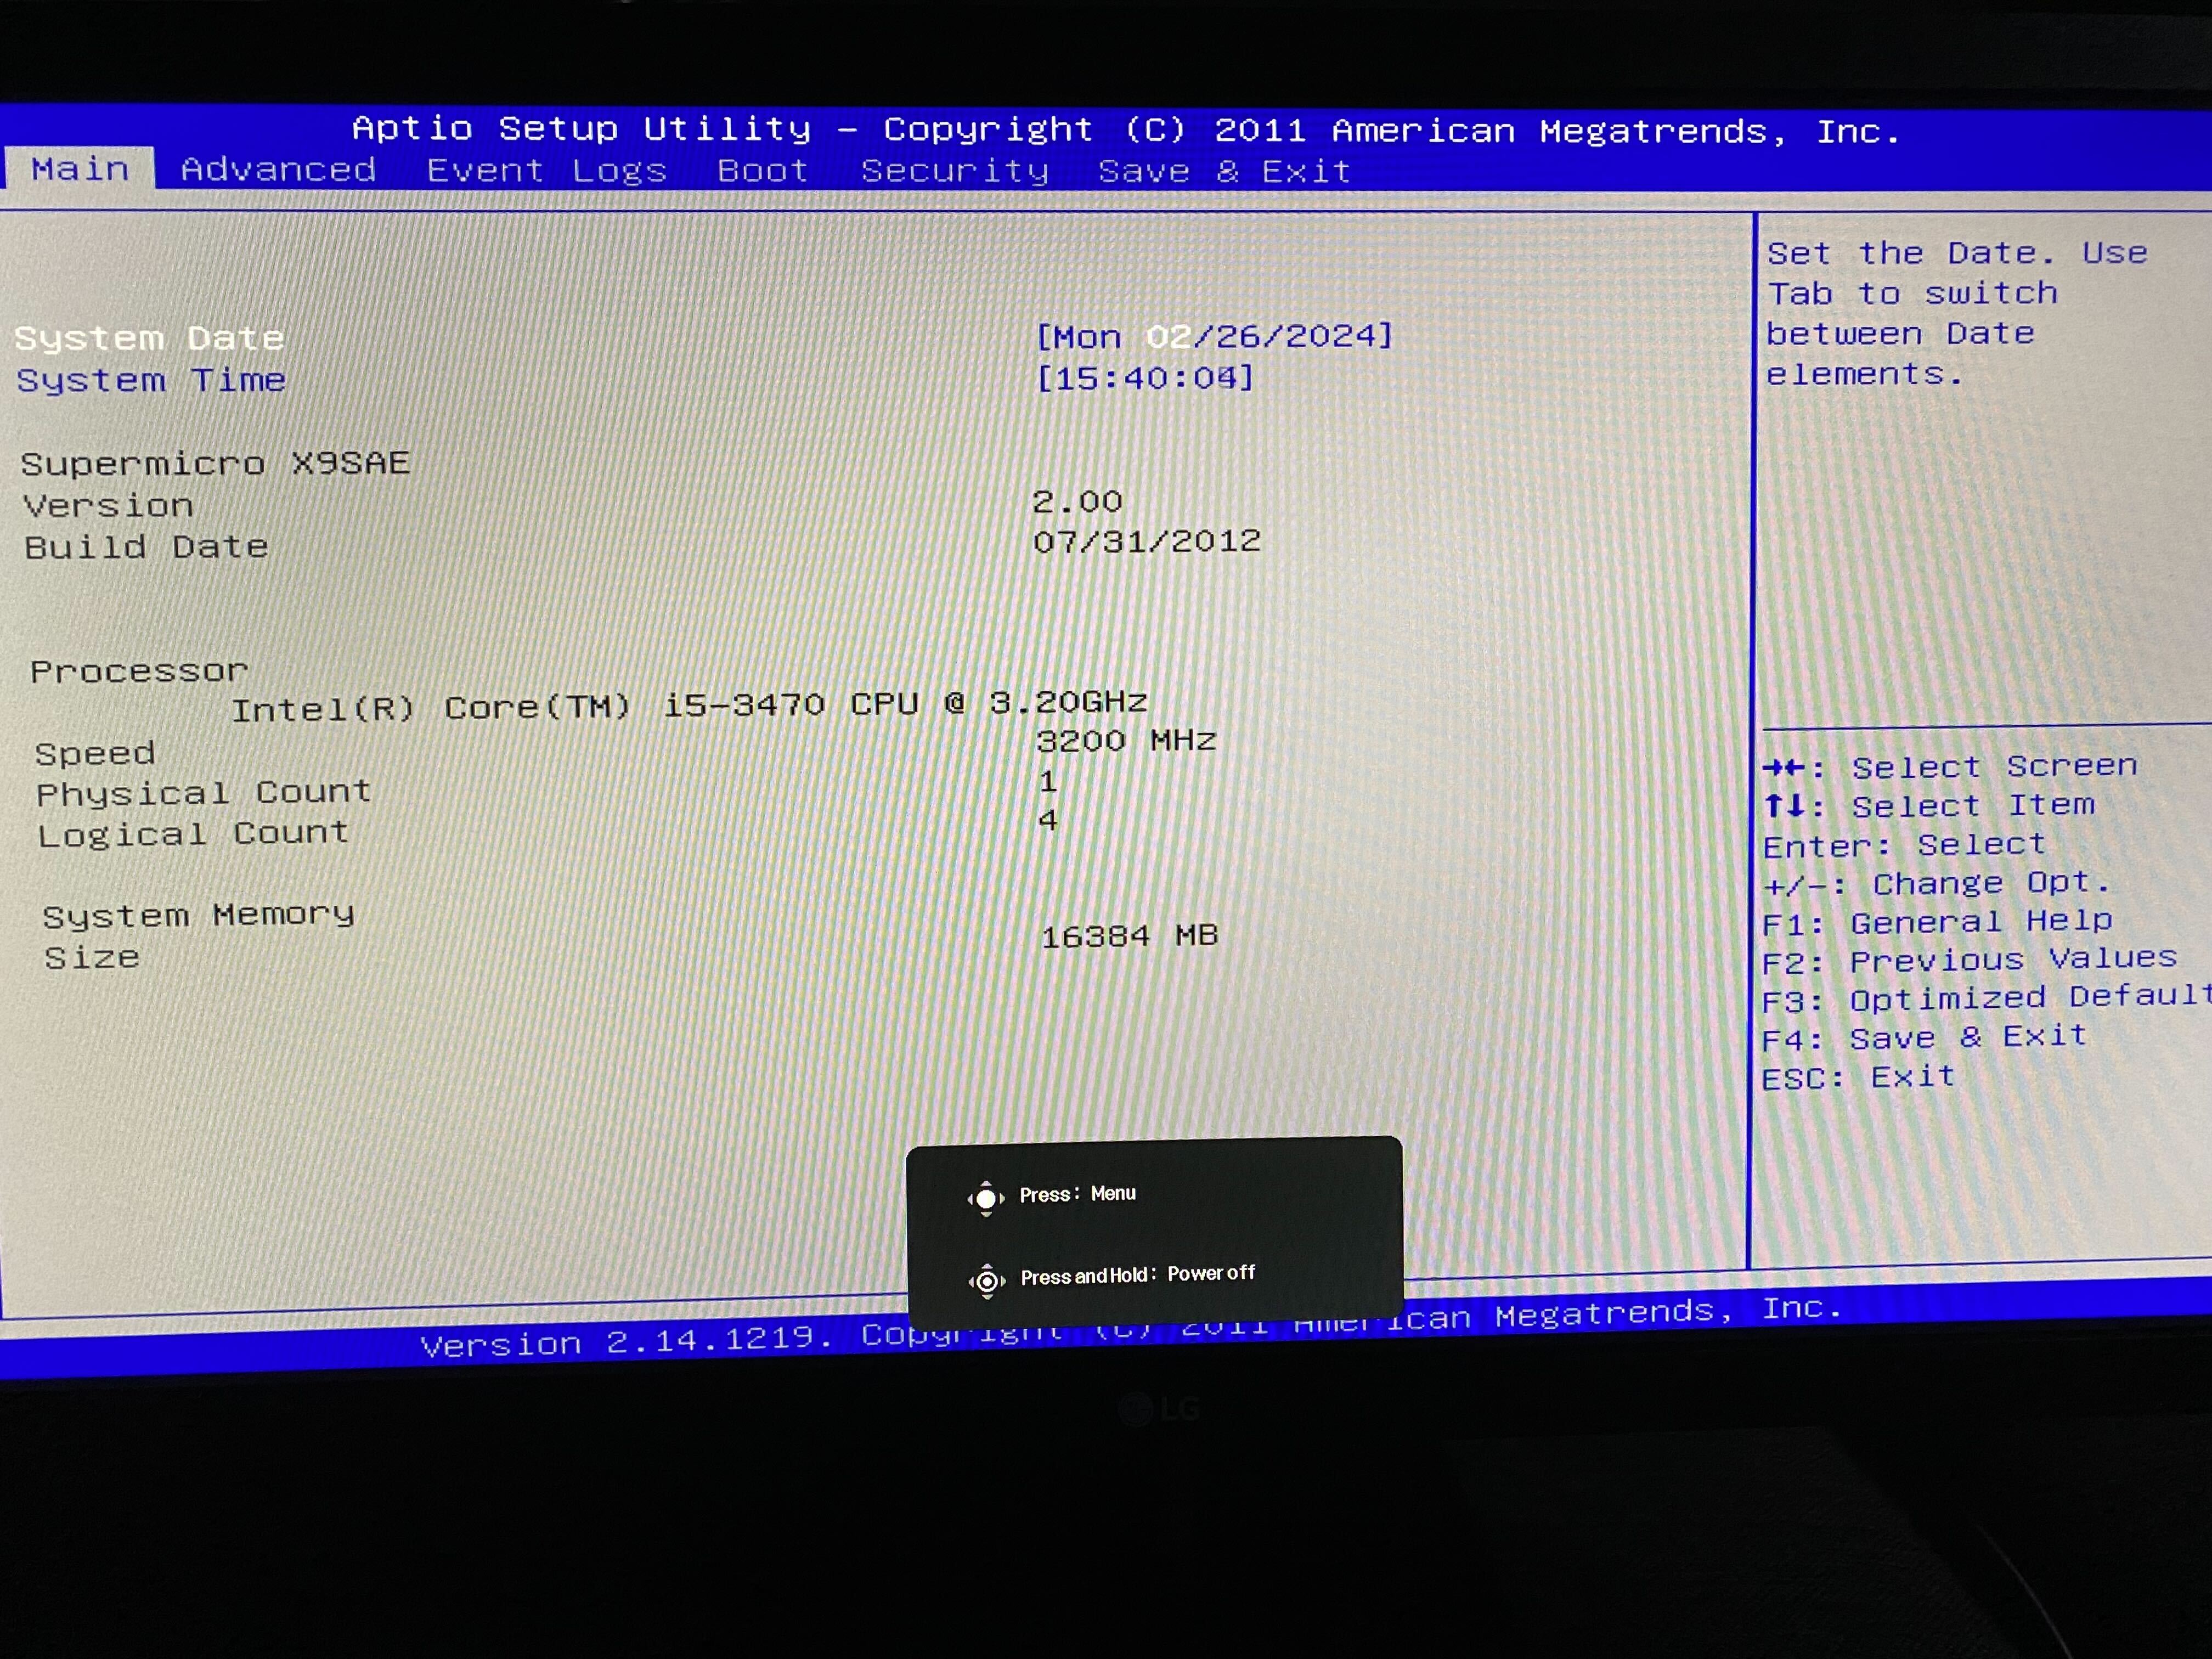
It has 6 PCI slots , on board HDMI and dual GigE, it is old, but will at least get things going. After boot it shows the CPU is an old i5
This is not going to set the world on fire with CPU capabilities but should be enough to make it work without spending too much money. This is after all a project rather than anything to be used in production (yet!)
So at this point we have a working motherboard, a case, locations for a PSU and drive bay location.
We also have 3 of these
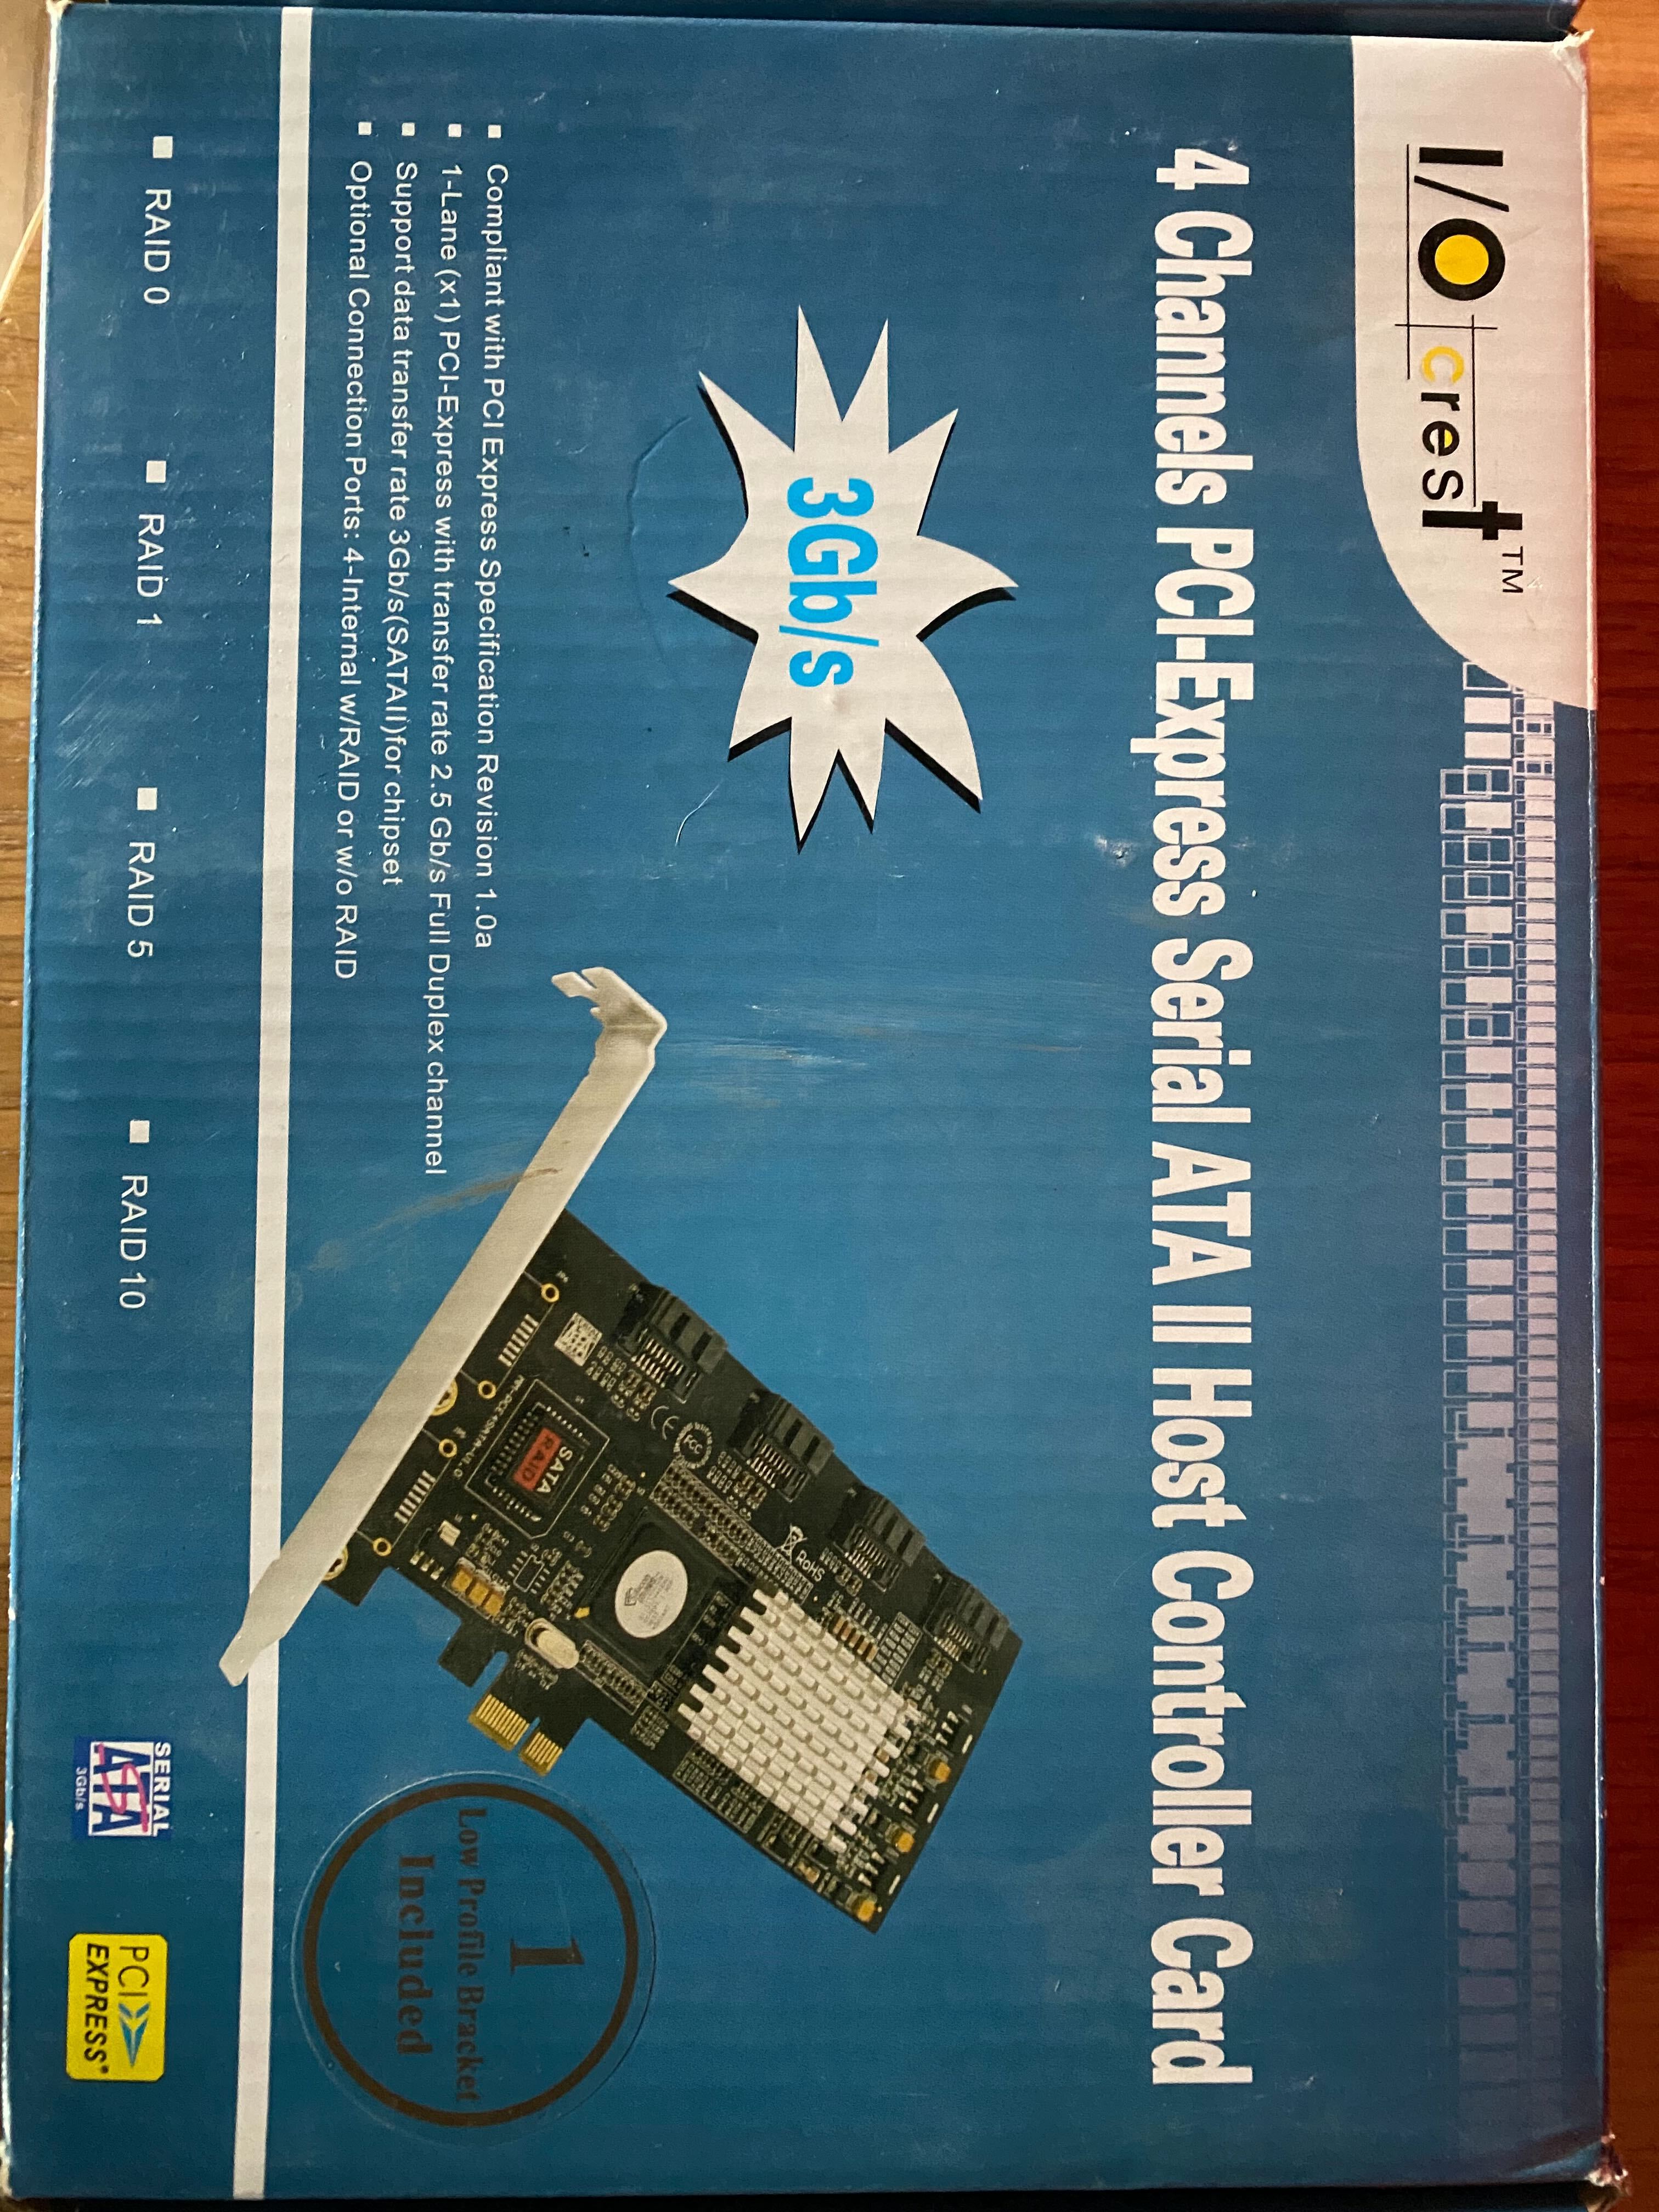
Nothing amazing, but simple 4 port SATA controllers.
Next I started to look at the size of the drives. I wanted to move away from spinny disks, power, noise, heat the primary factors but also fully loaded is very heavy! So to keep things compact SSD form factor 2 1/2 is the way to go.Let’s compare the sizes
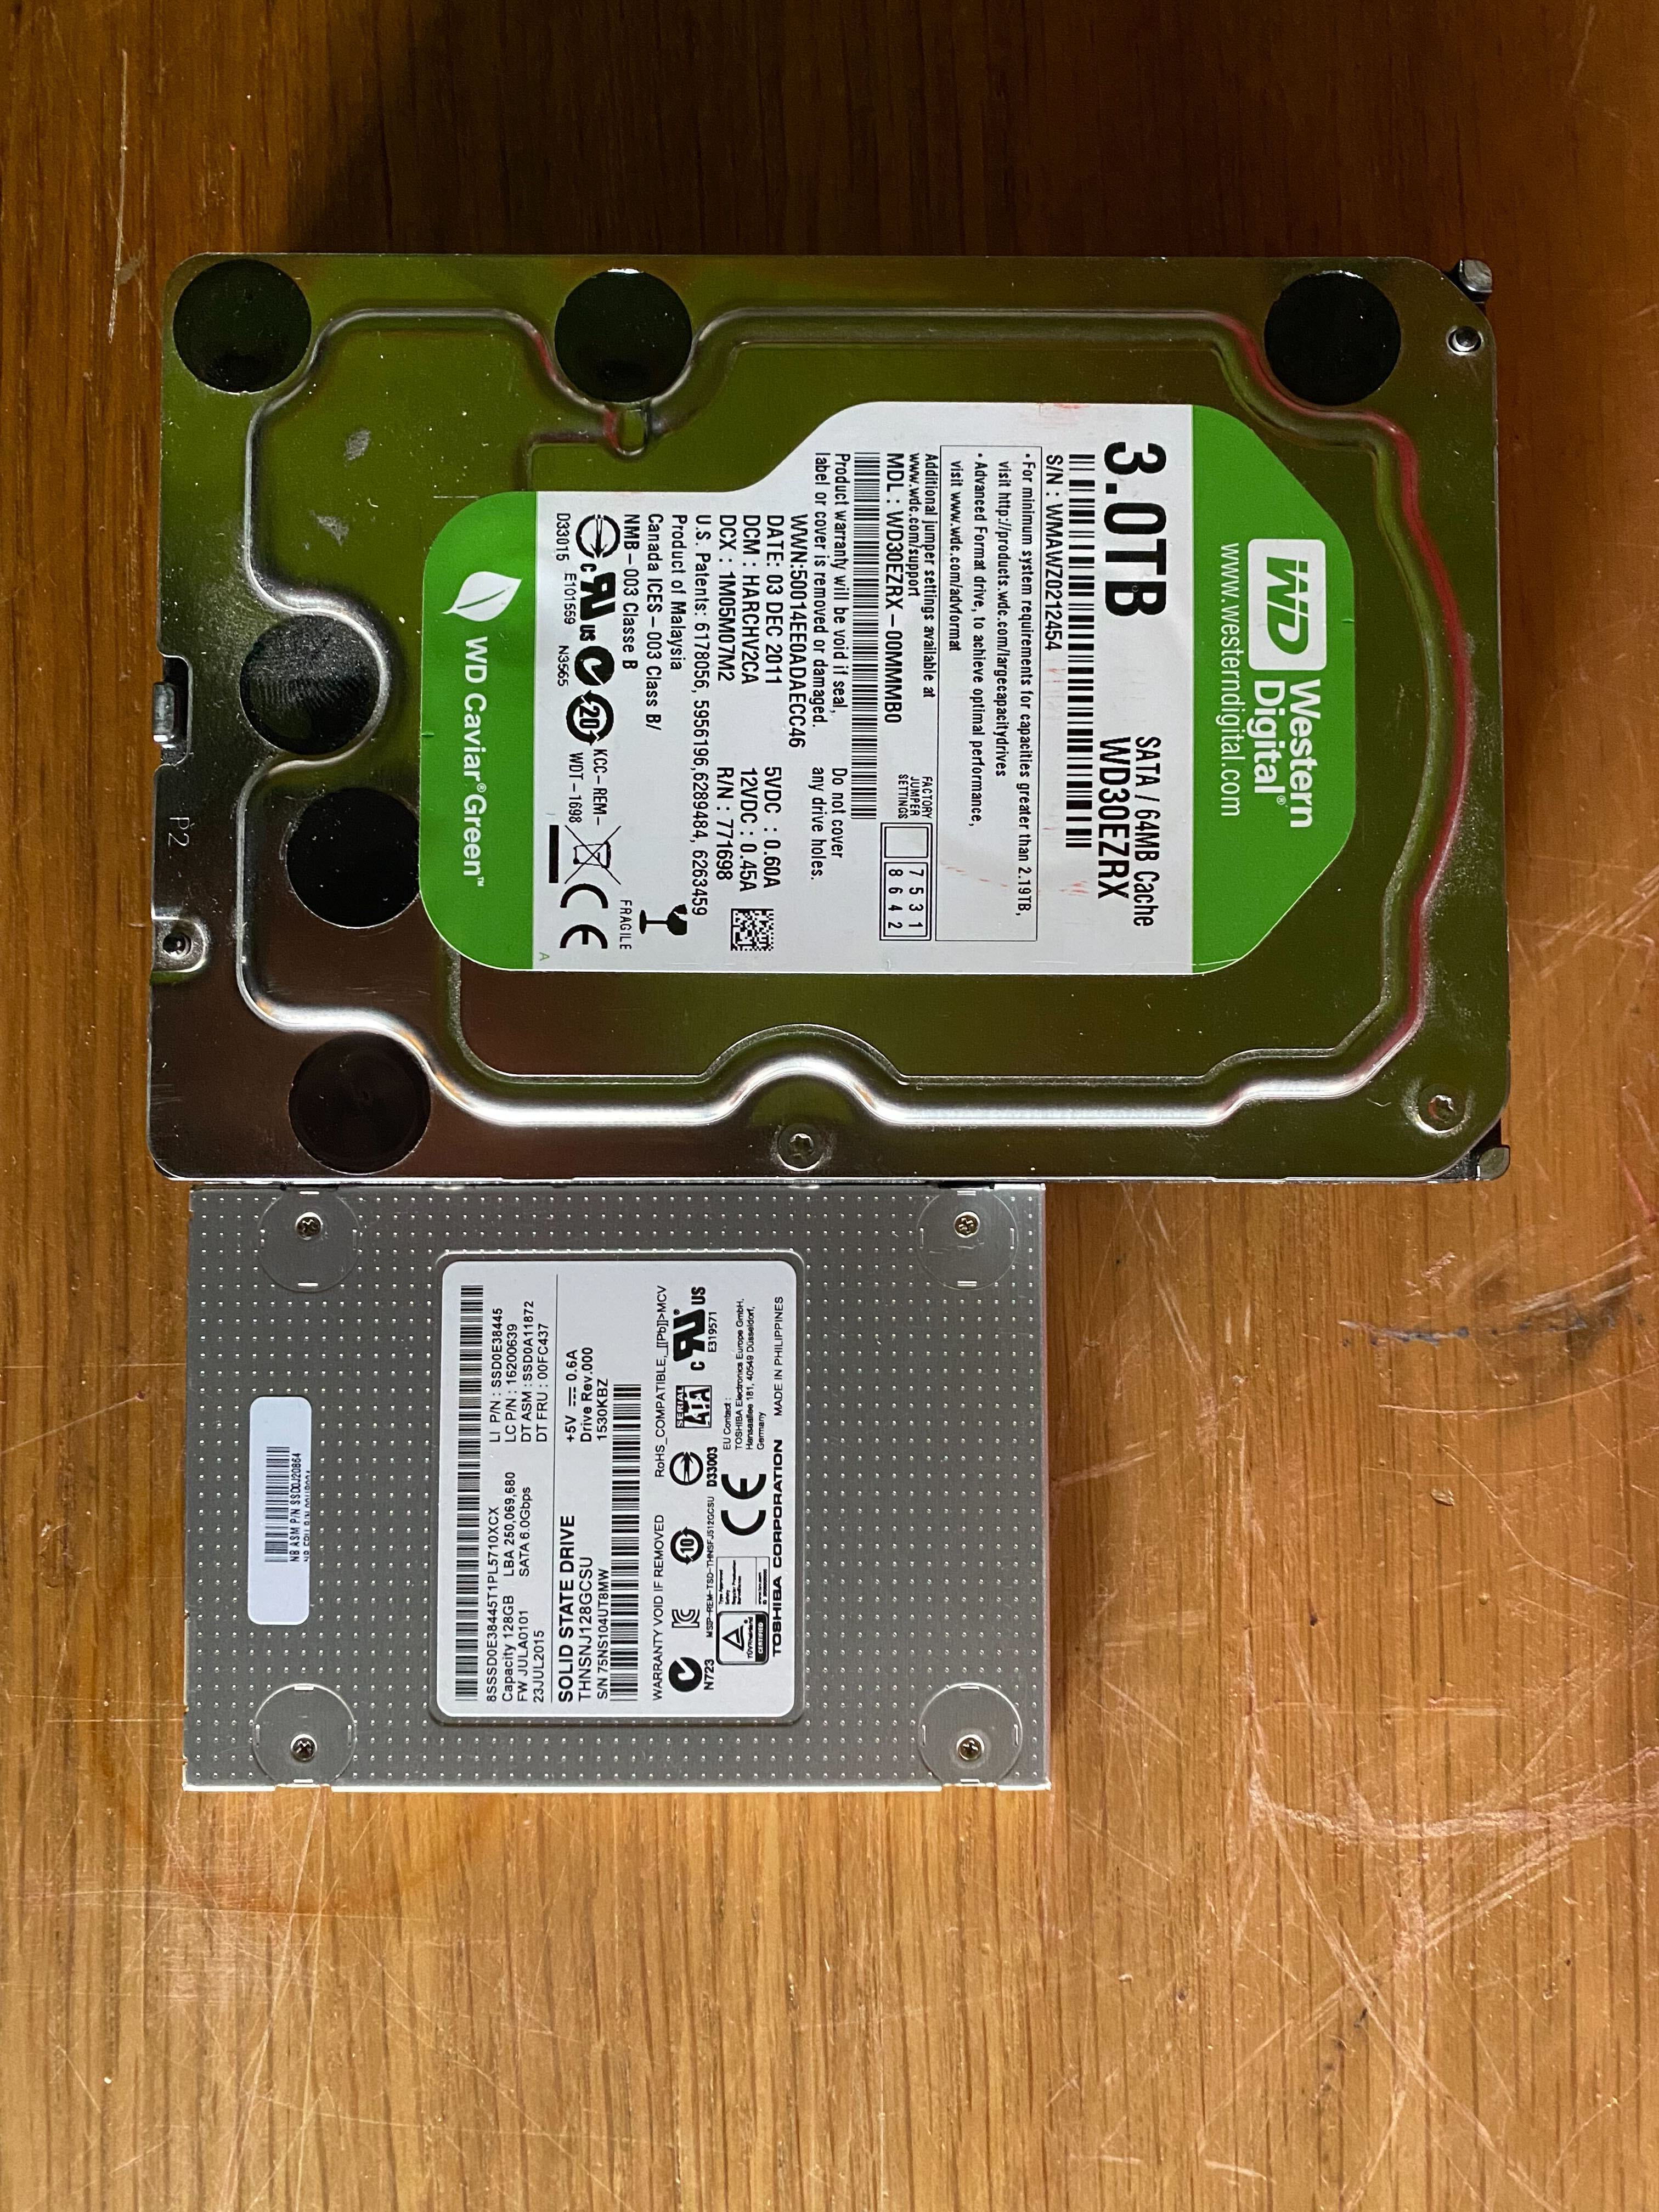
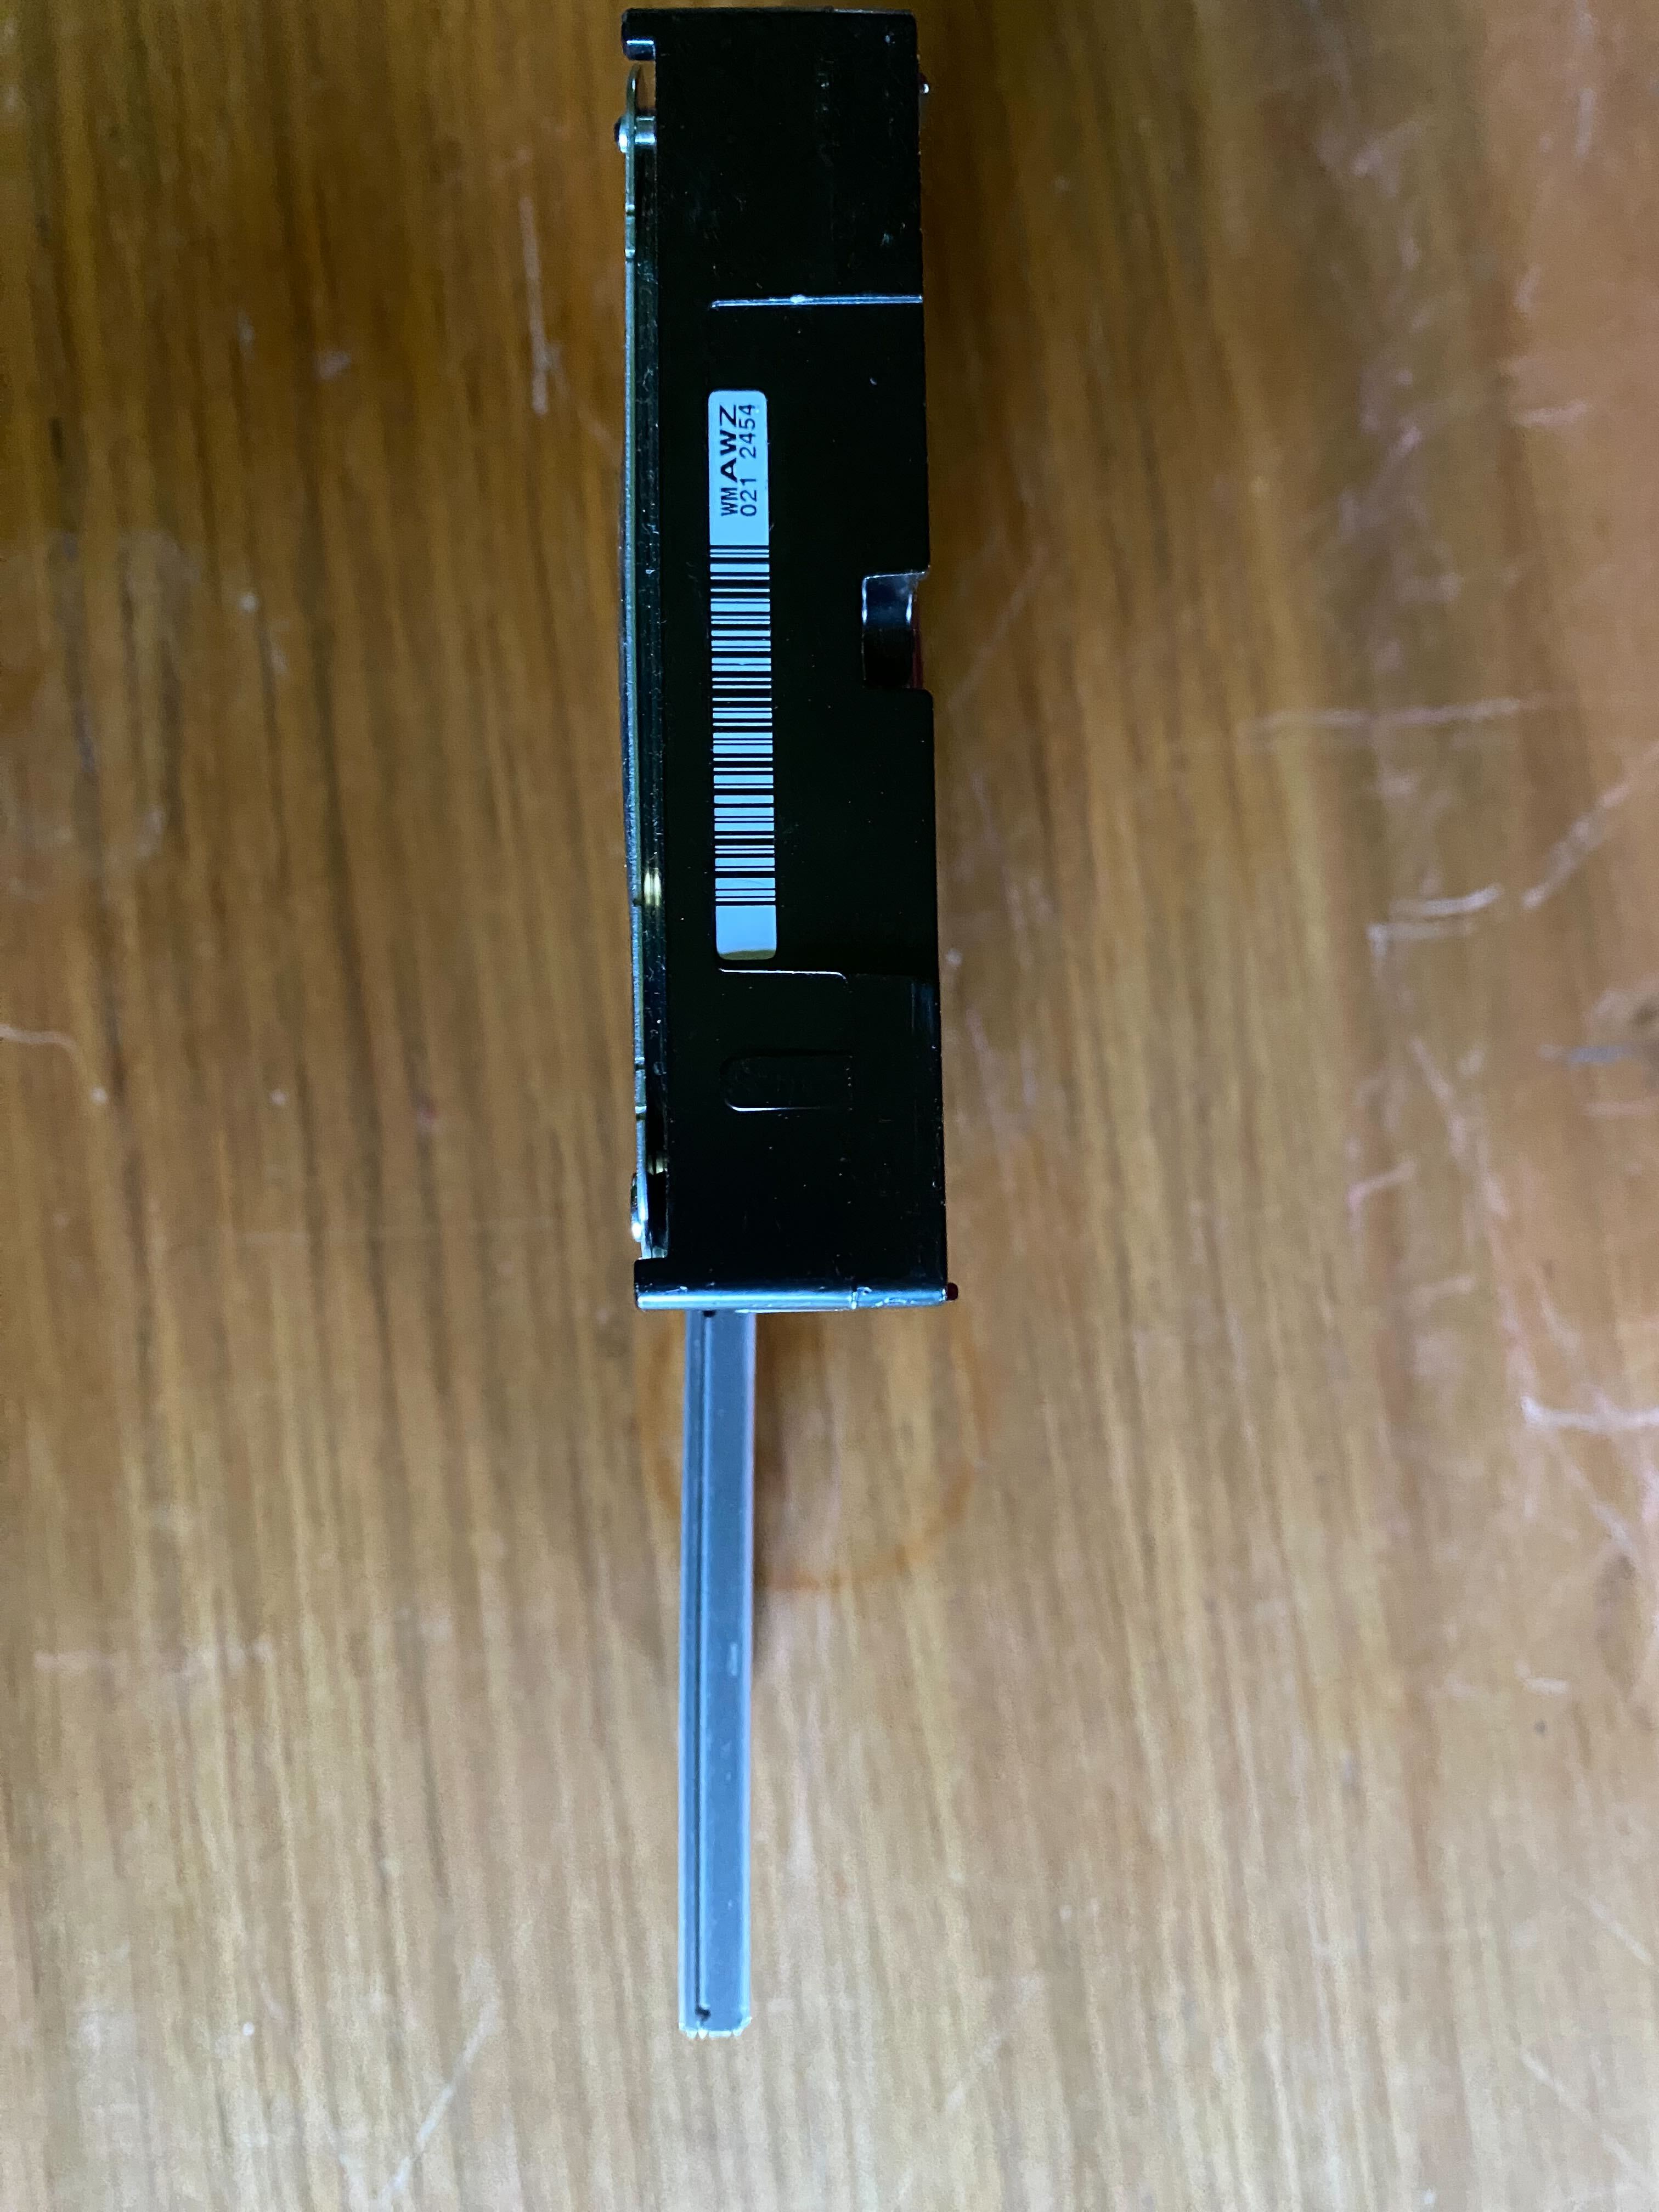
I created a 3d printed flat platform that the drives could stand on, just to test out how many seemed reasonable

At this point I realized the cabling would not fit under the platform, so any new location for the drives would either need to be custom with driver chip (like the previous items) or just connectors with drivers elsewhere, but also with the SSDs being smaller (hence shorter) there is now more room to move things upwards, as it turns out about 35mms of room. I then 3d printed a mask, that would allow me to use the nylong screws into the positions in the chassis but also allow me to add additional holes for anything I wanted to attach, so removing the need to match holes but allow me to extend upwards
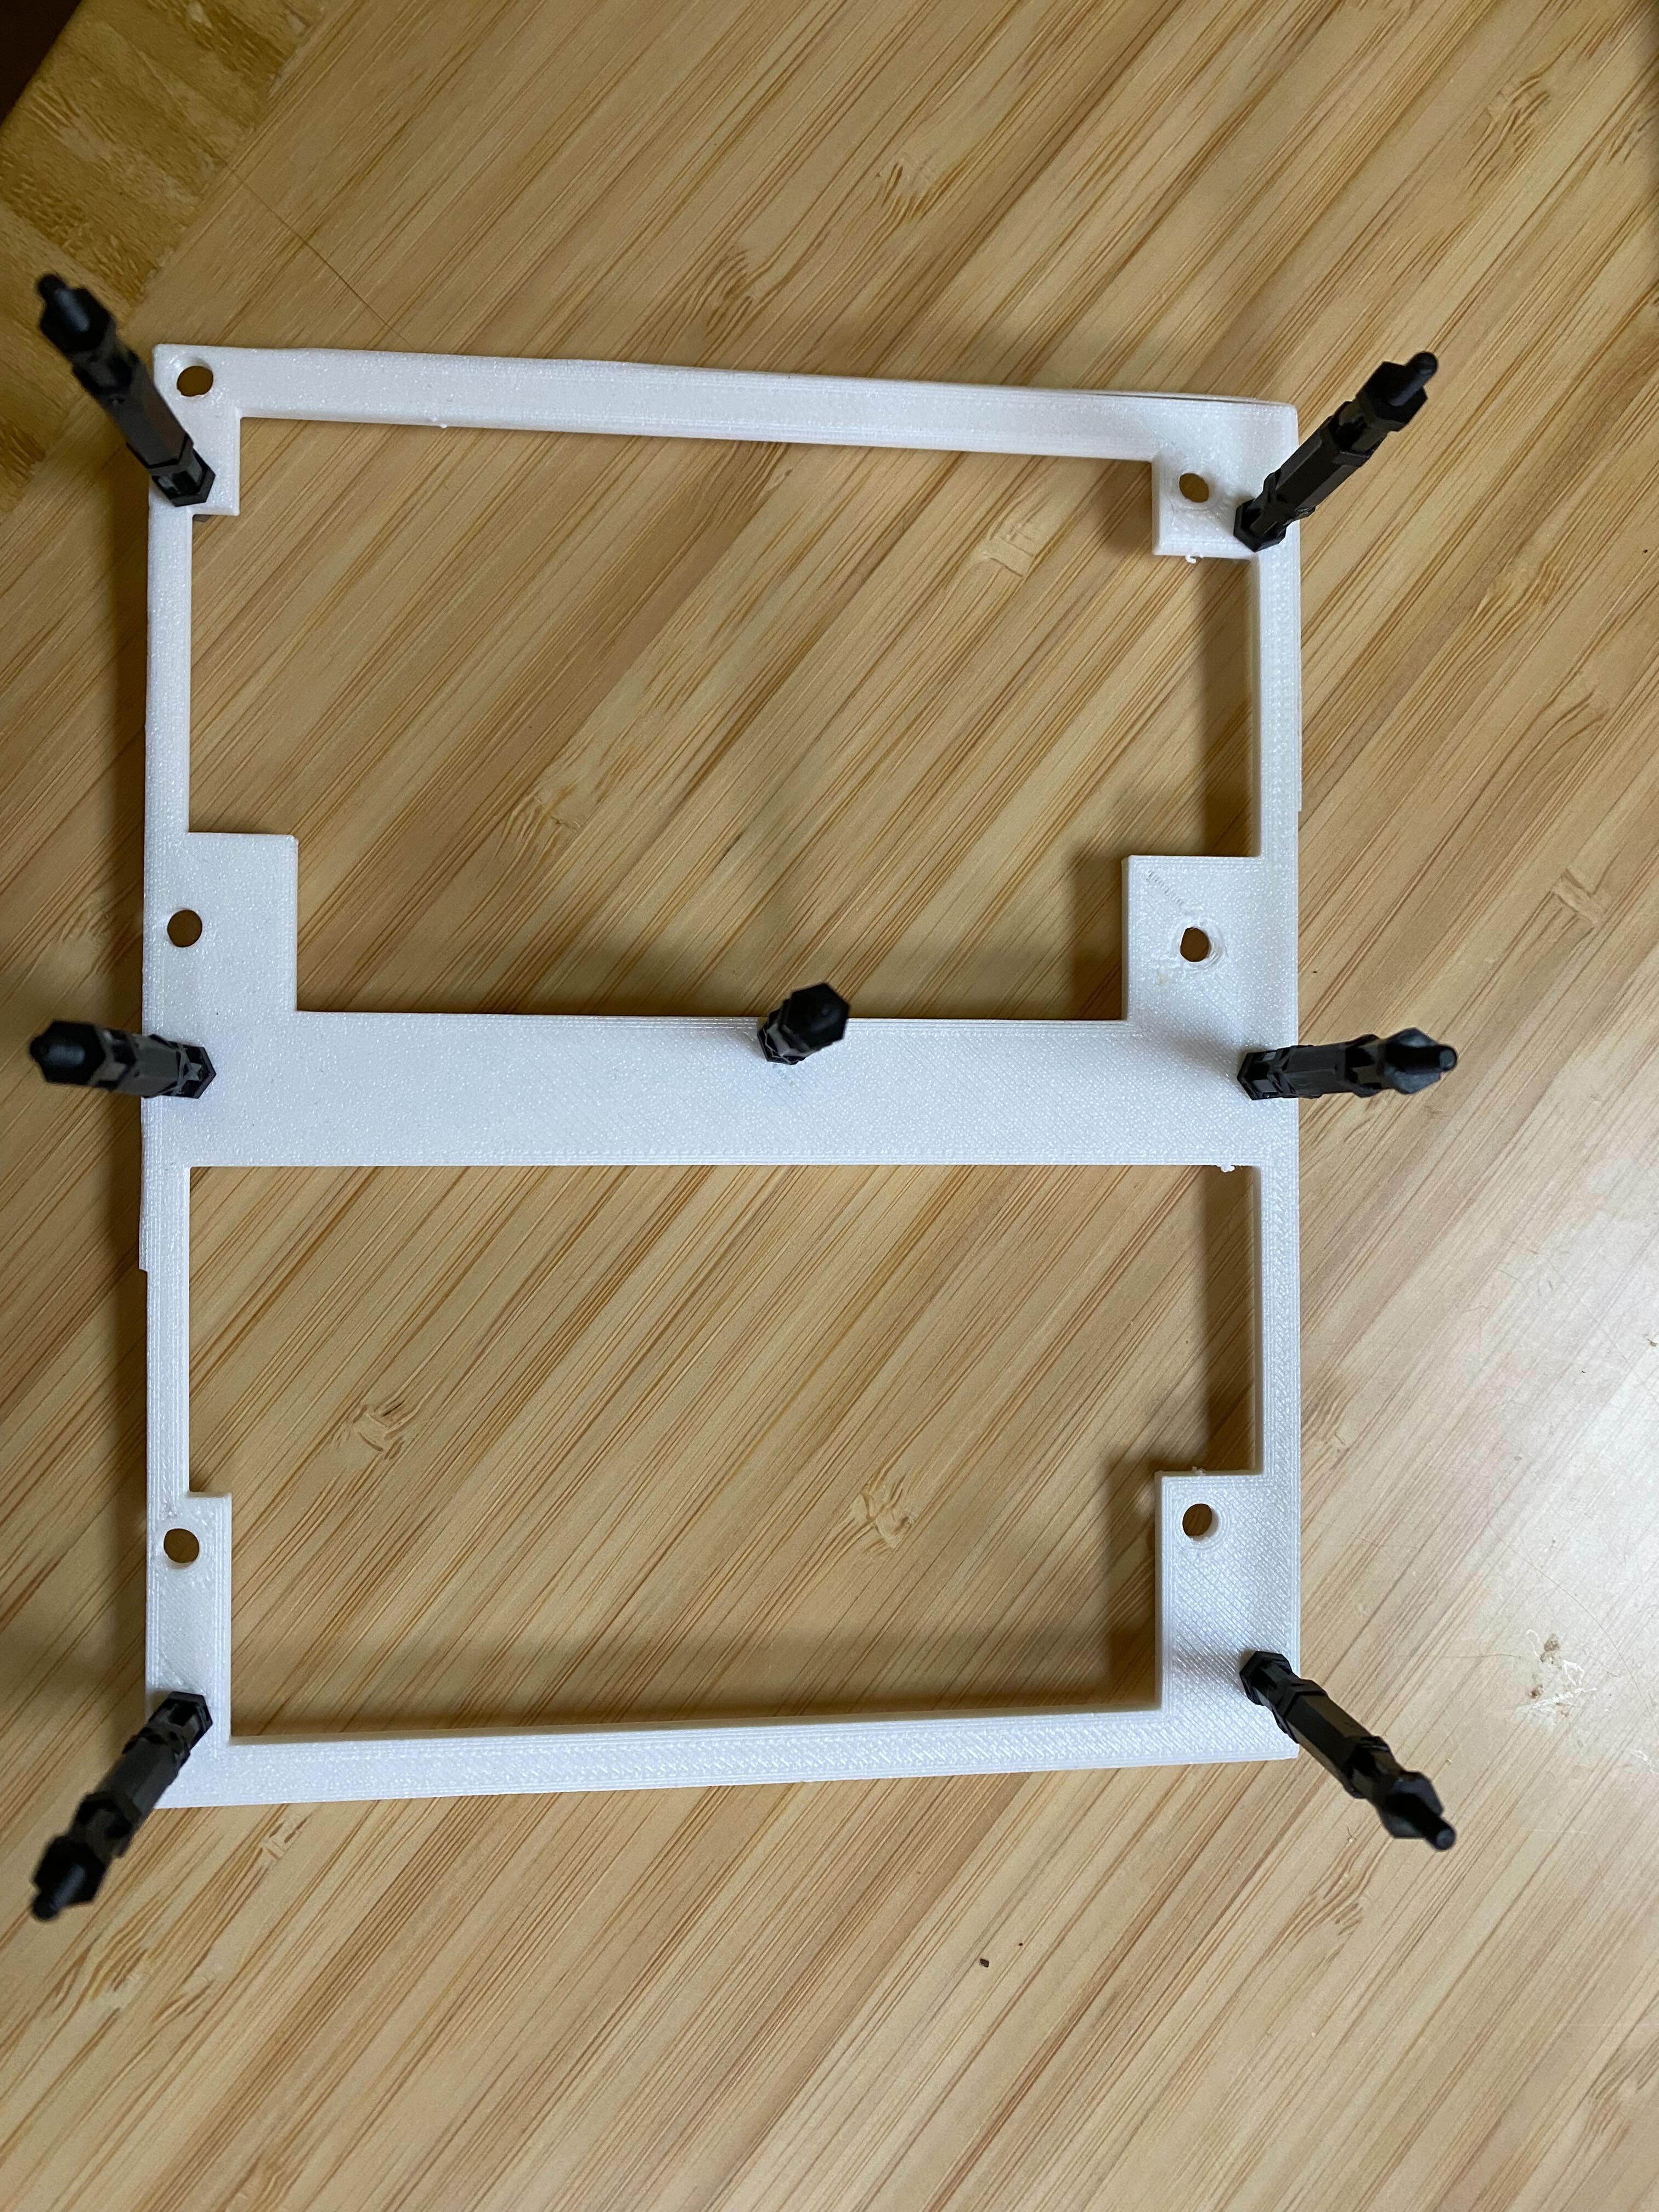
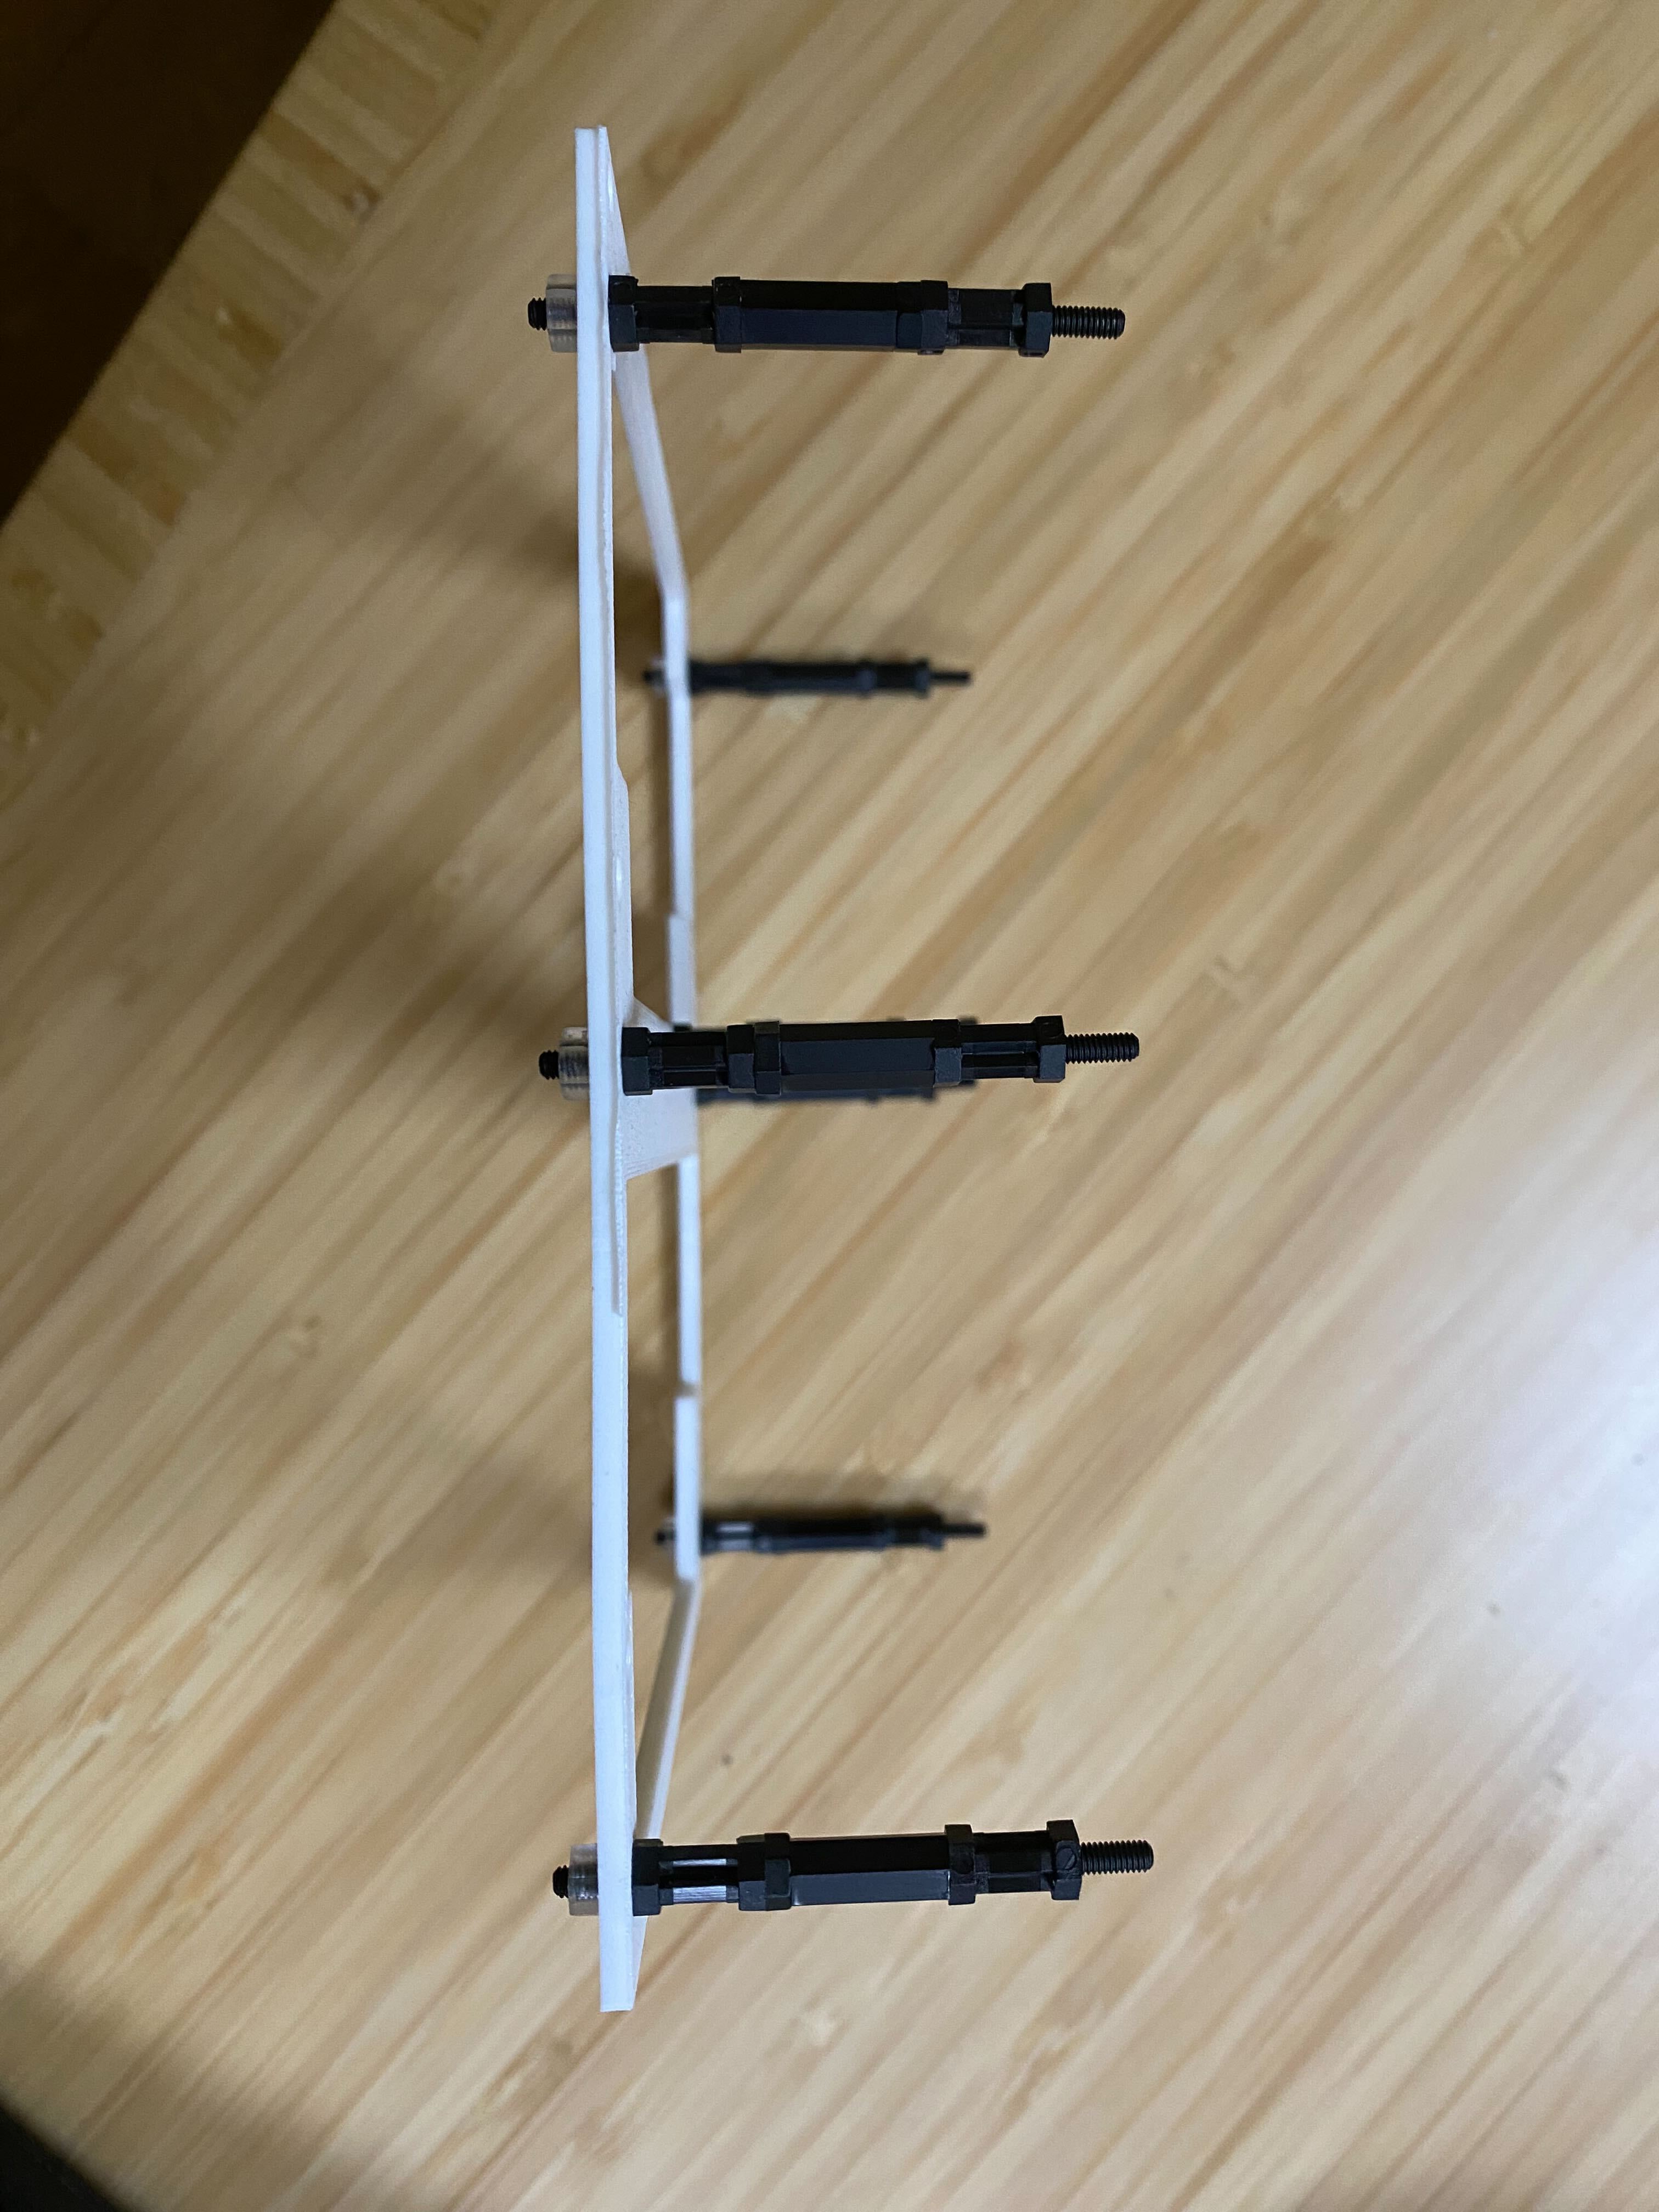
Now to get more drives into the chassis, I initially went for 10 drives , instead of 5 per location. This then required the use of port expanders, so I bought a few of these.
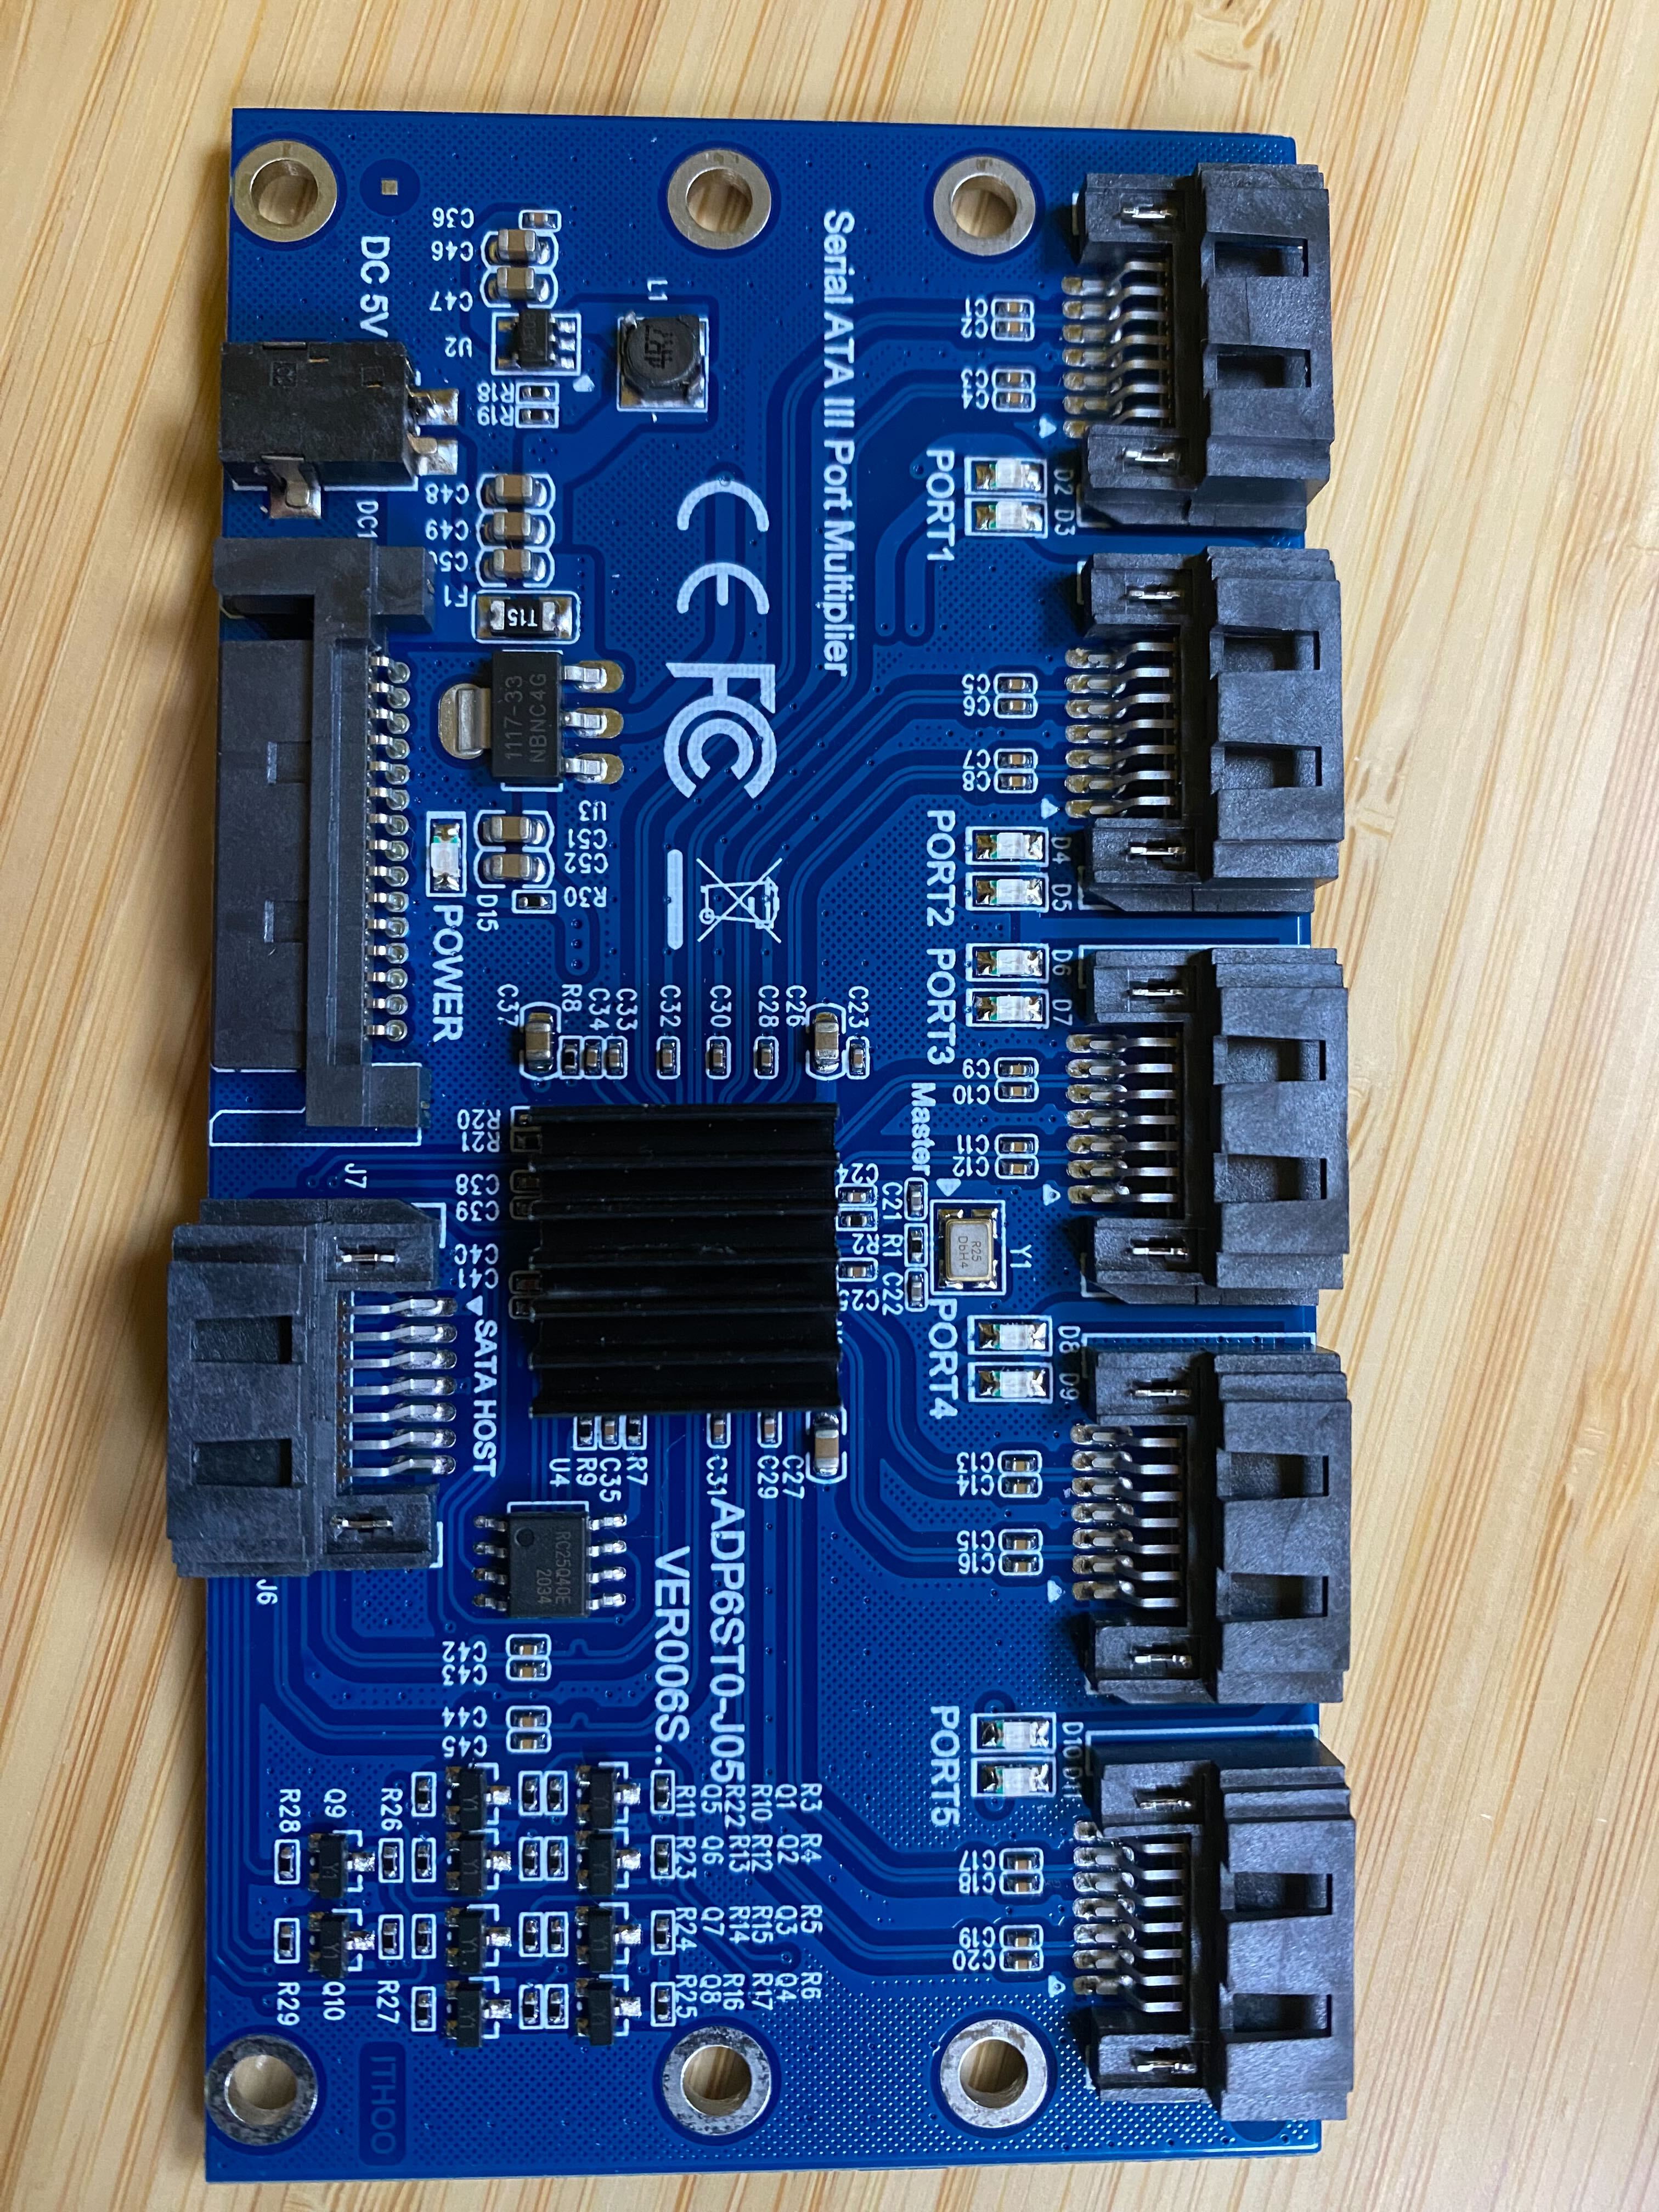
As it turns they are little rubbish. Not because they do not work, or that they are insanely slow but if you buy them from anywhere the heatsink is stuck in place with some kind of double sided heat resistance tape, which transfers little heat to the heatsink. This causes them to restart regularly when in use, rendering them next to useless. You can remove the heatsink, applying heat ( seems strange ) and it will come off
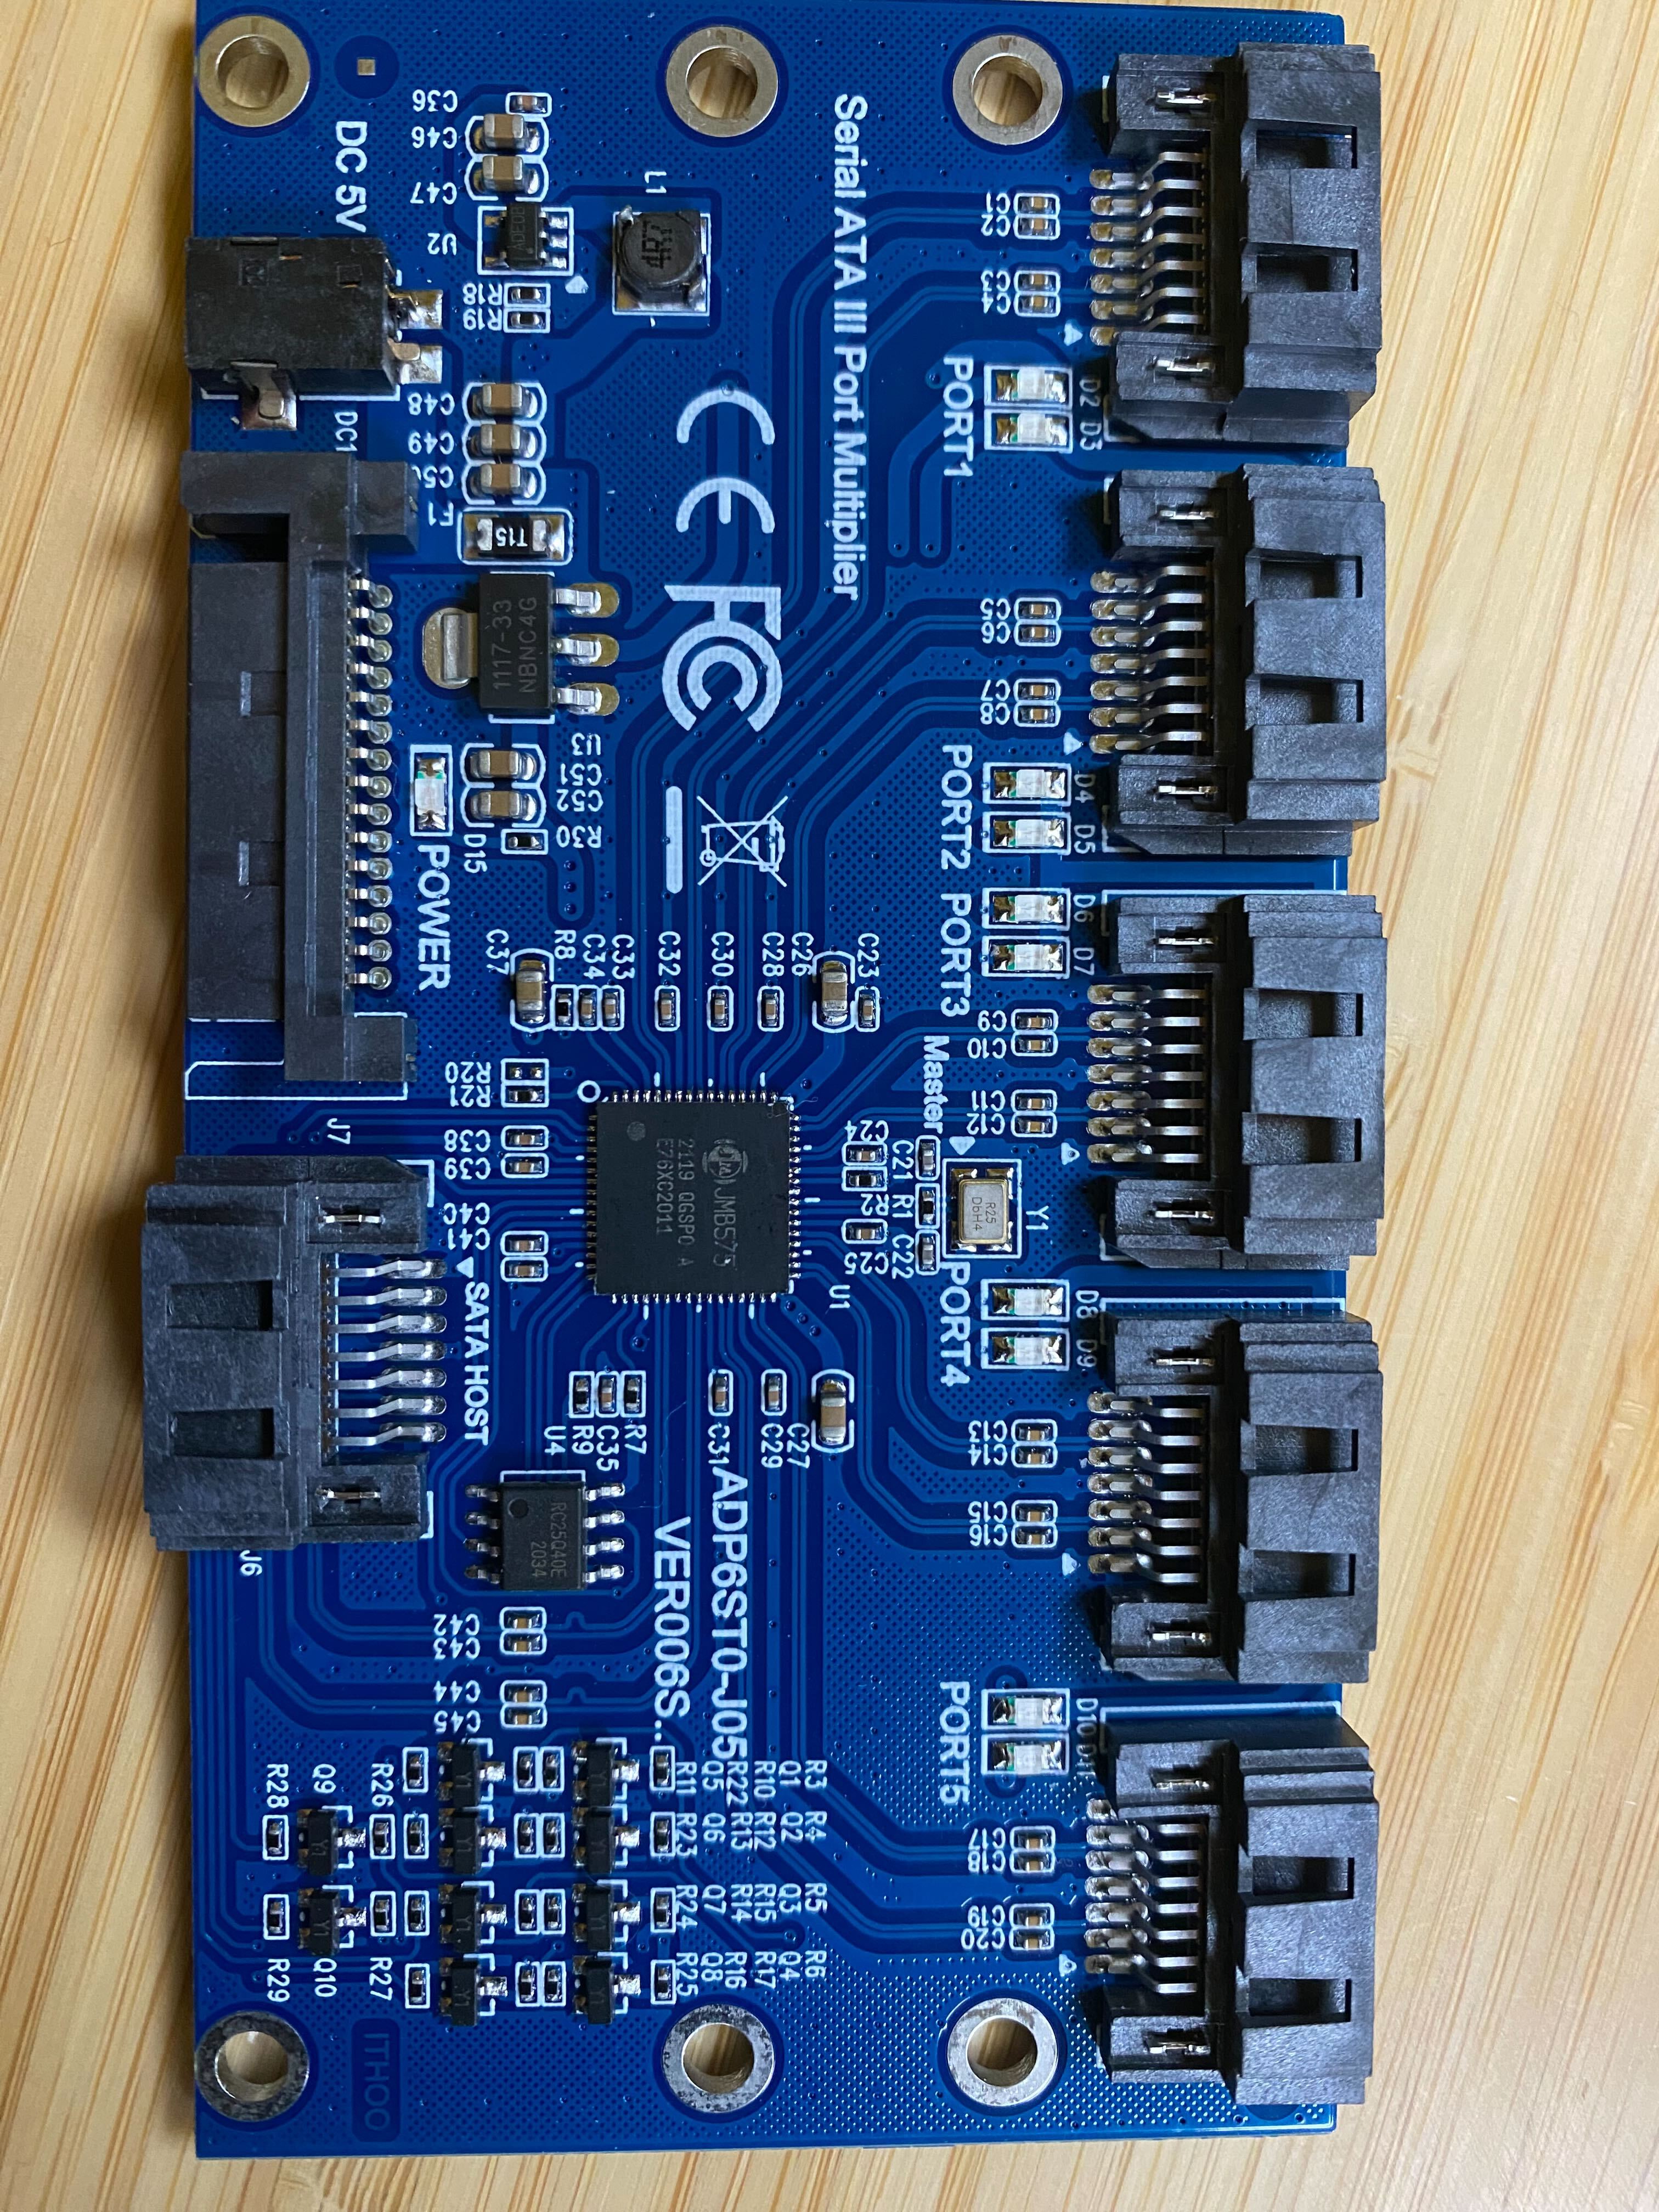
Then if you put it back with heat transfer epoxy, it will stop restarting, but remains incredibly slow!
But I did push on and get it going and I got some custom PCBs made from PCBWay. Nothing clever, just locators for the connectors , nothing active. Then then came up with a design to have the port expanders underneath, so two per location, giving 10 drives.


and then with the PCB in place As you can see, it kind of fits ?
So in my wisdom I thought I could fit more connectors on the PCB, so I went for 14 drives per PCB, two rows of 7, I would have two port expanders underneath and using some method not determined find a location for a 3rd one. If I have 9 slots, 14 x 9 = 126 , so I get to my goal with a few to spare!
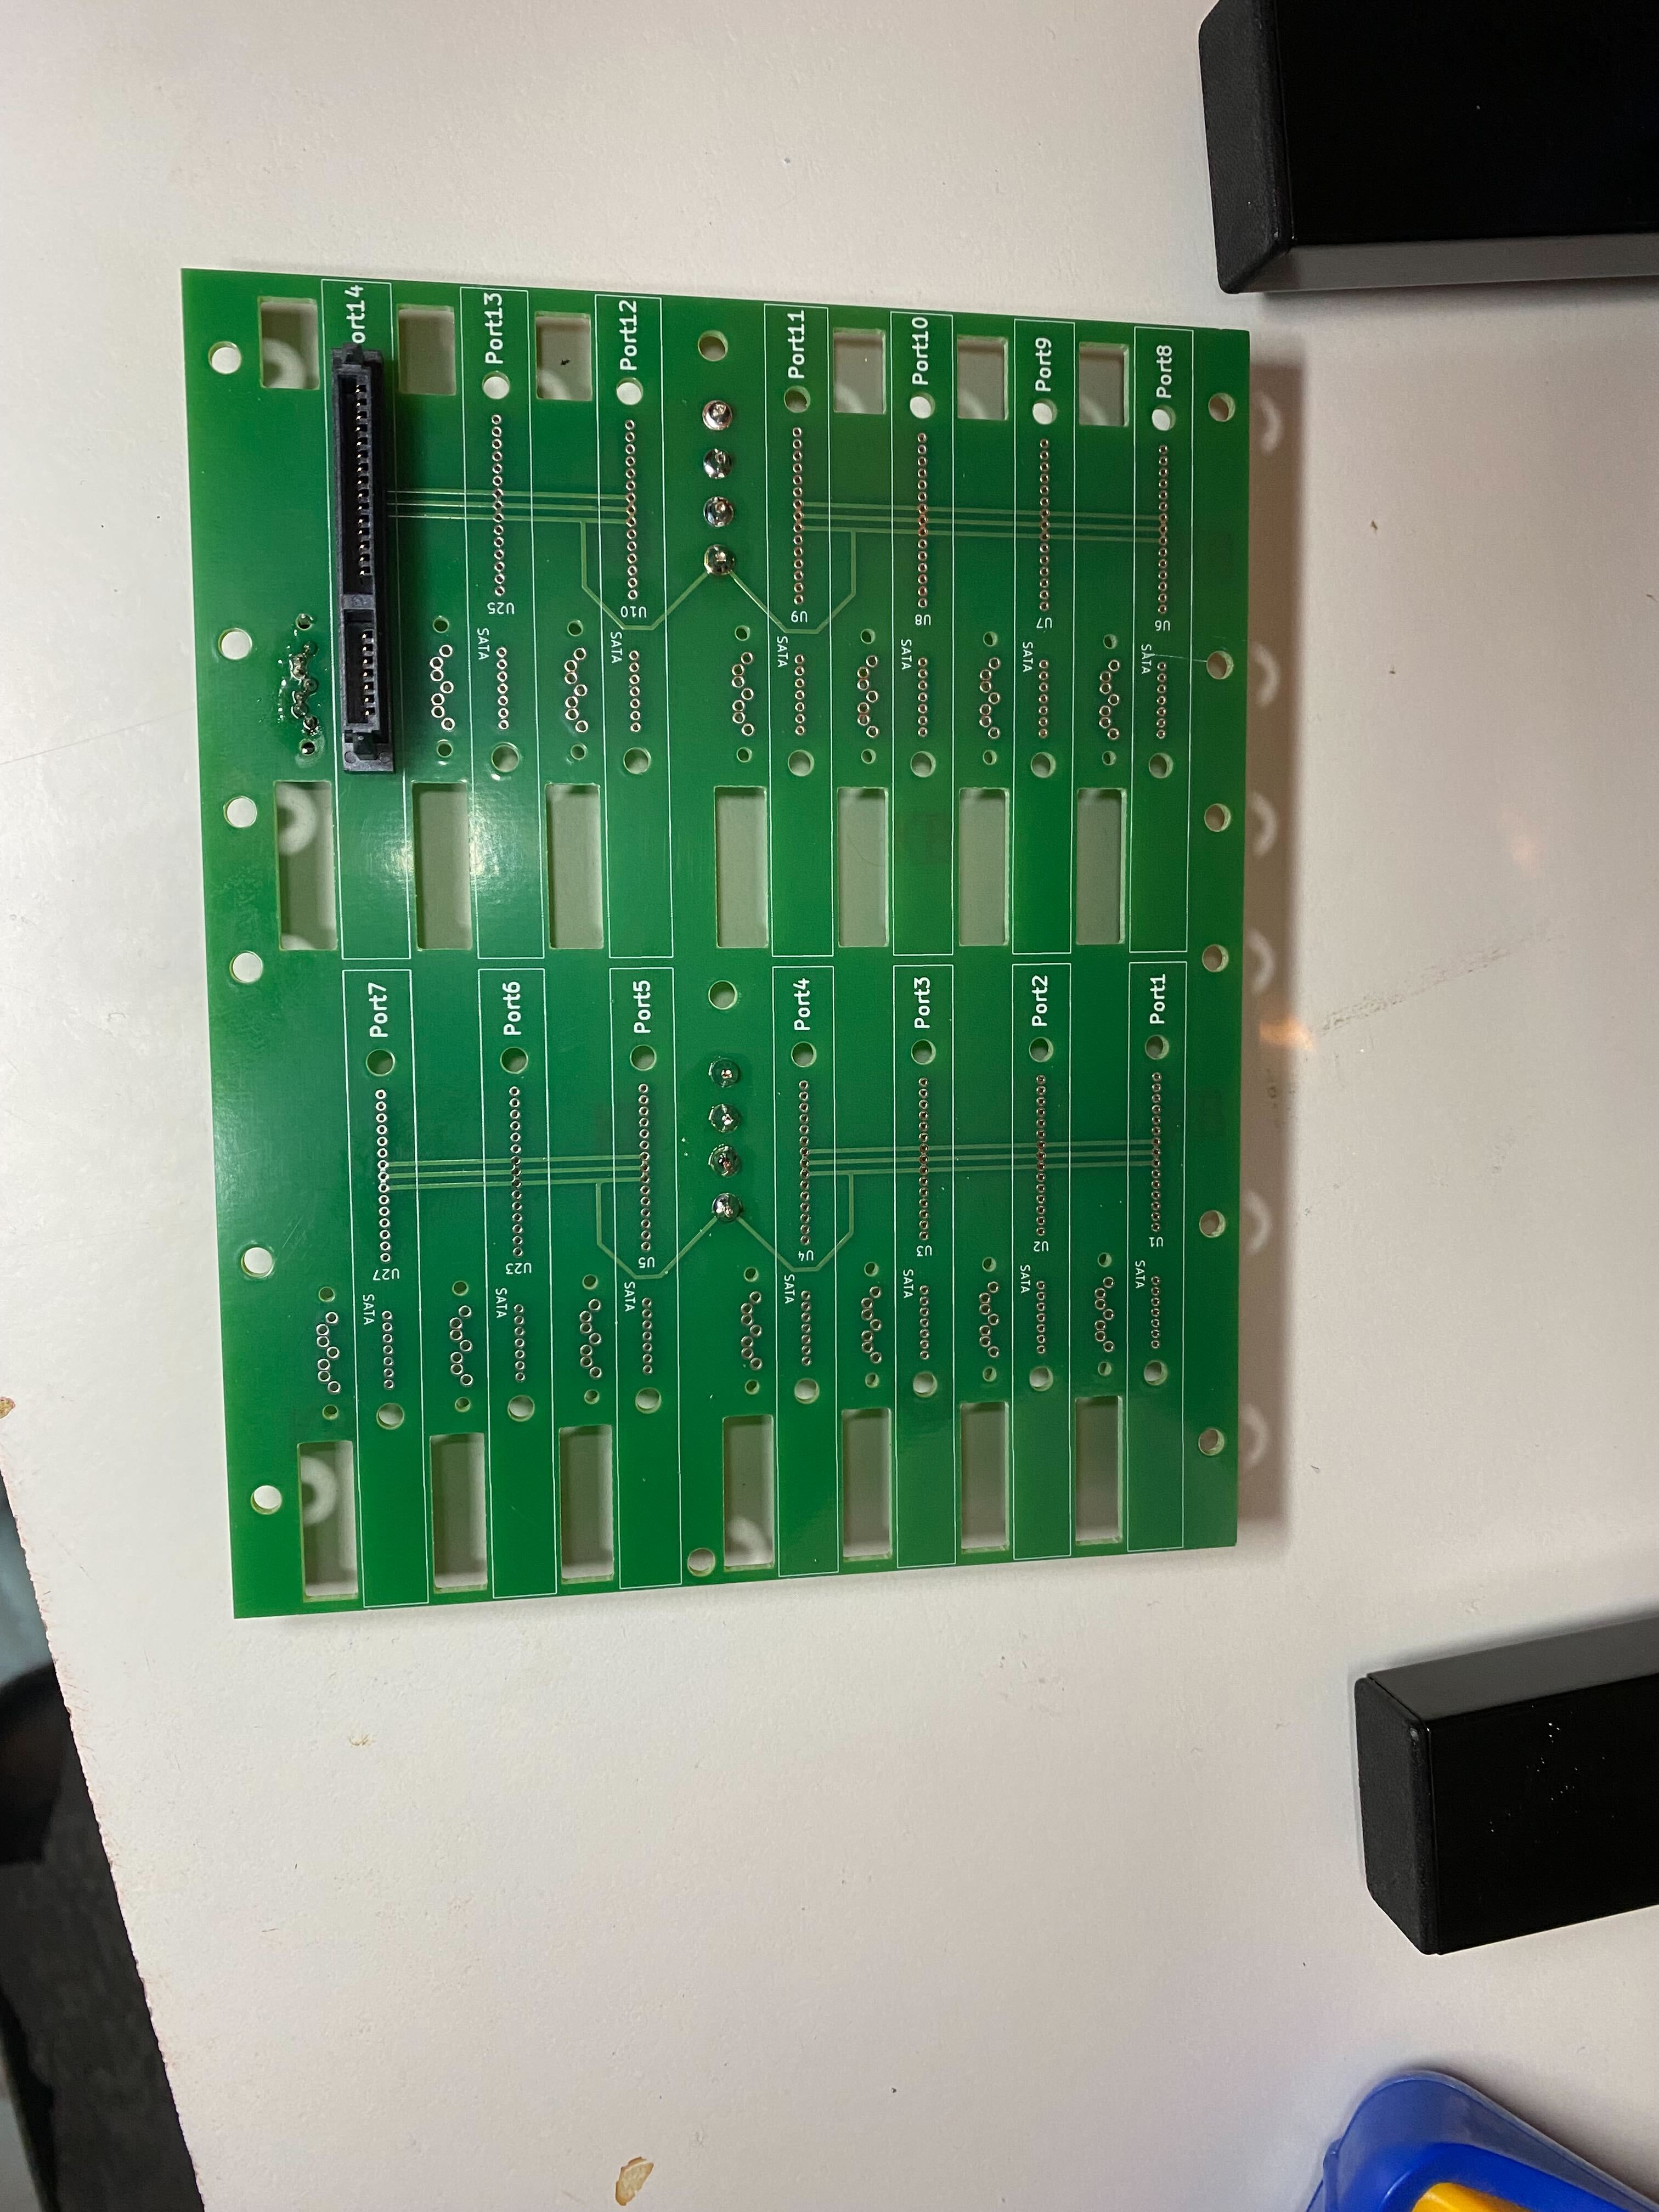
So a completed PCB, it is a very simple design, two locations to power the drives and then pass through connectors for SATA
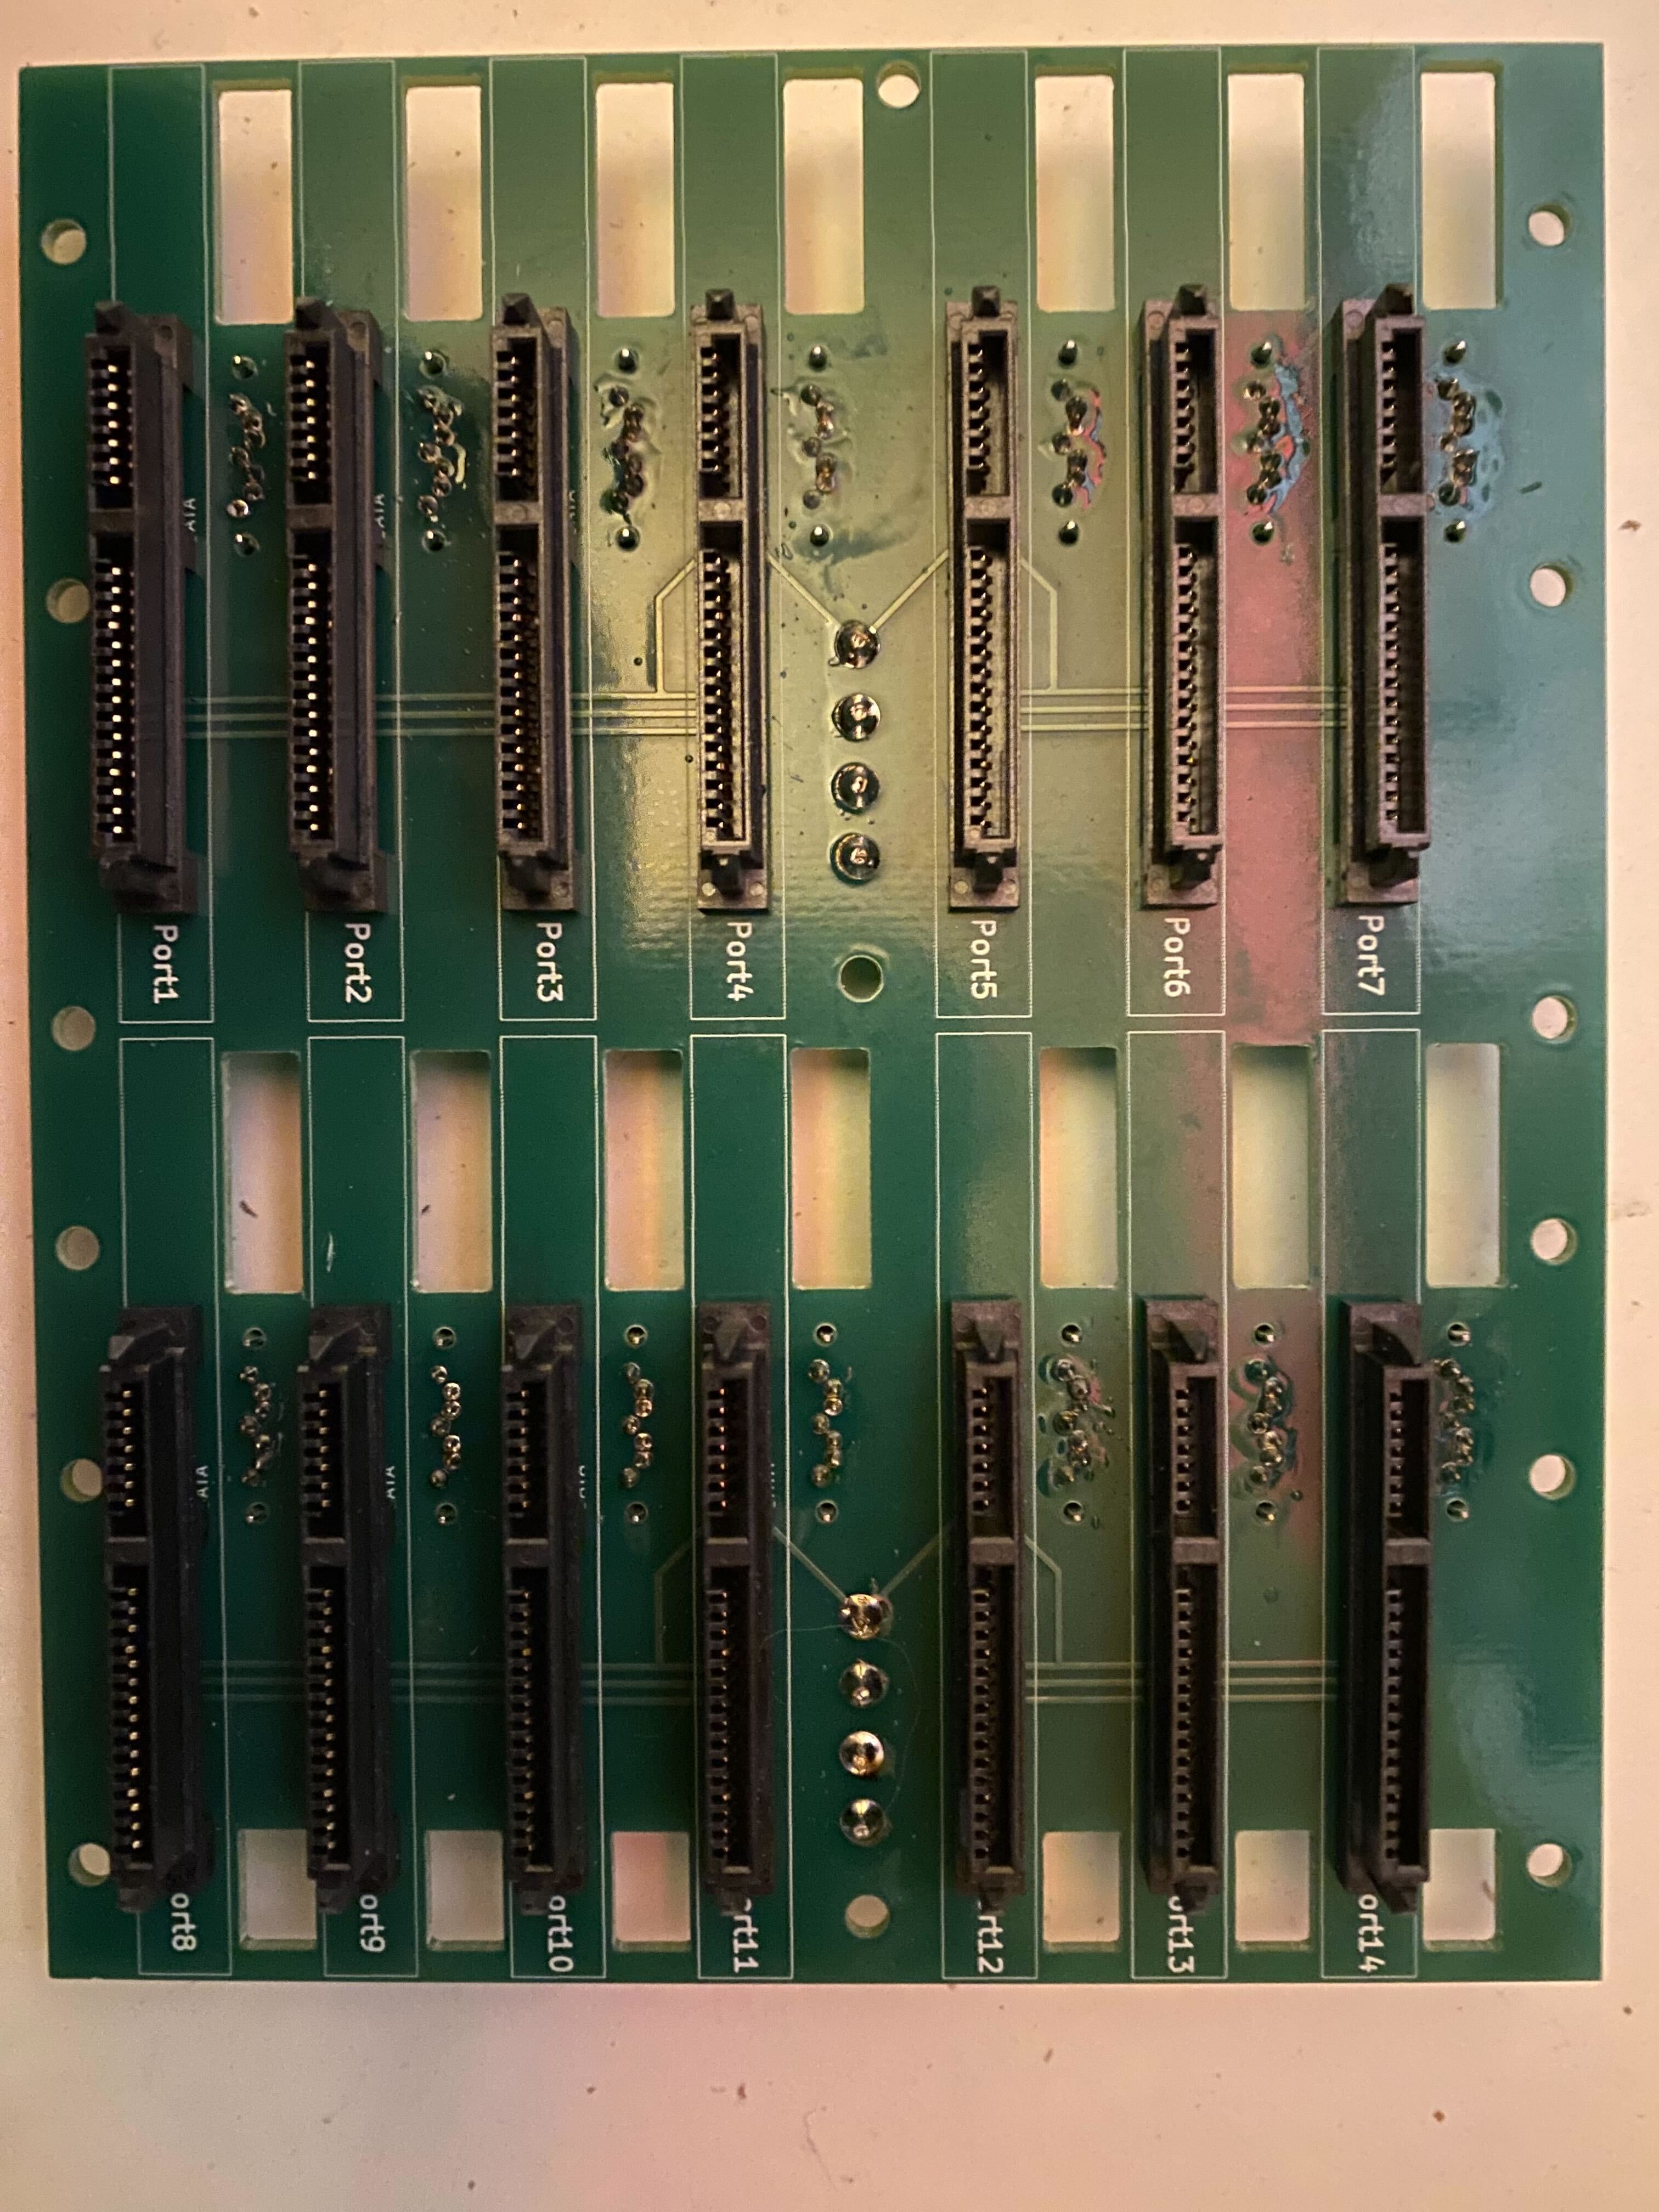
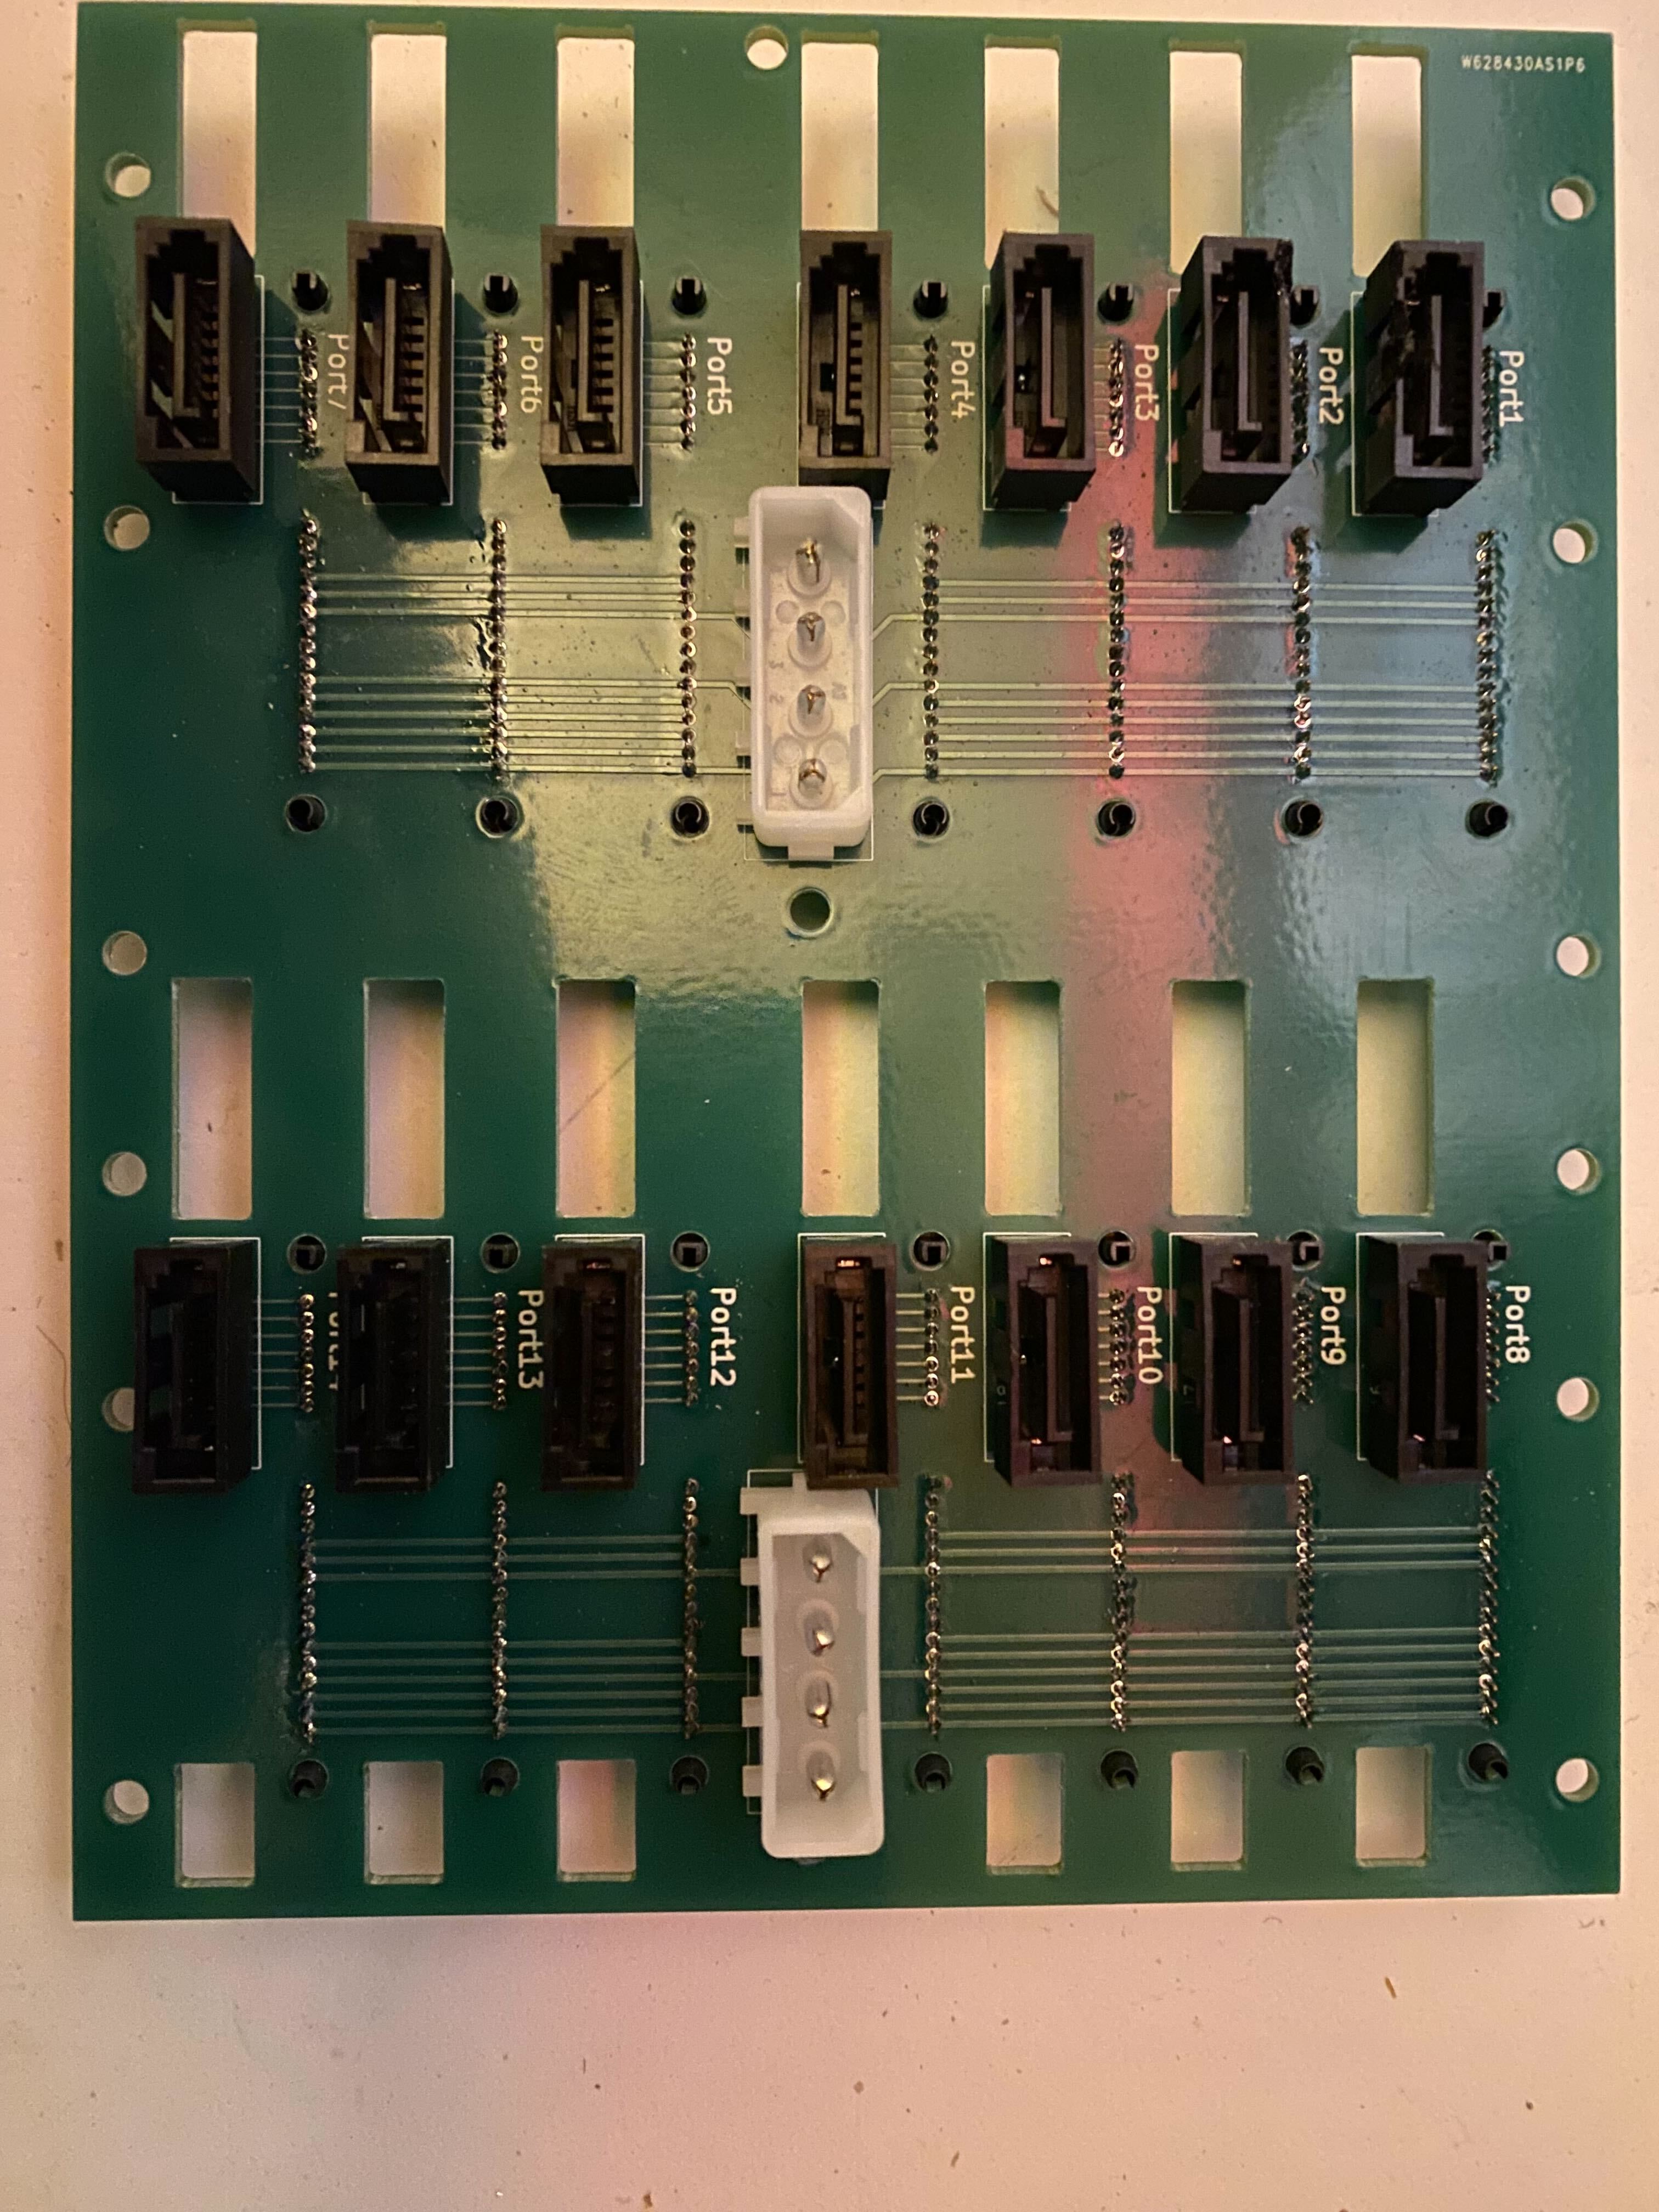
Then I wired it up with the SATA cables I had
It looks pretty, and did work, 20 drives and a boot drive, so 21 drives.
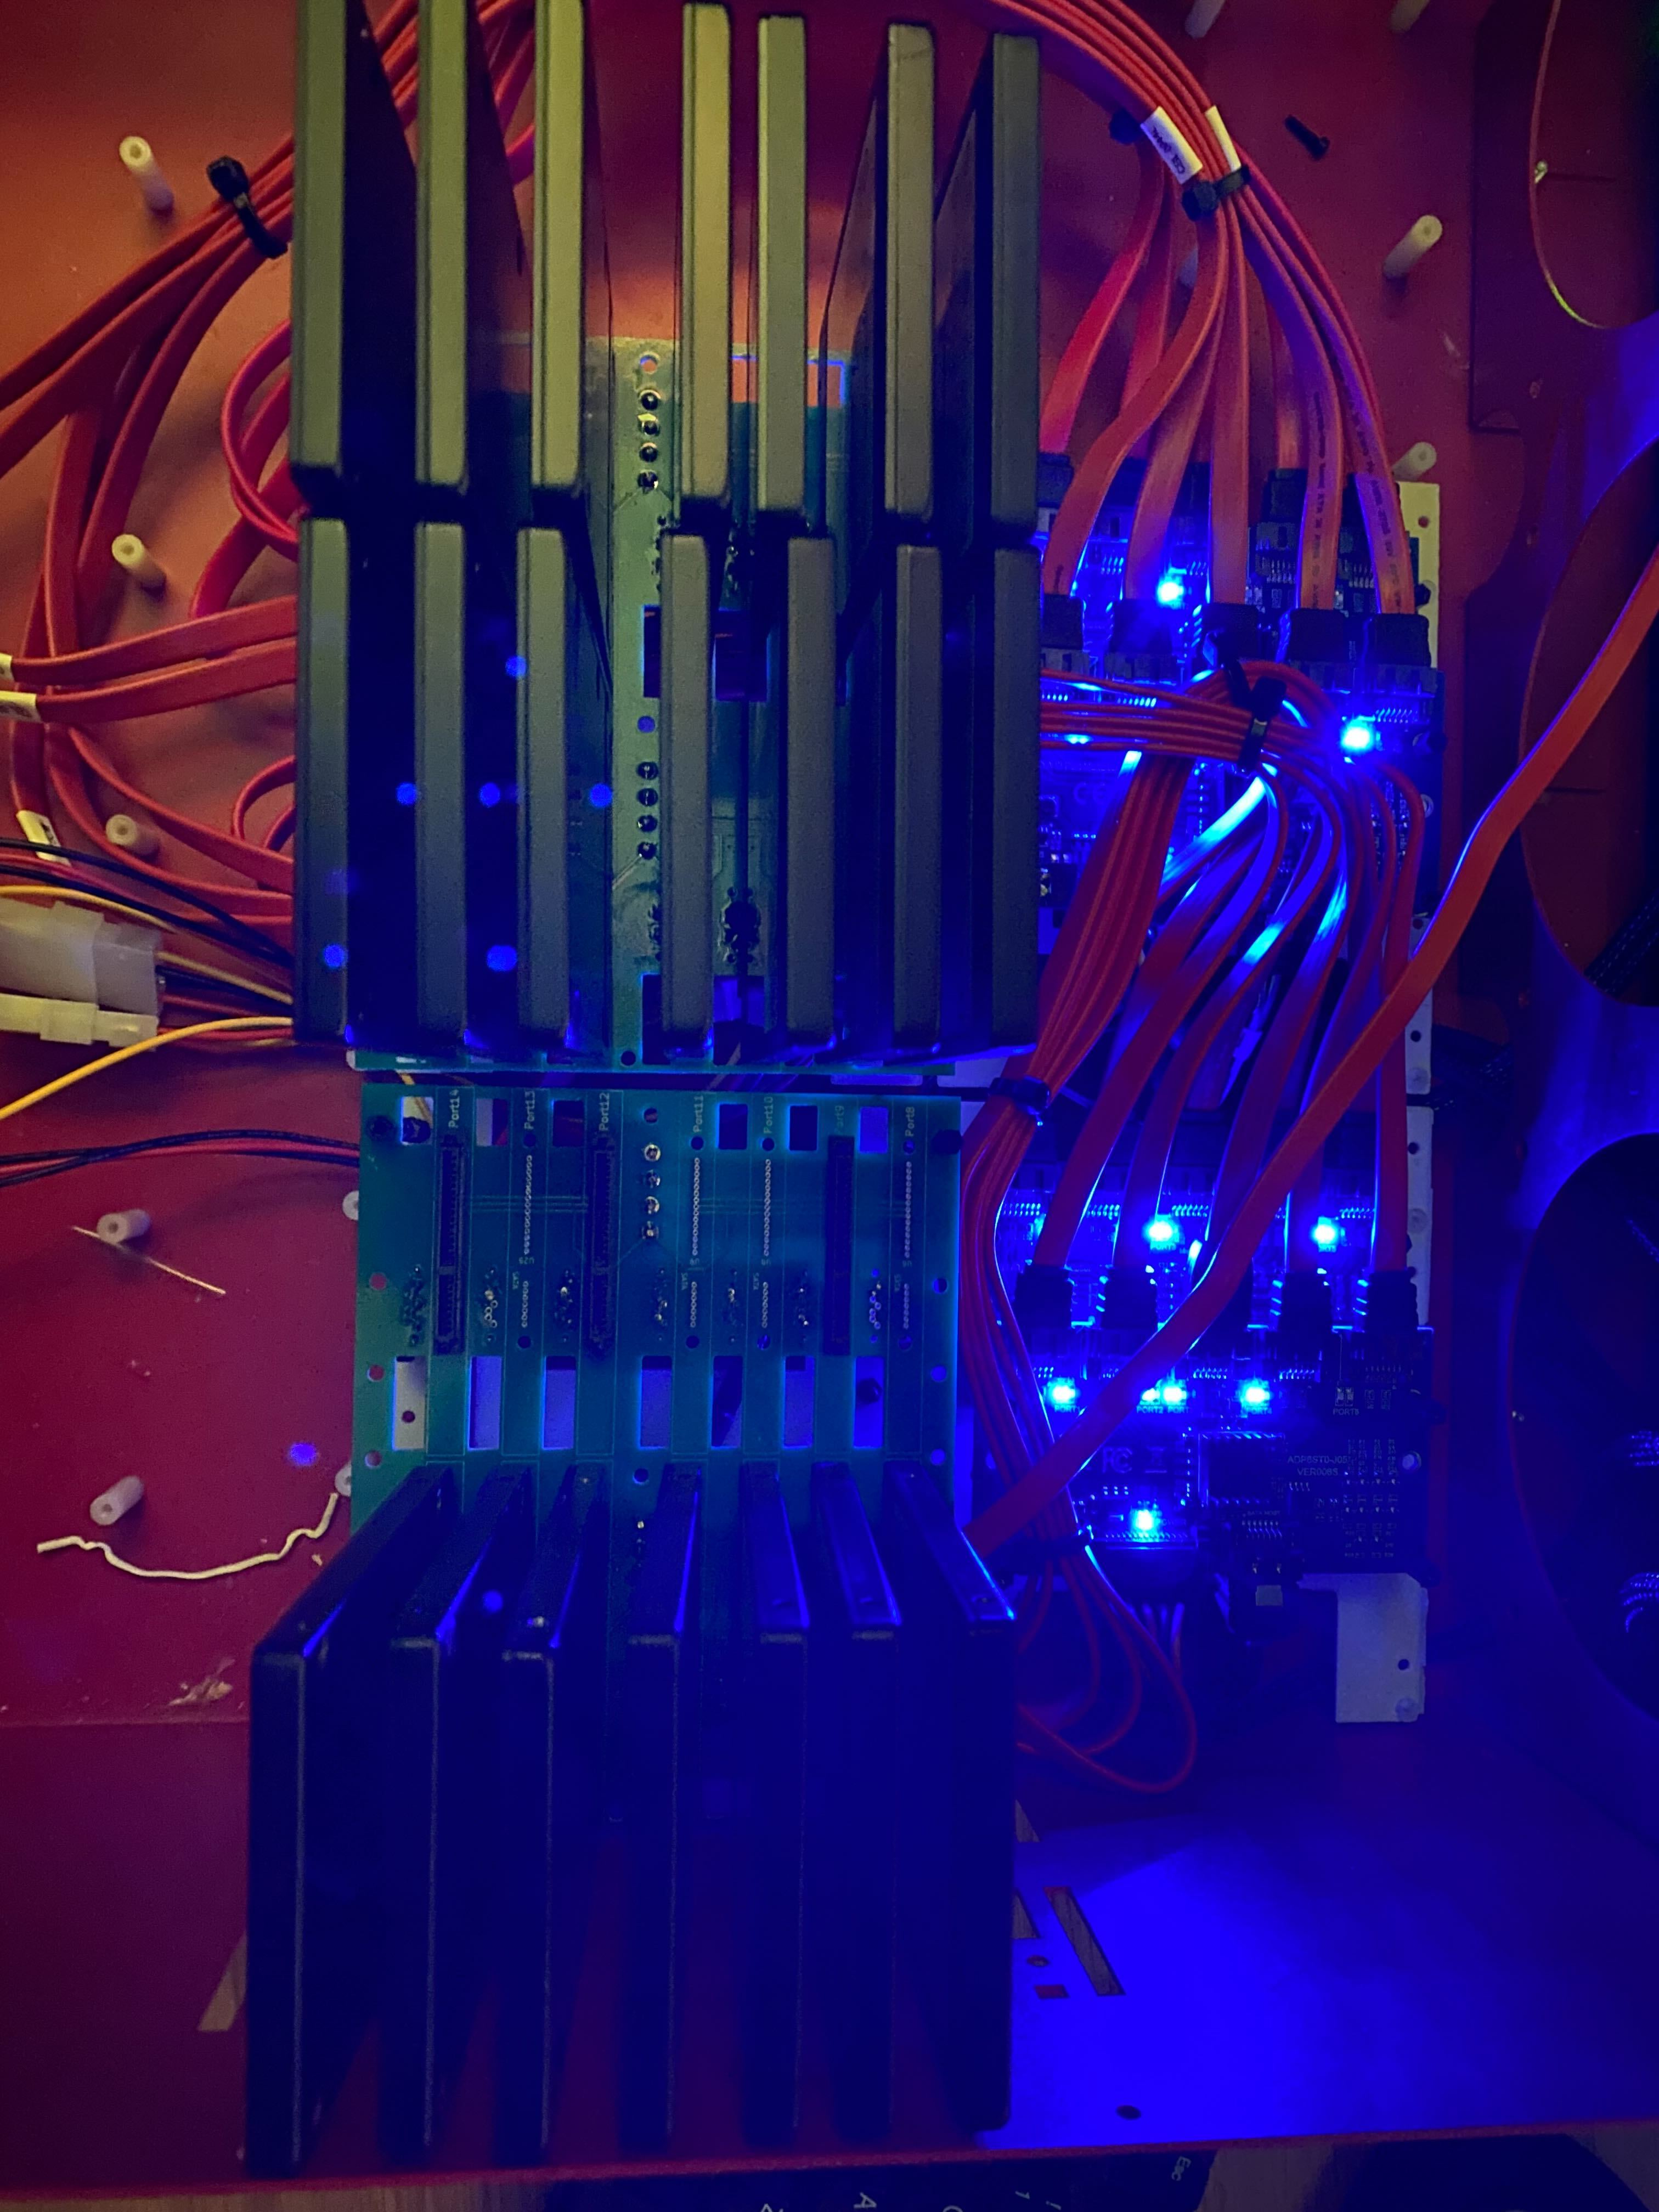
At this point, which was quite a bit of work, I realized with much distress, it was slower than a snail, at one point I was getting an underwhelming 10Mb/s !!!
- Three PCBway prototypes ( one not mentioned here was a disaster )
- Multiple port expanders ( 5 in total, after destroying one  )
- Not solving the space problem for an additional 3rd port expander use
- Lots of SATA cabling, testing
- OS install, re-install, RAID testing, multiple controller etc etc
- Very slow performance
The final design of the PCB , 2 x 7 slots I was keeping, even if I did not use all the locations, it works, there are air flow cut outs. It also now matches the mask to connect to the chassis.
I now need to find a solution to control a large number of disks, without breaking the bank and also consider how would cabling work for all the drives
If you look at this motherboard it is 2 x 1x and 1 x 2x and 3 x 4x PCIE interfacers so options are limited on the number and type of interface cards.
There are multiple SATA cards that provide good 8x SATA interfaces such as this StarTech it’s a fast card, does the job well, so with 3 of these in I get 24 ports. Alas not getting me close to the 120 I wanted, so no real use.
SAS cards are incredibly cheap and relatively quick and compatible with SATA drives, not to be confused with SAS drives ARE NOT compatible with SATA controllers. This one is goes for about $30 and has 2 ports on board.
To make the best use out of it you also need to expand the number of ports available, which is where this card comes in.
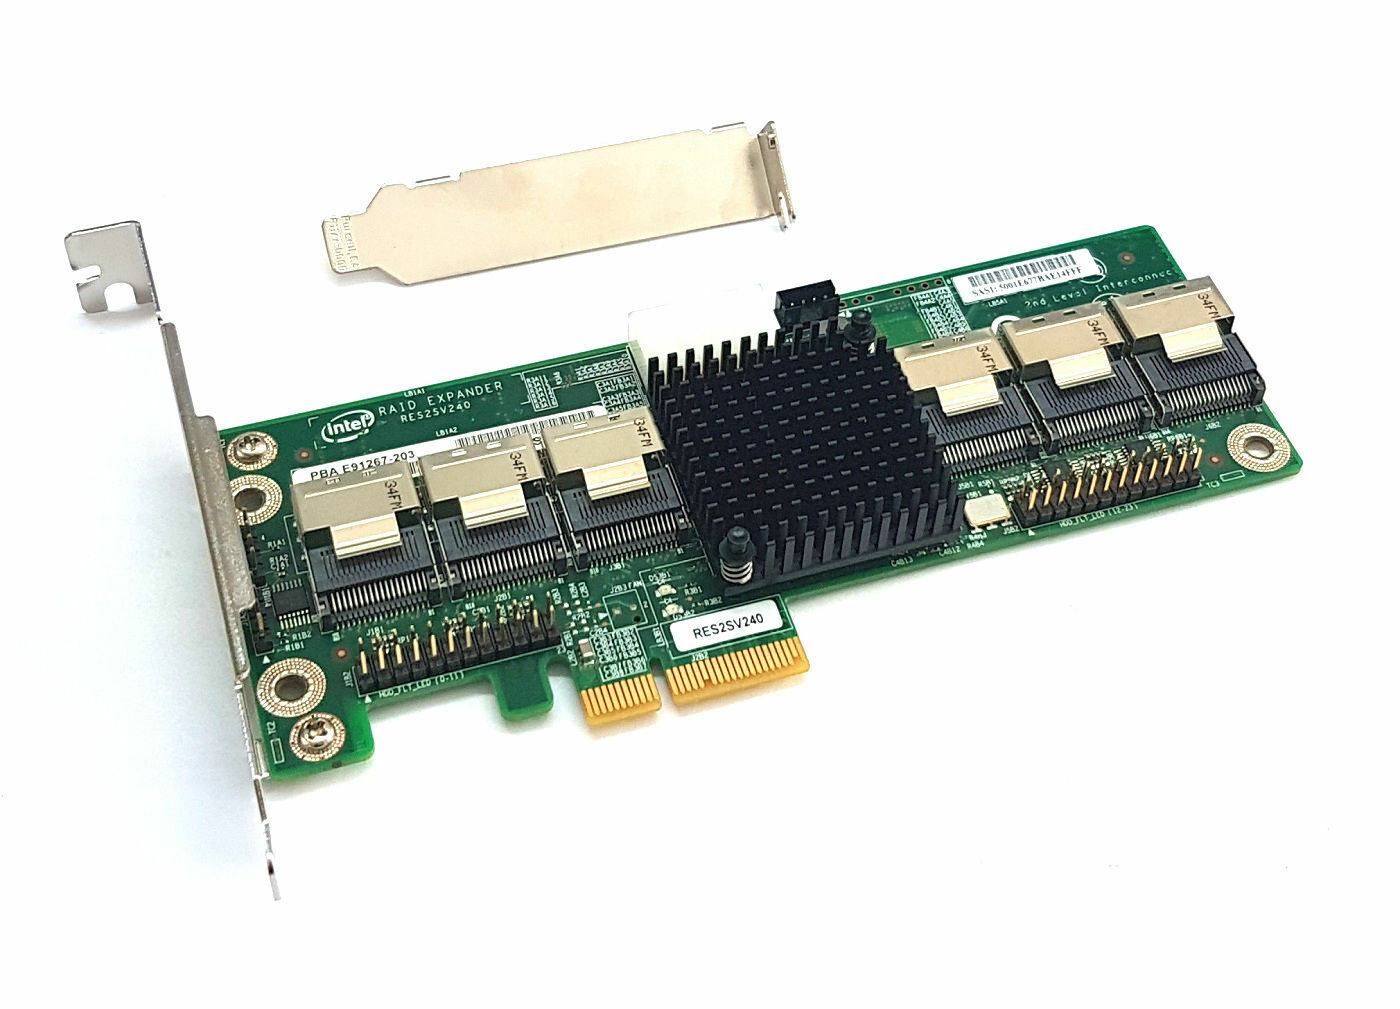
It is an Intel RES2SV240 RAID card. It is not really a RAID card in this case, but provides 24 ports, of which 4 are inbound and 20 outbound. This card is relatvely good as you can then use SFF8087 cables to SATA ports, keeping the cabling manageable, rather than individual SATA cables
So let’s do the maths
So three (3) LSI cards and 6 RES240 cards = 120 ports. We are there.
Even better the RES240 cards do not actually need to plug into the motherboard, they just need power and are fitted with an external power socket!!!

This is an amazing win so I started the build out as follows
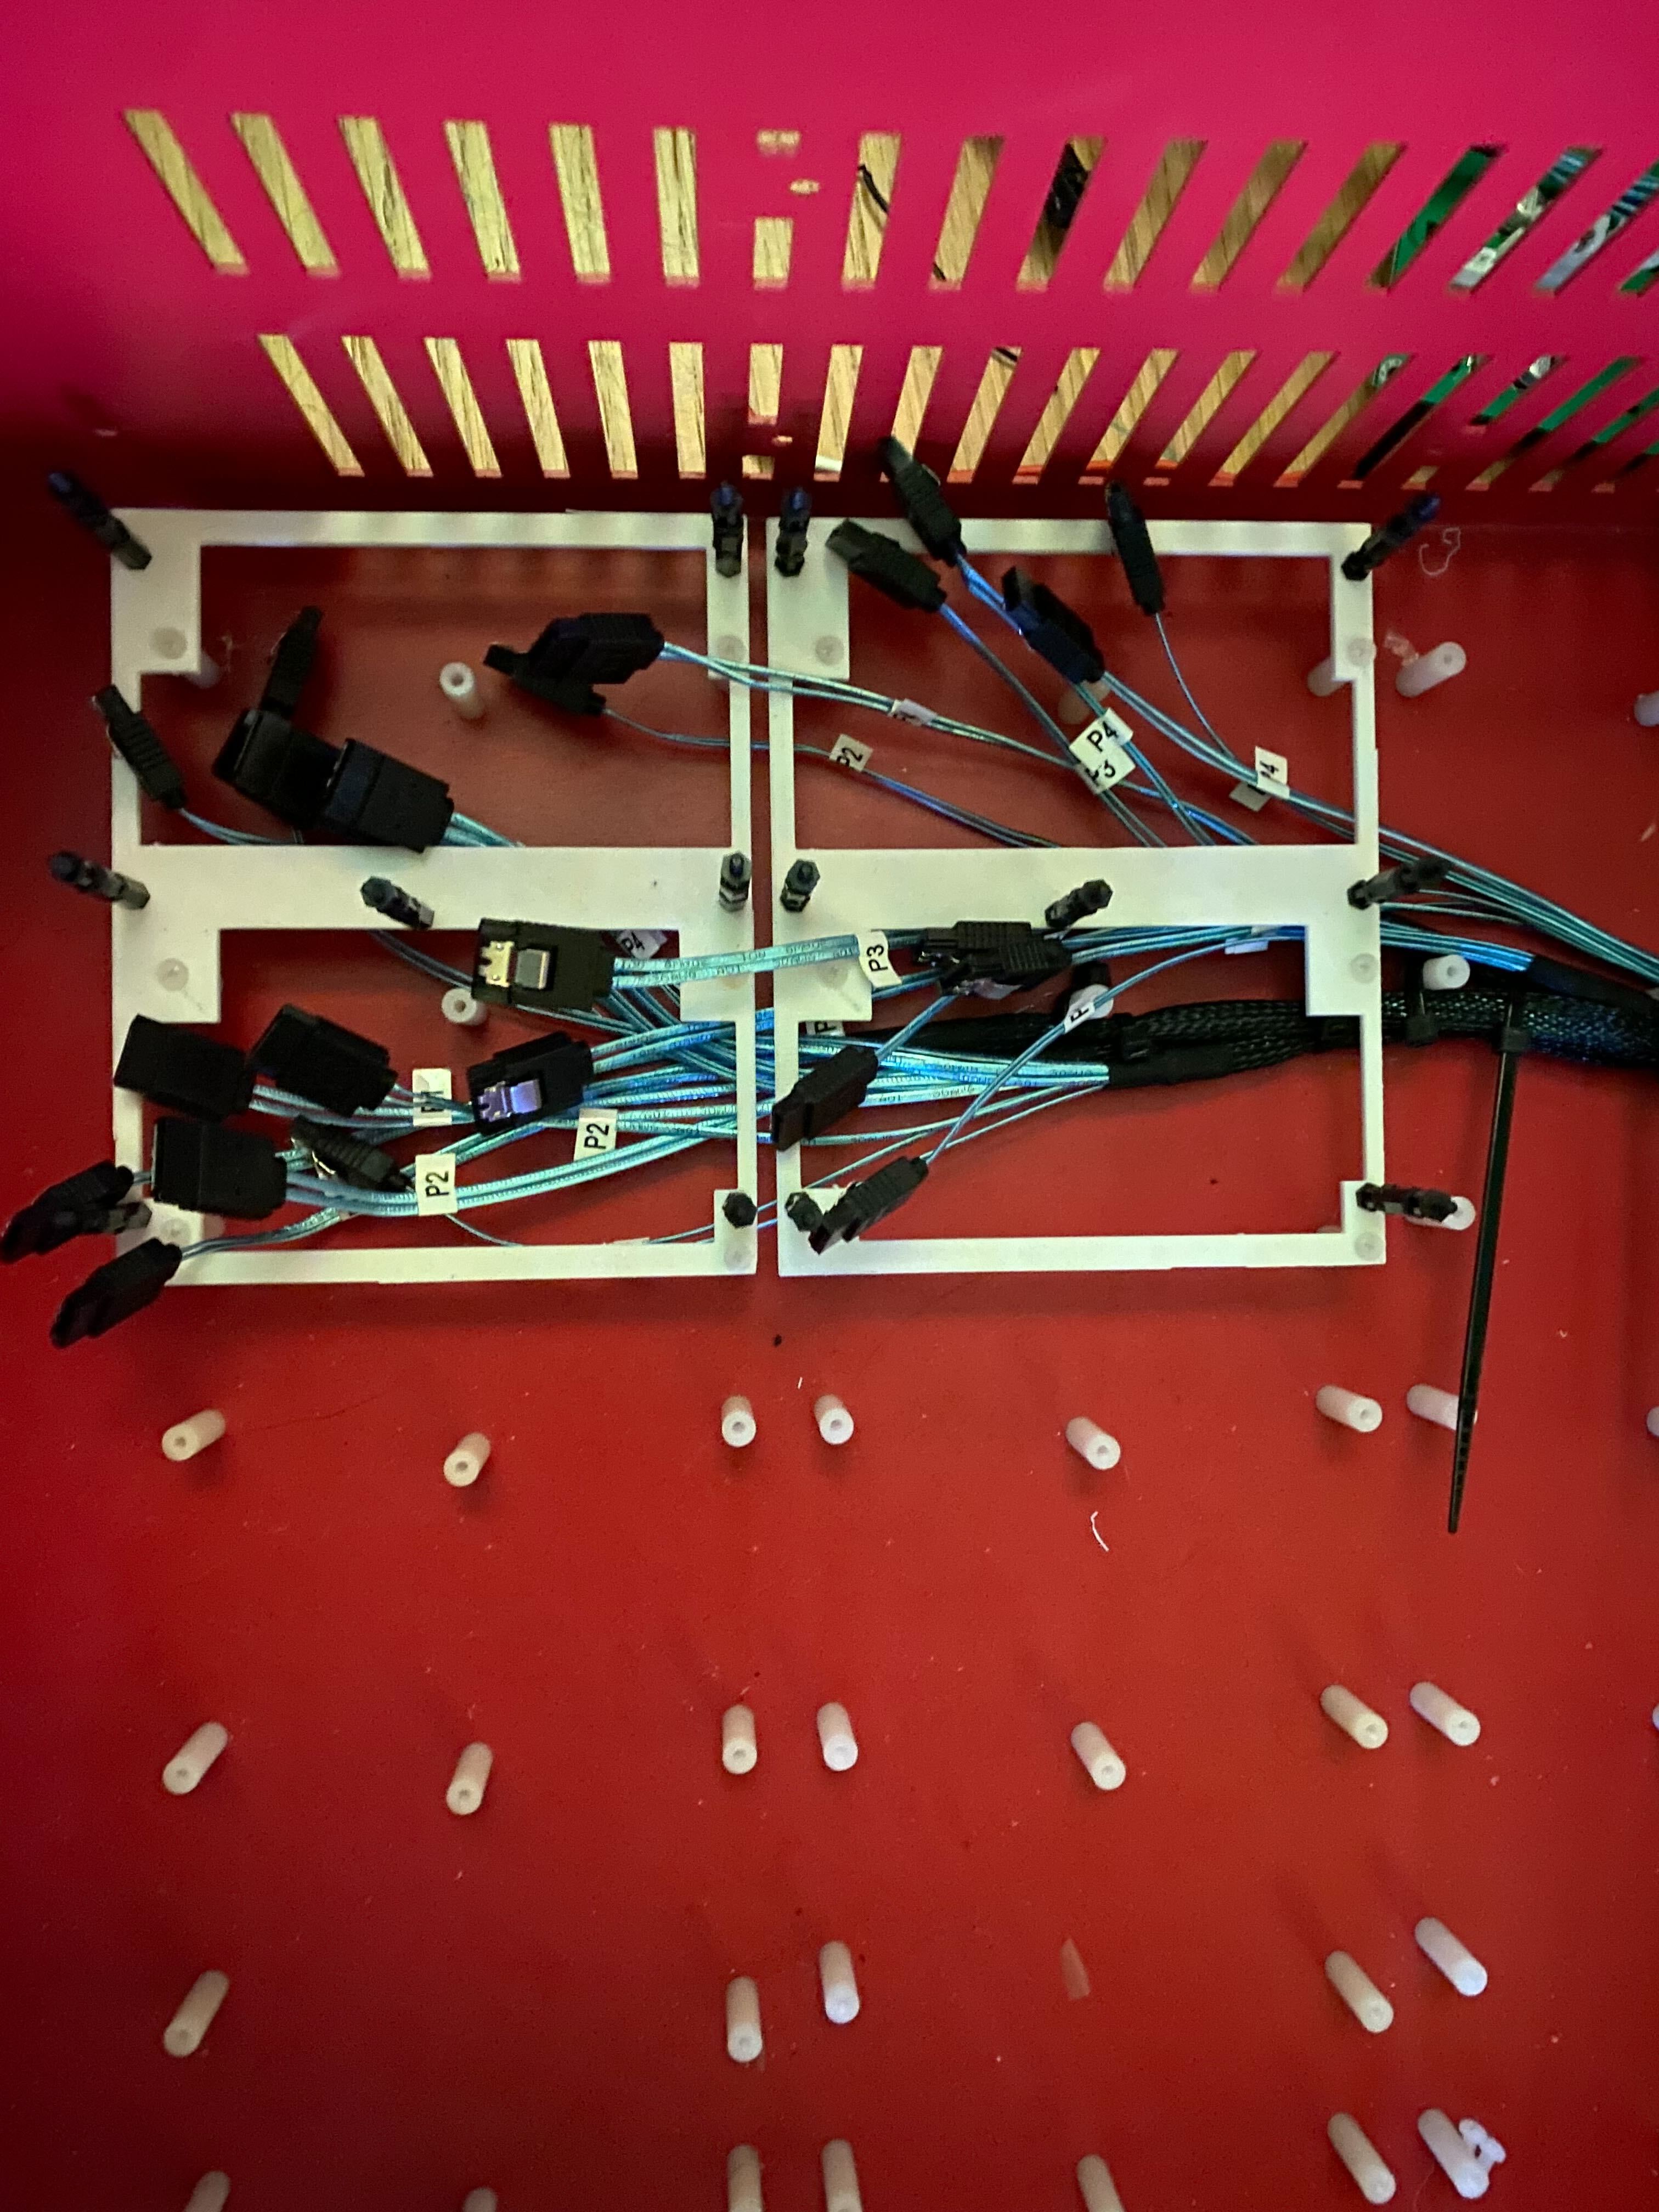
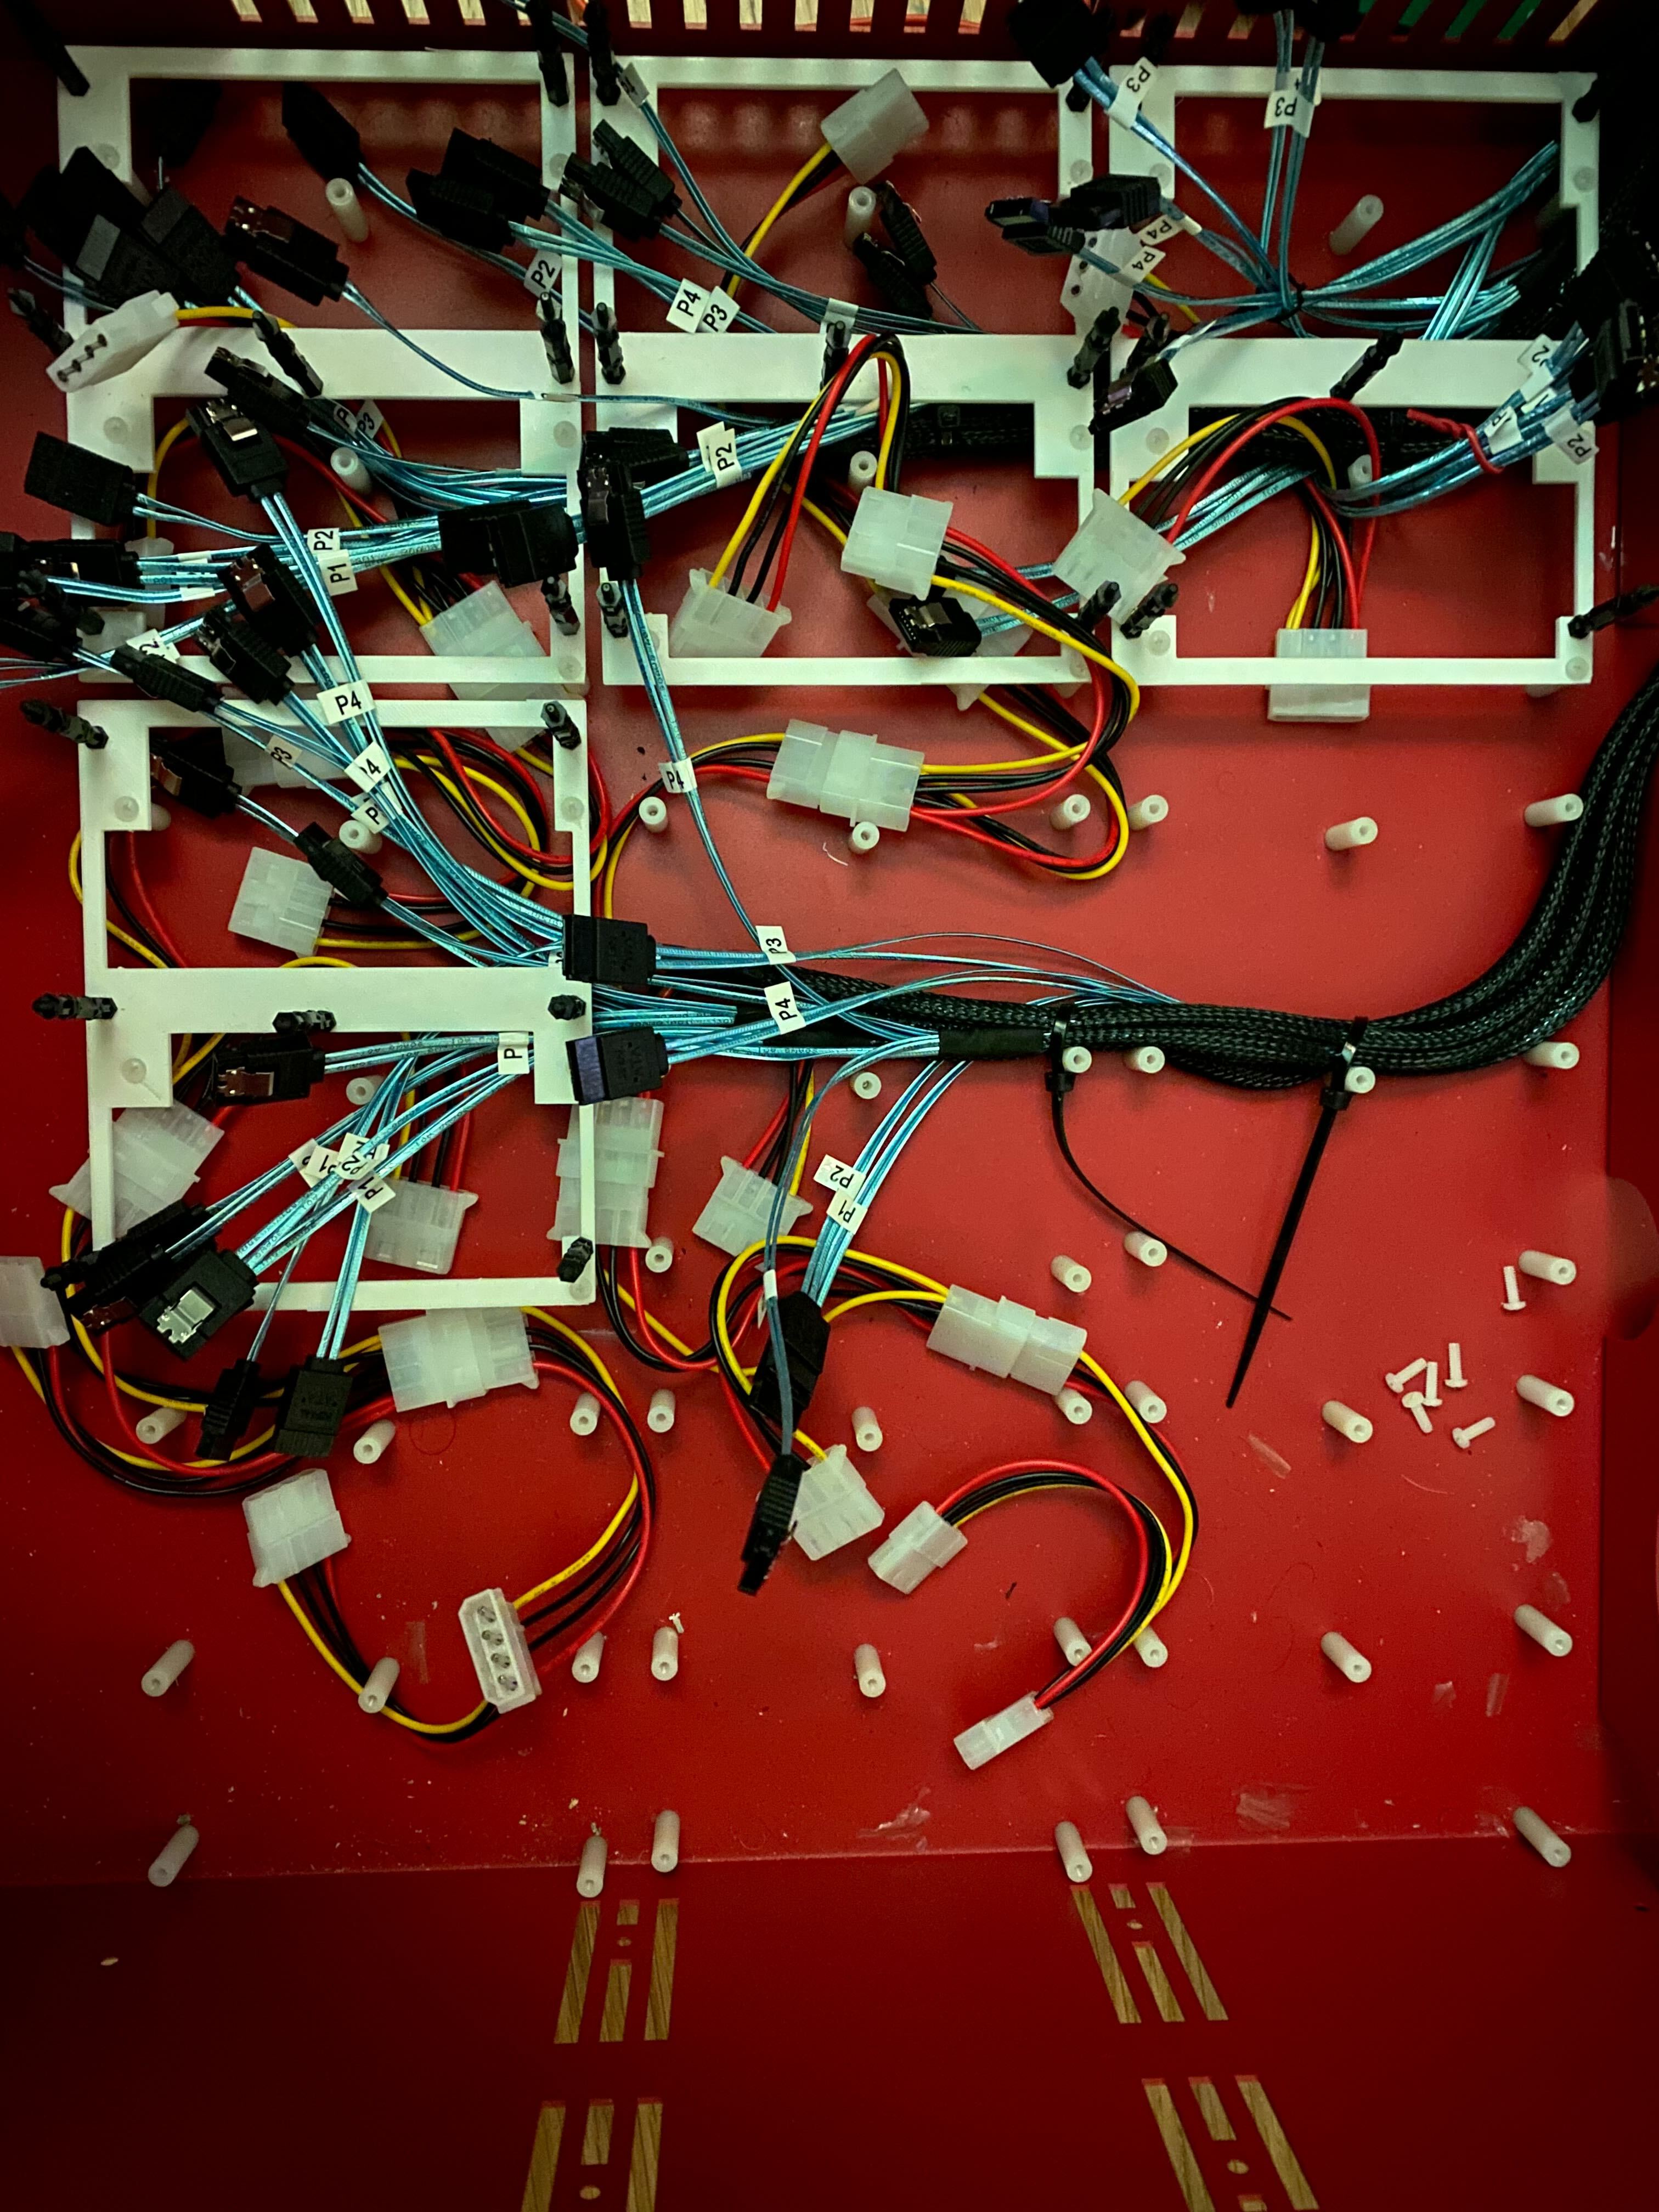
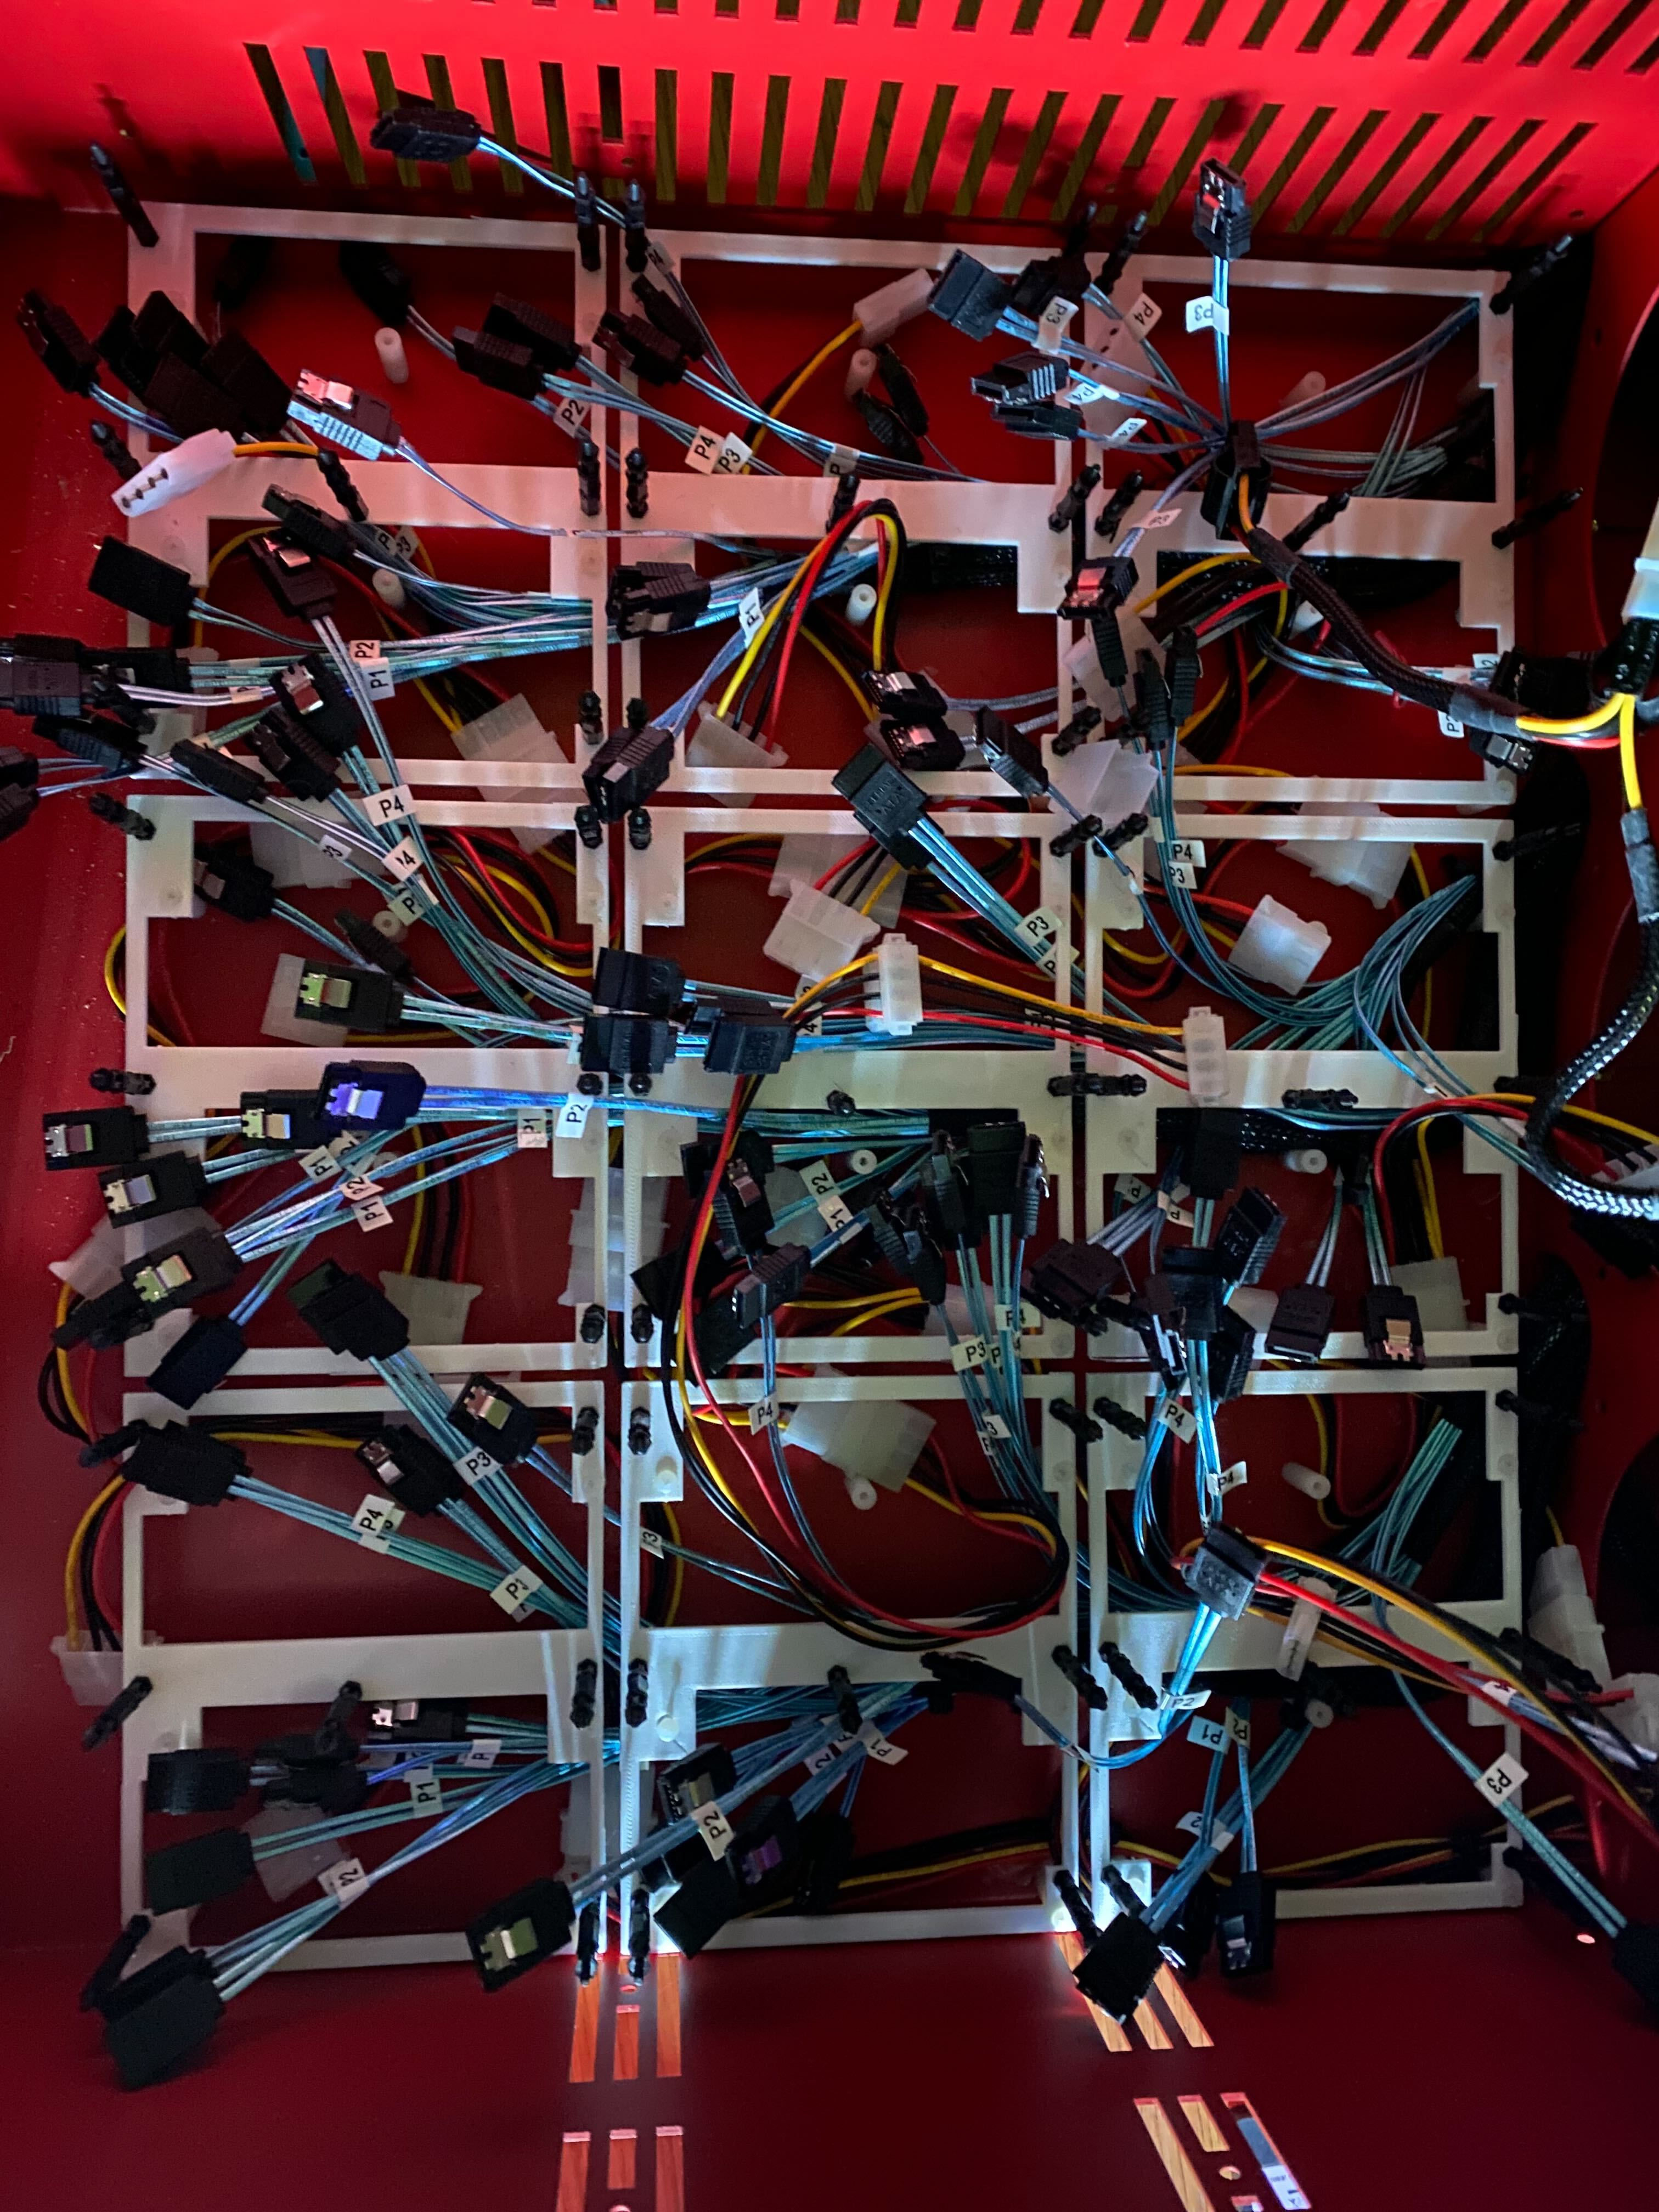
Add some drive location testing
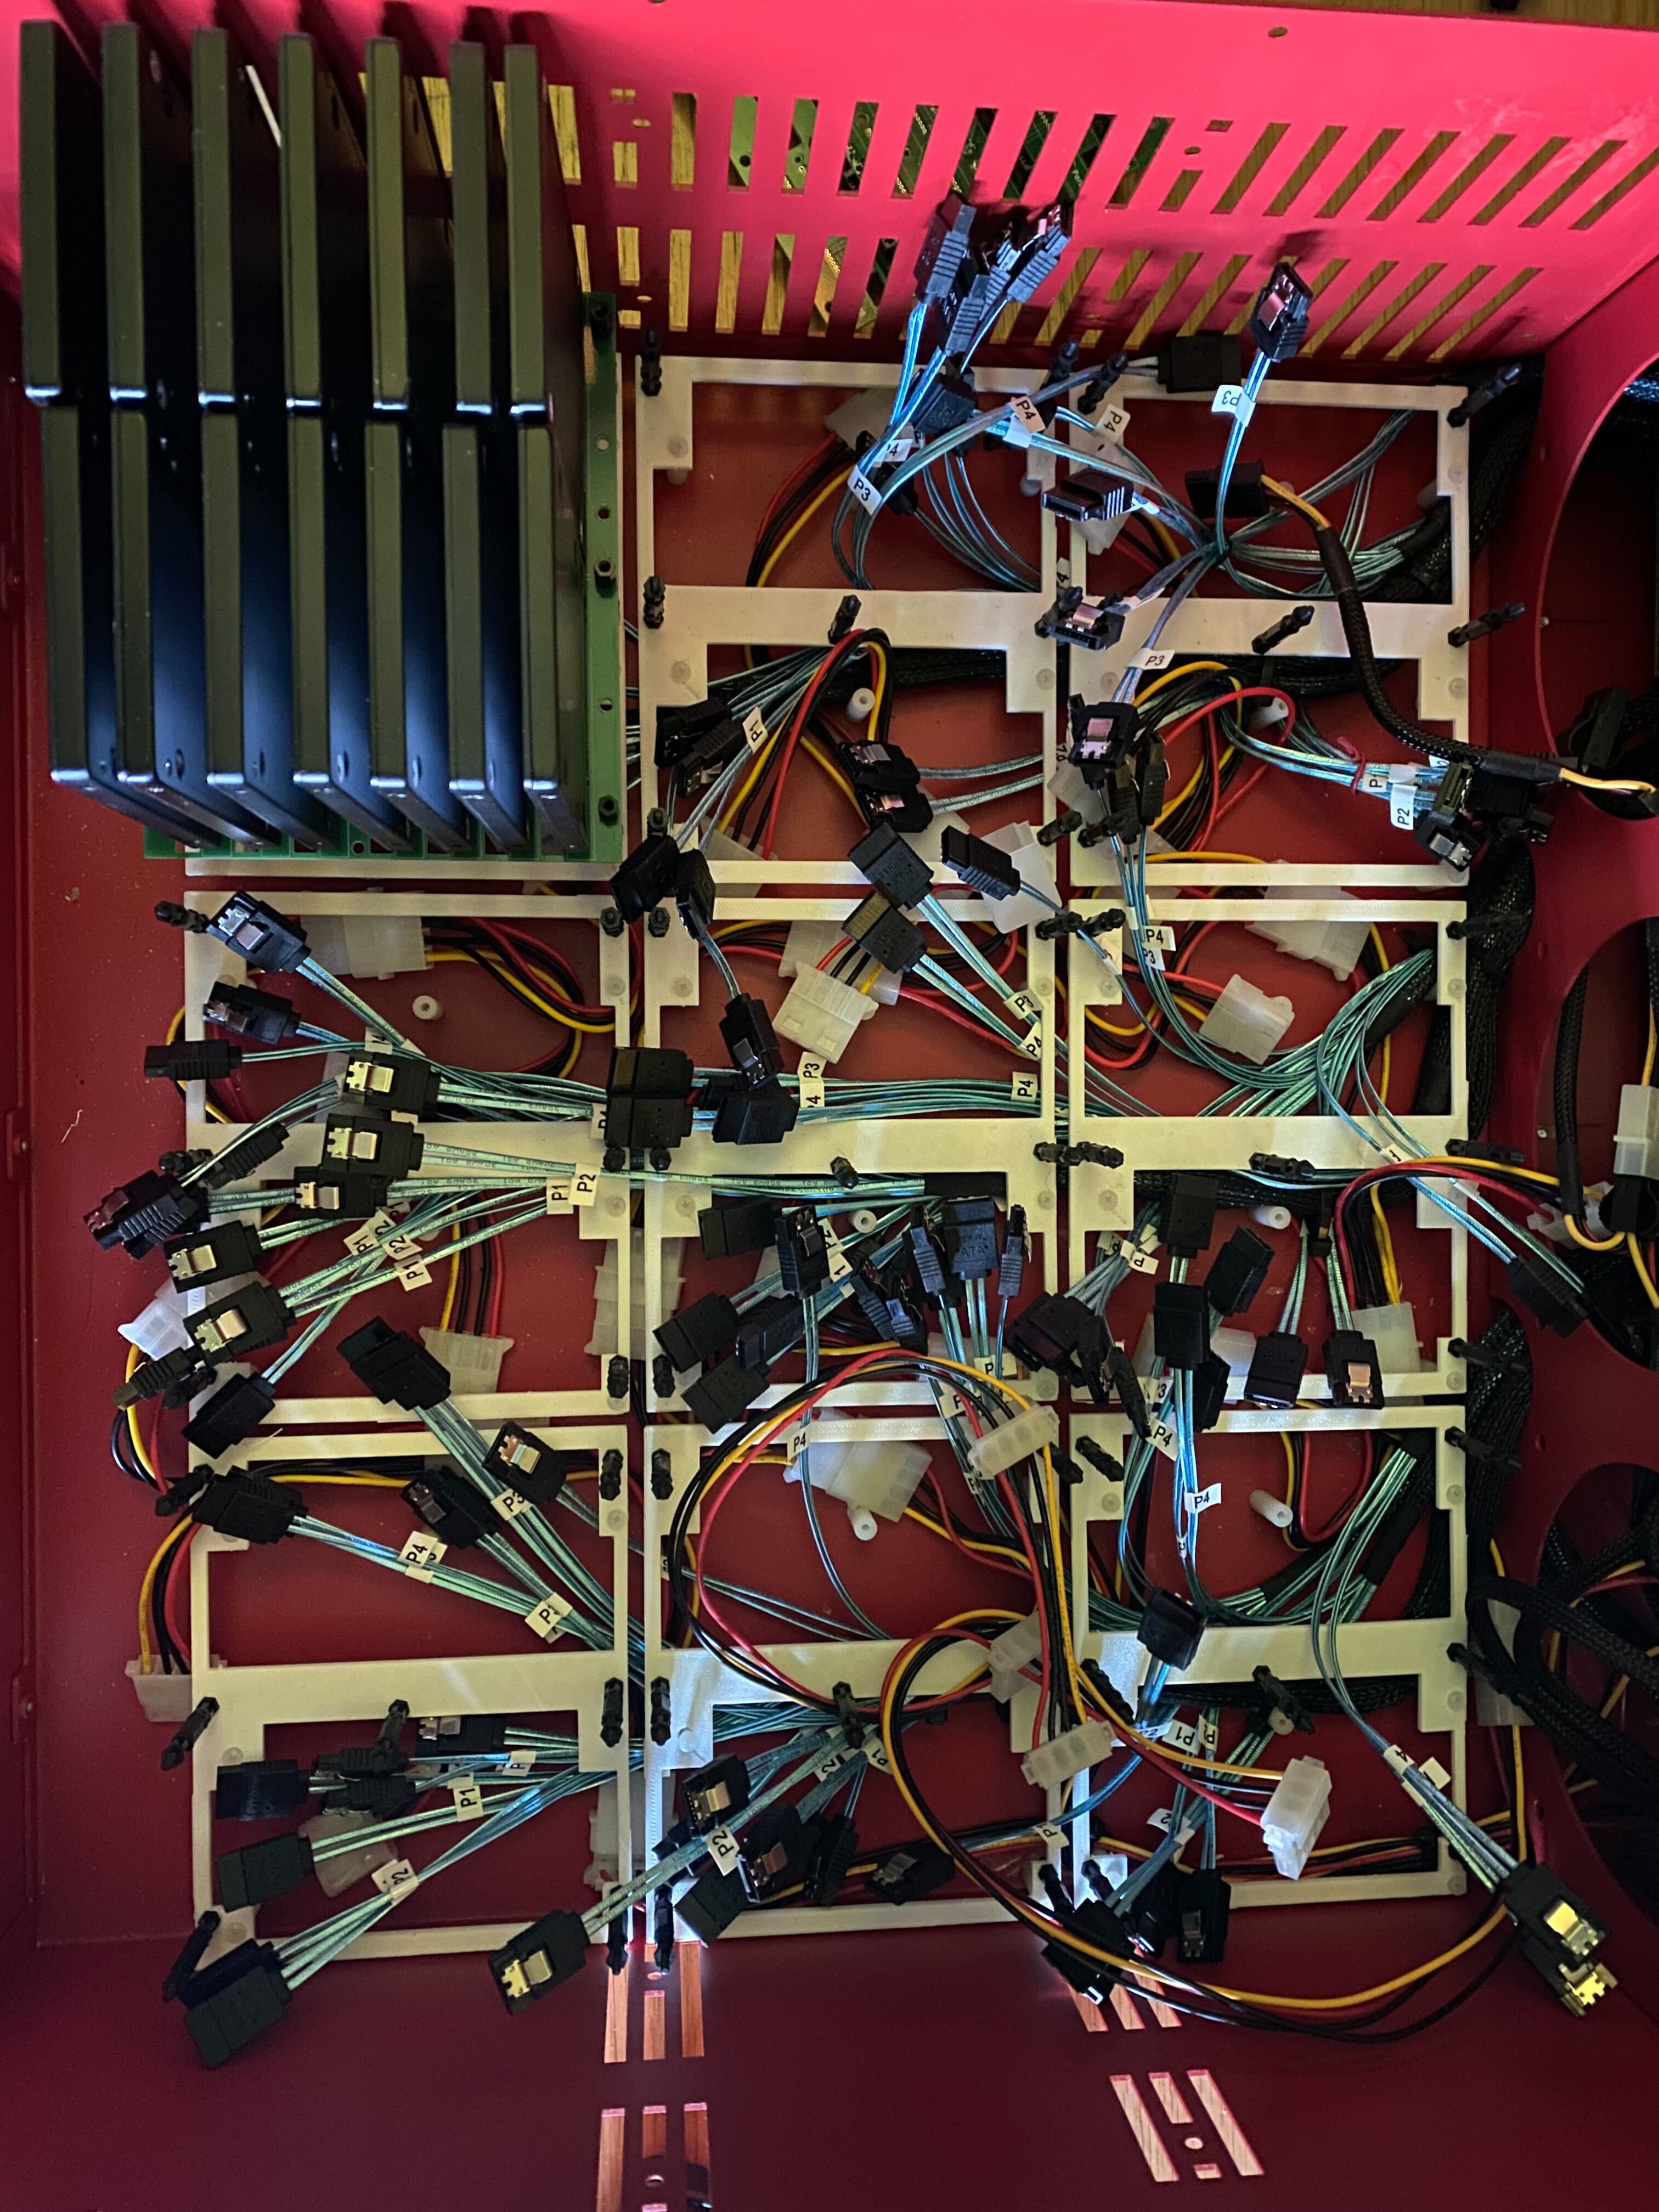
It is brilliant what could go wrong!
As it turns out … there is always something!
When I added an additional 14, the SAS controller only showed 24, but 14 + 14 = 28
It turns out SAS controller cards do not have an unlimited number ports, they can only service 24 drives per card! Some mention 16 , some 32, all the ones I bought that touted different numbers, the upper limit was always 24.
The best we can do with 3 controllers is then 72 drives ( 1 RES240 card + other physical port to 4 drives ).
Close but not yet 120 drives - ARG!!!!!
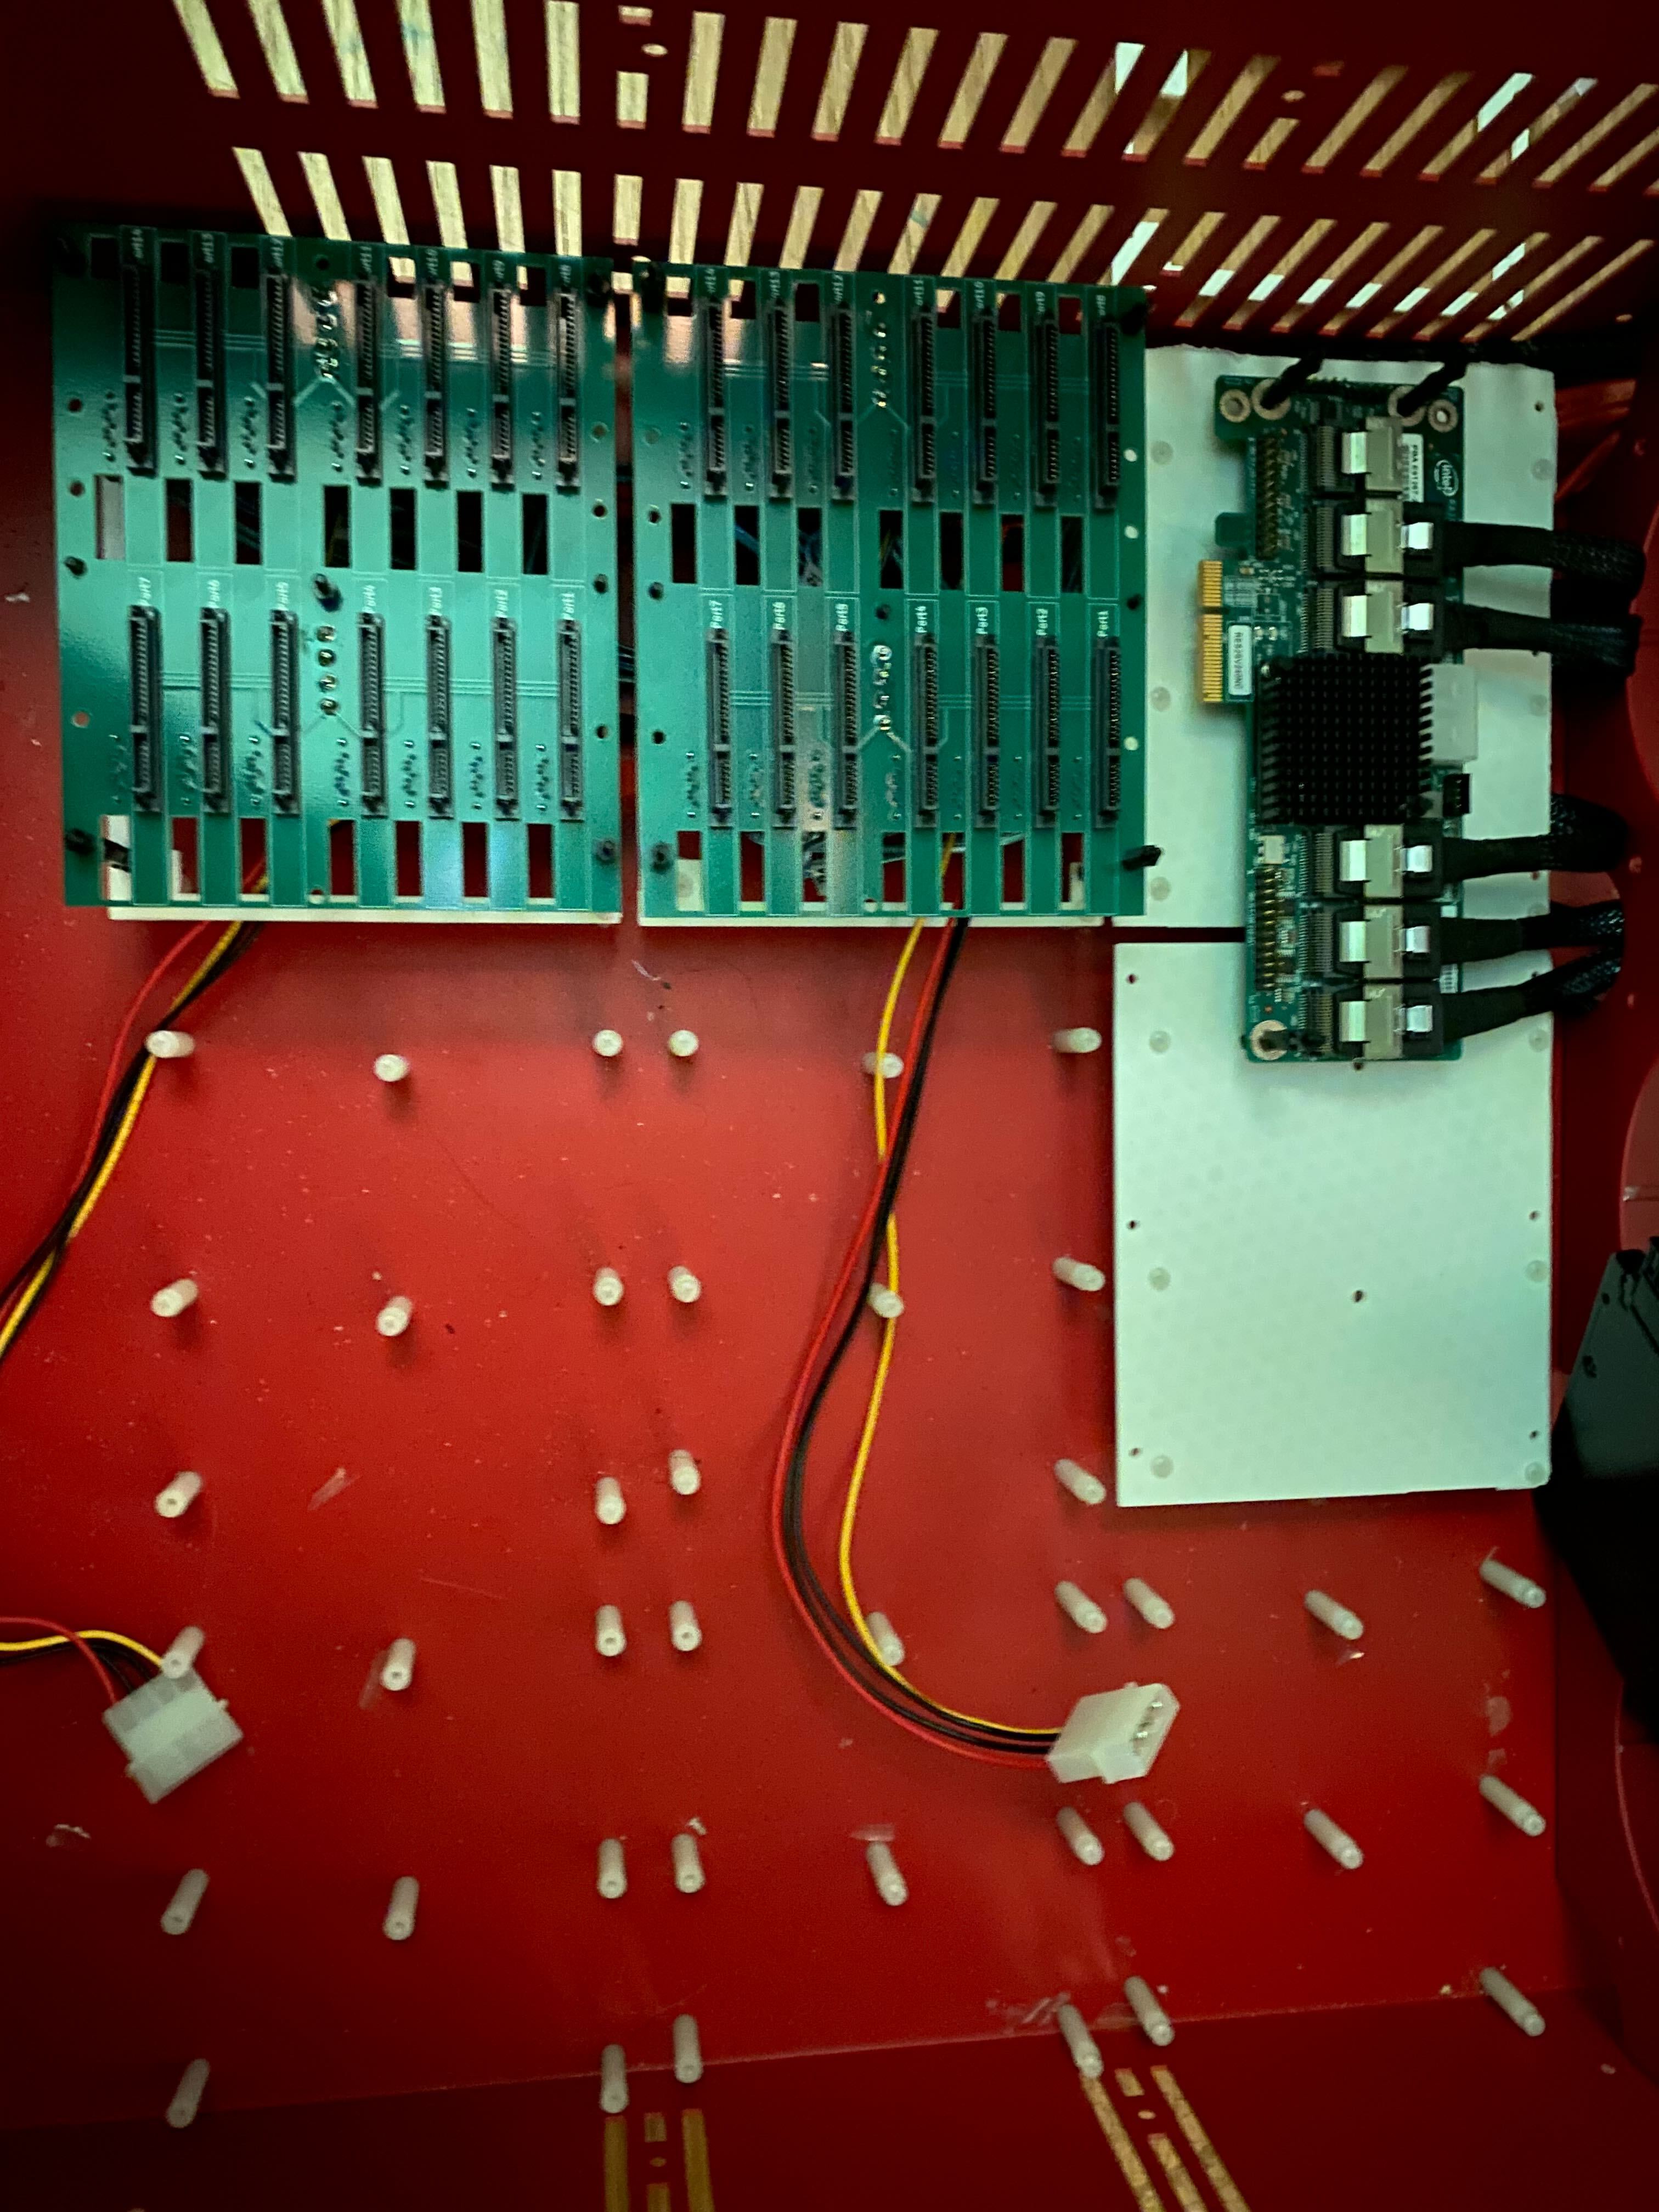
As I was cabling this, space for cabling was also becoming a premium, even with SFF cables. So now I changed tac on the design for the last time, and brough my expectations down a little.

So I did have this
I am now going to do this
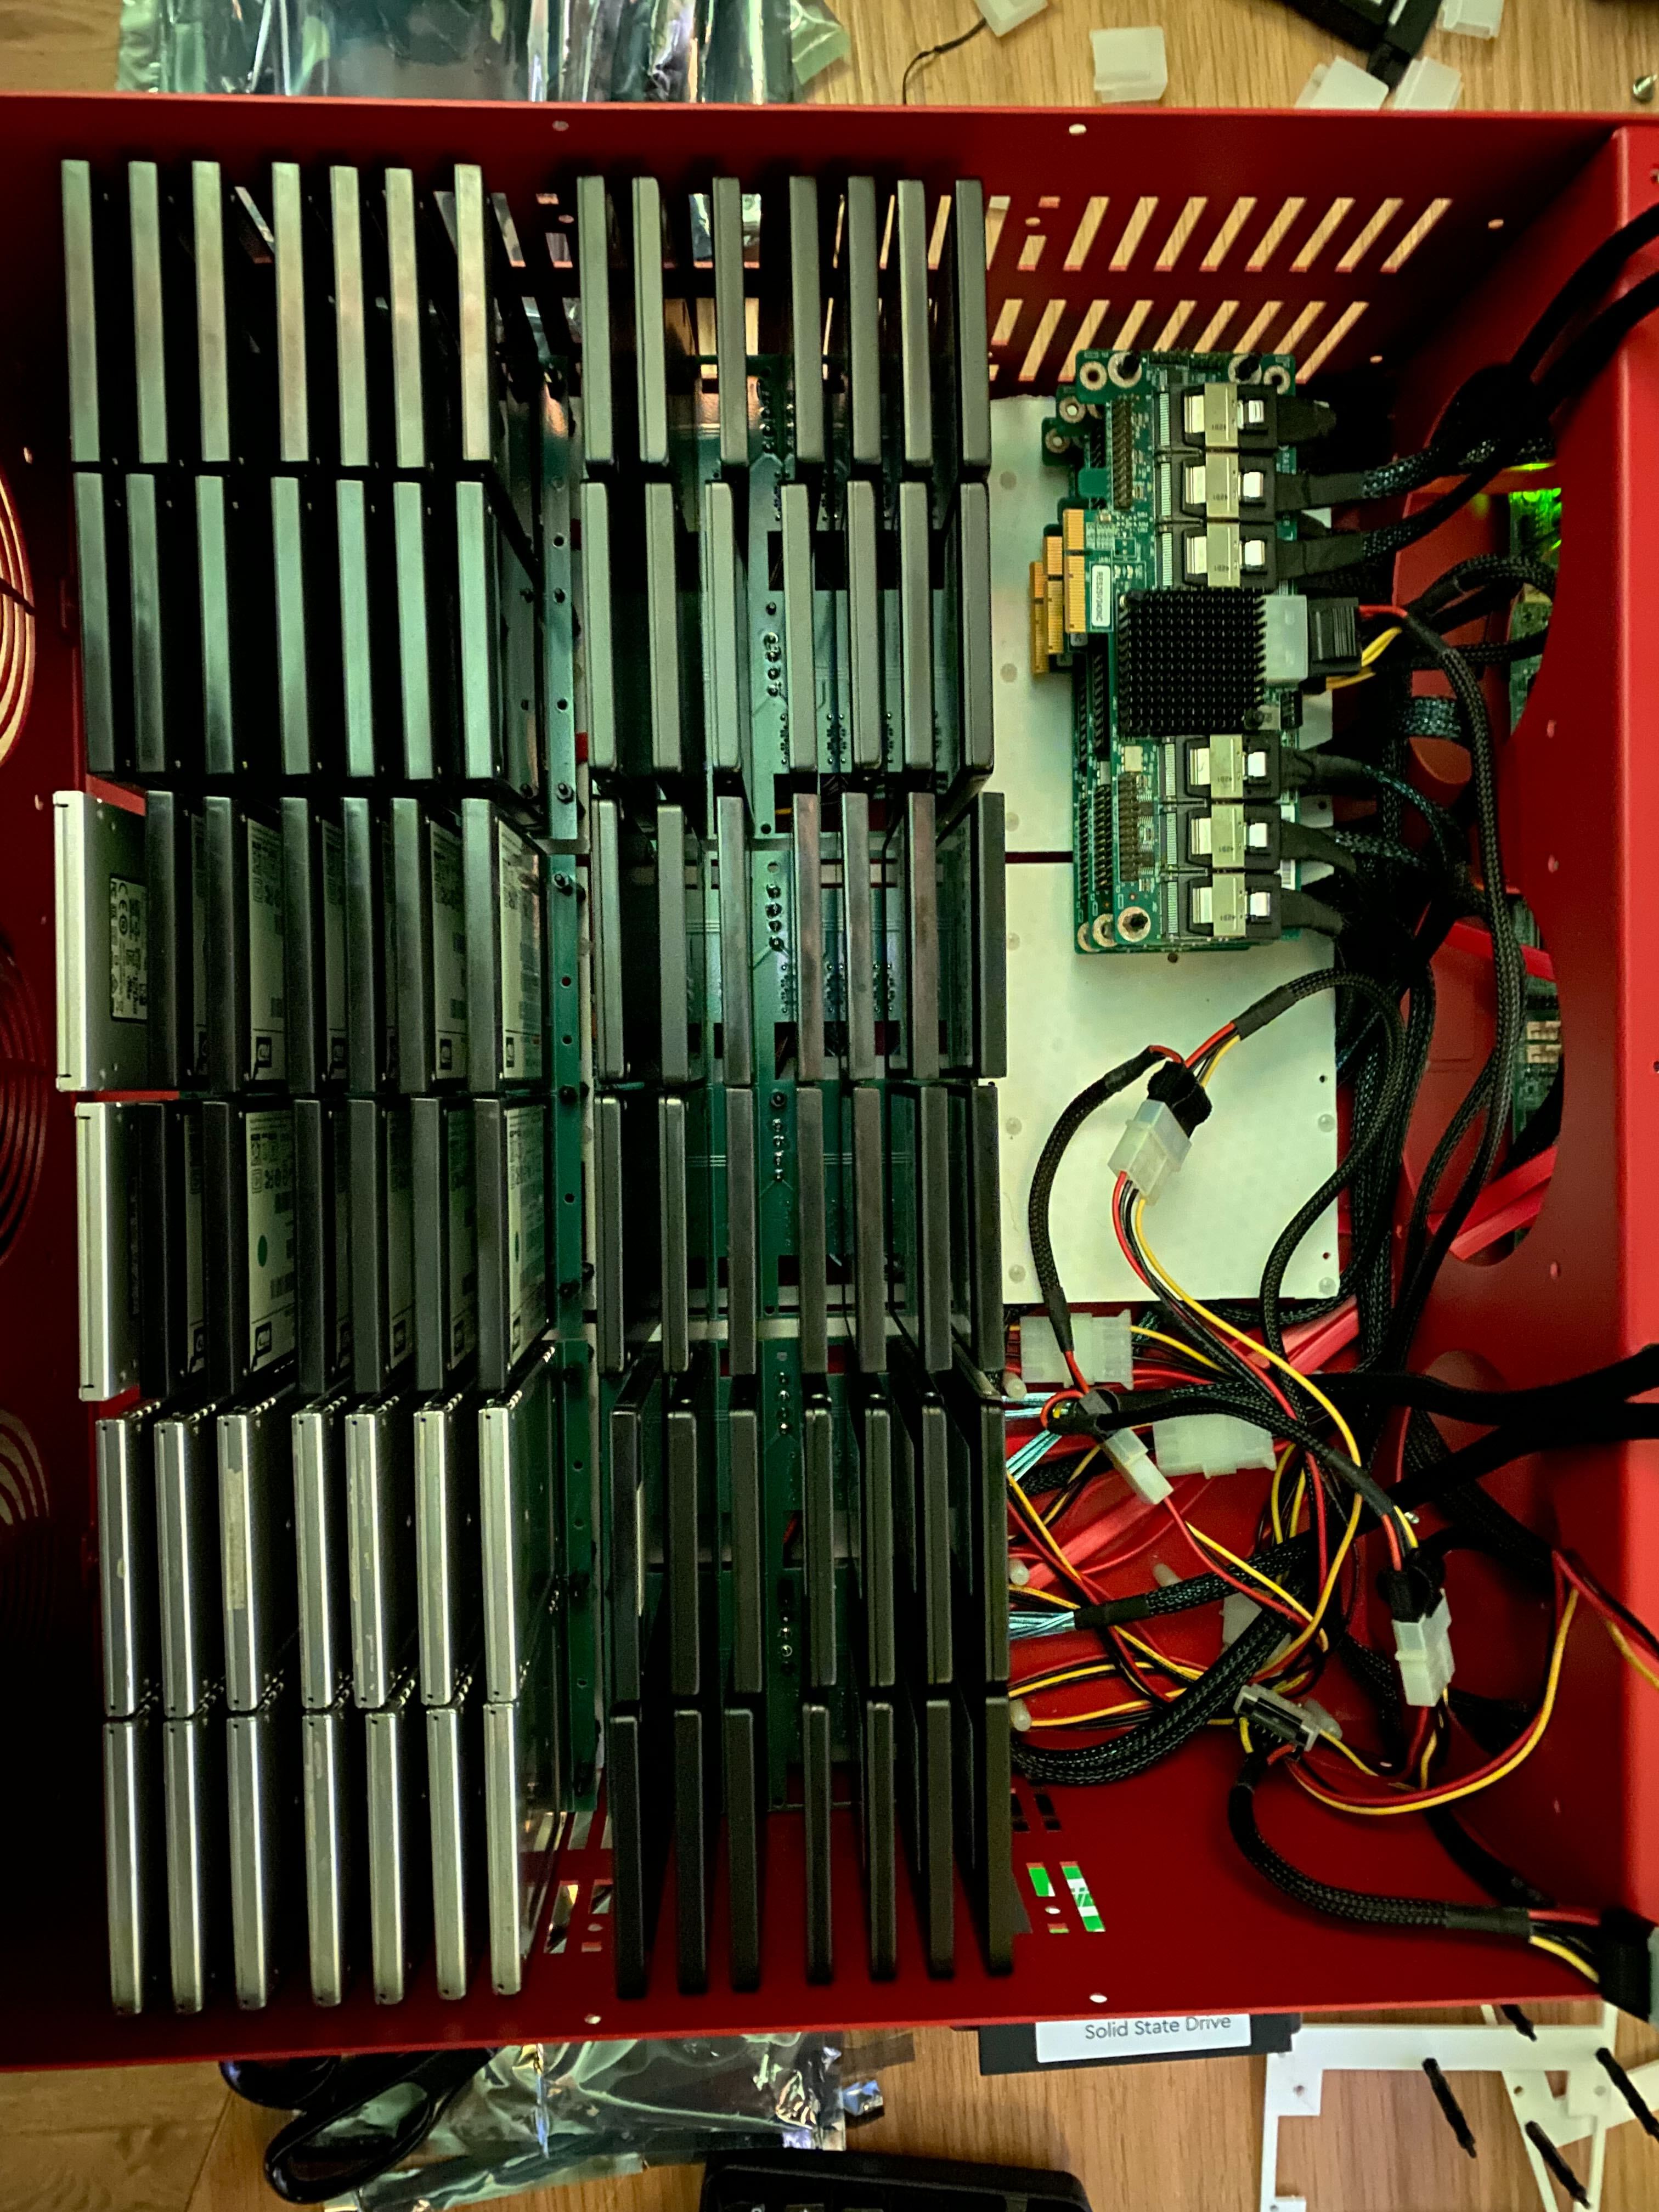
Instead of using the 9 locations for drives I am going for 6. The last 3 I can use for the RES240 cards and allow some space for cabling, air flow and as it turns out some boot space as well.
In this picture you can see 84 drives, but I did mention 72, where did the other 12 come from ? Remember the 3 original controller cards, as it turns out they fit into the remaining PCI slots.
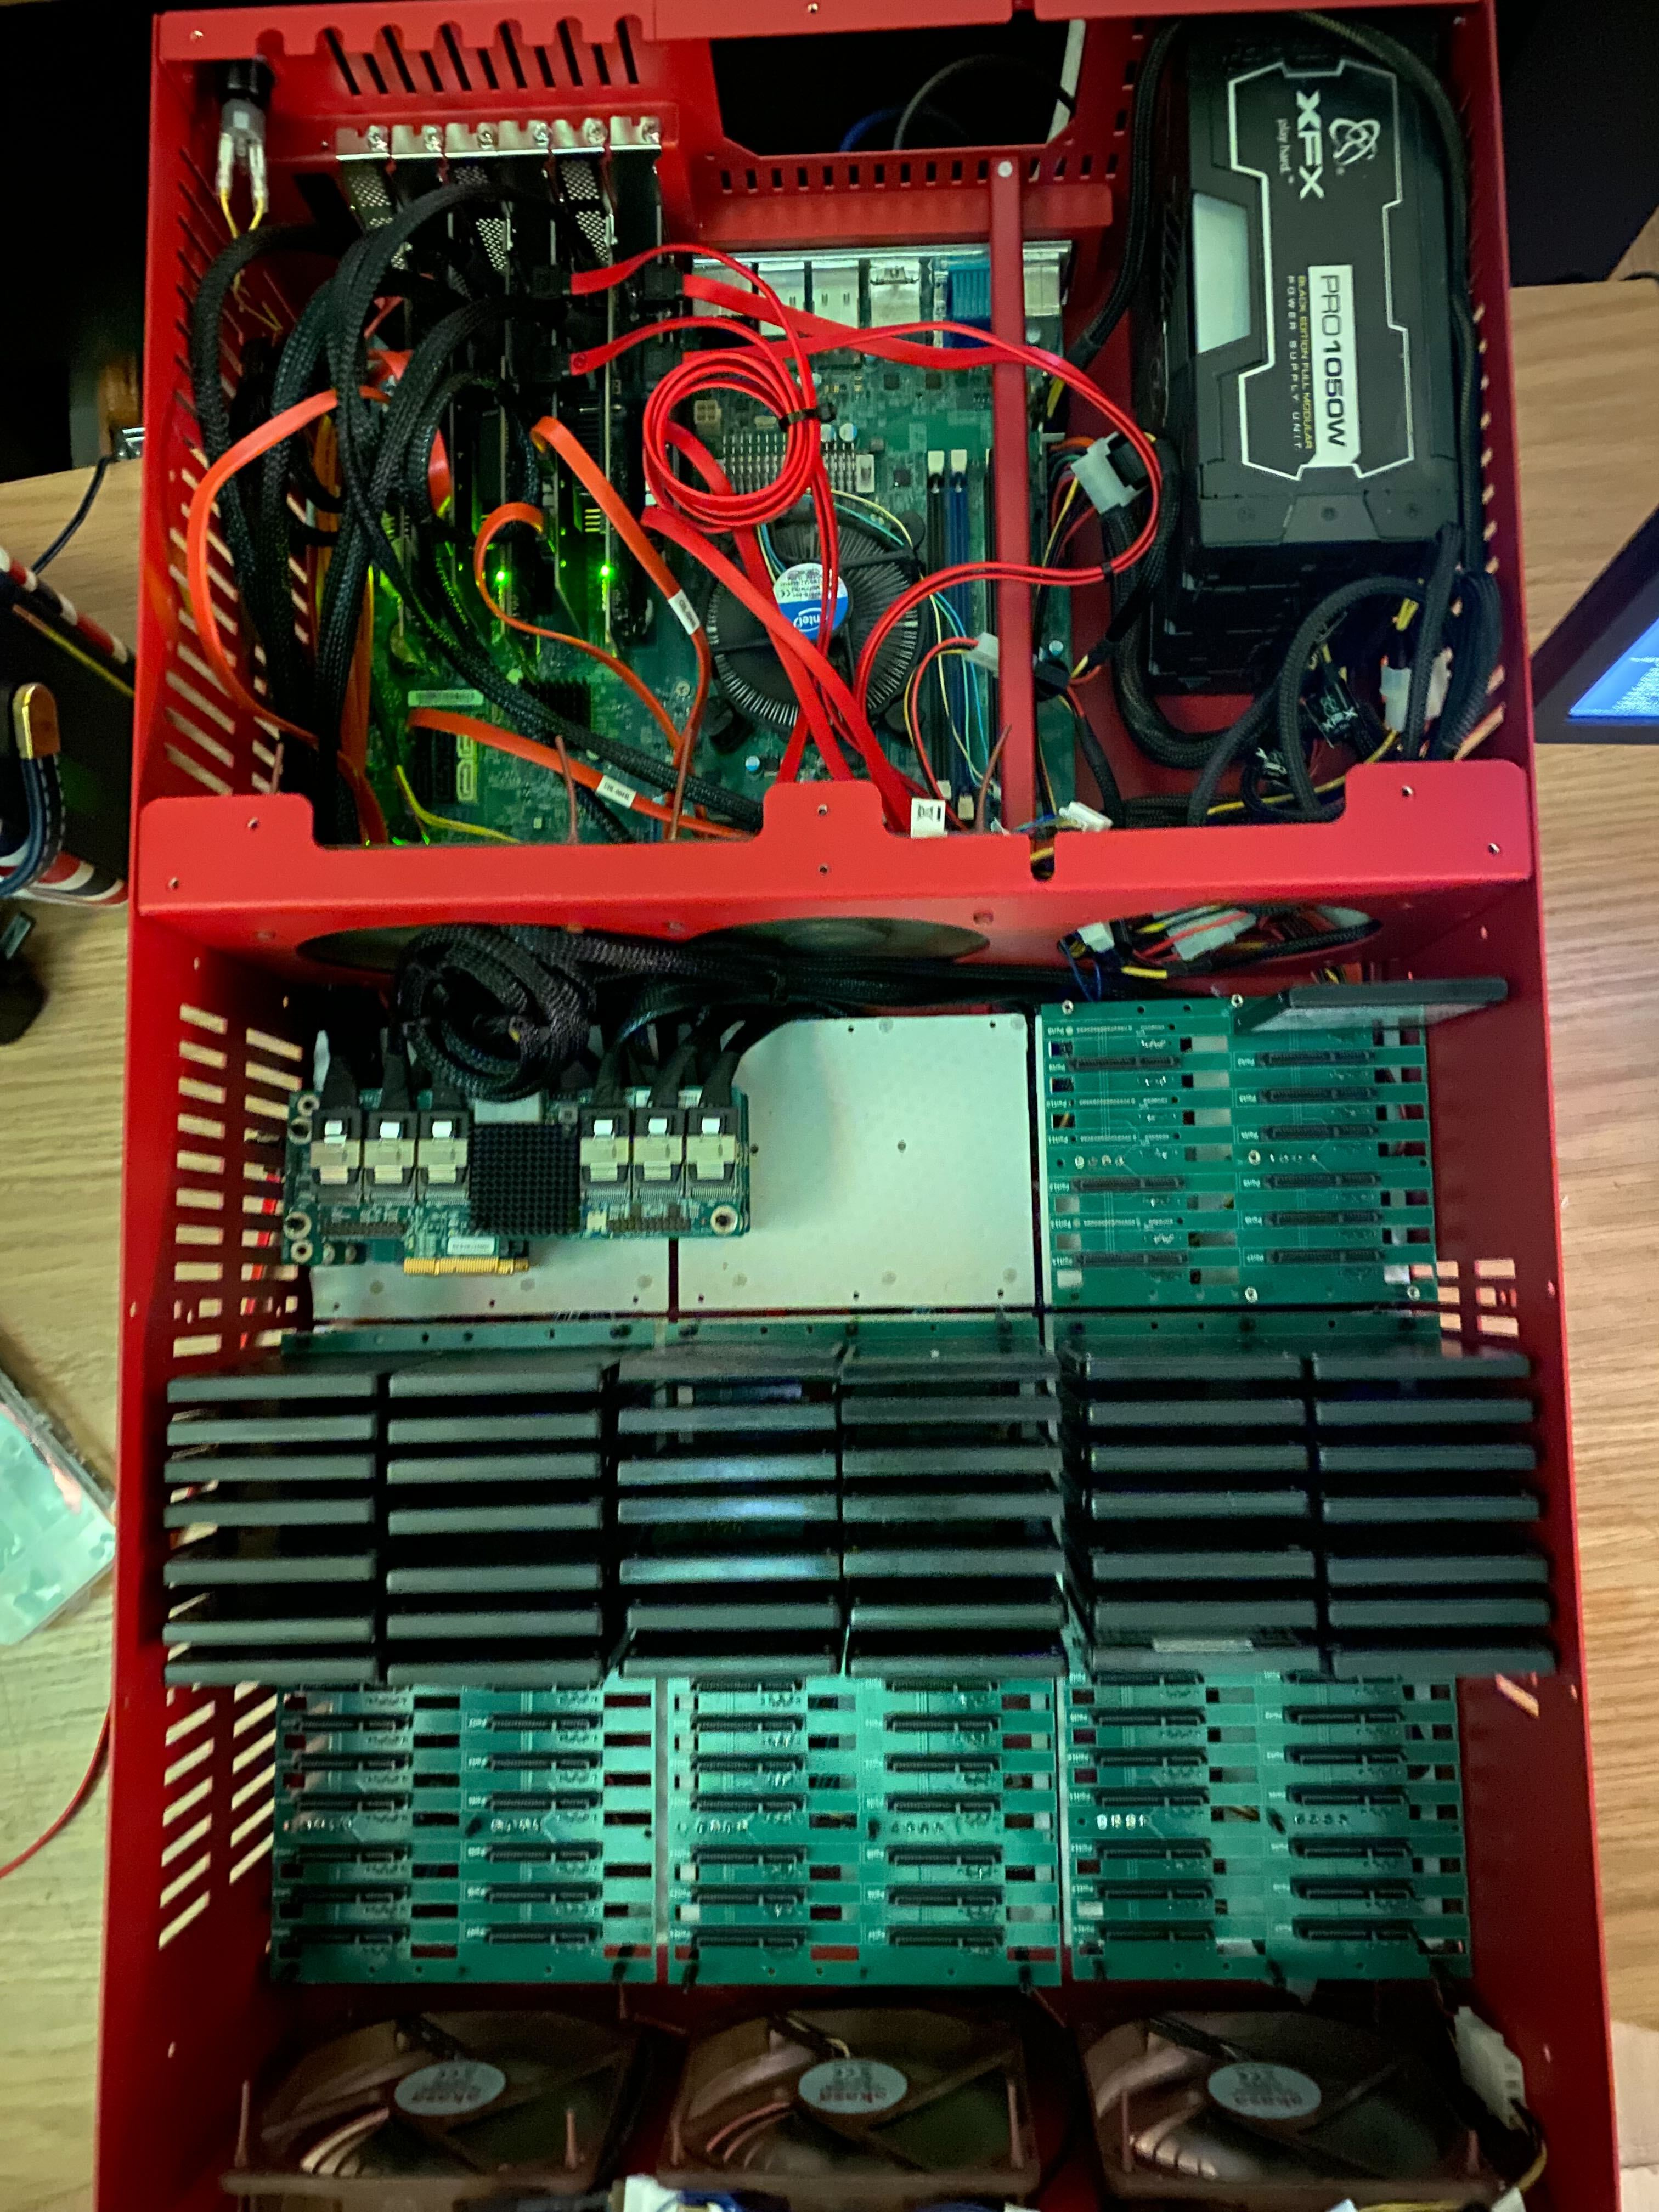
We now end up with this
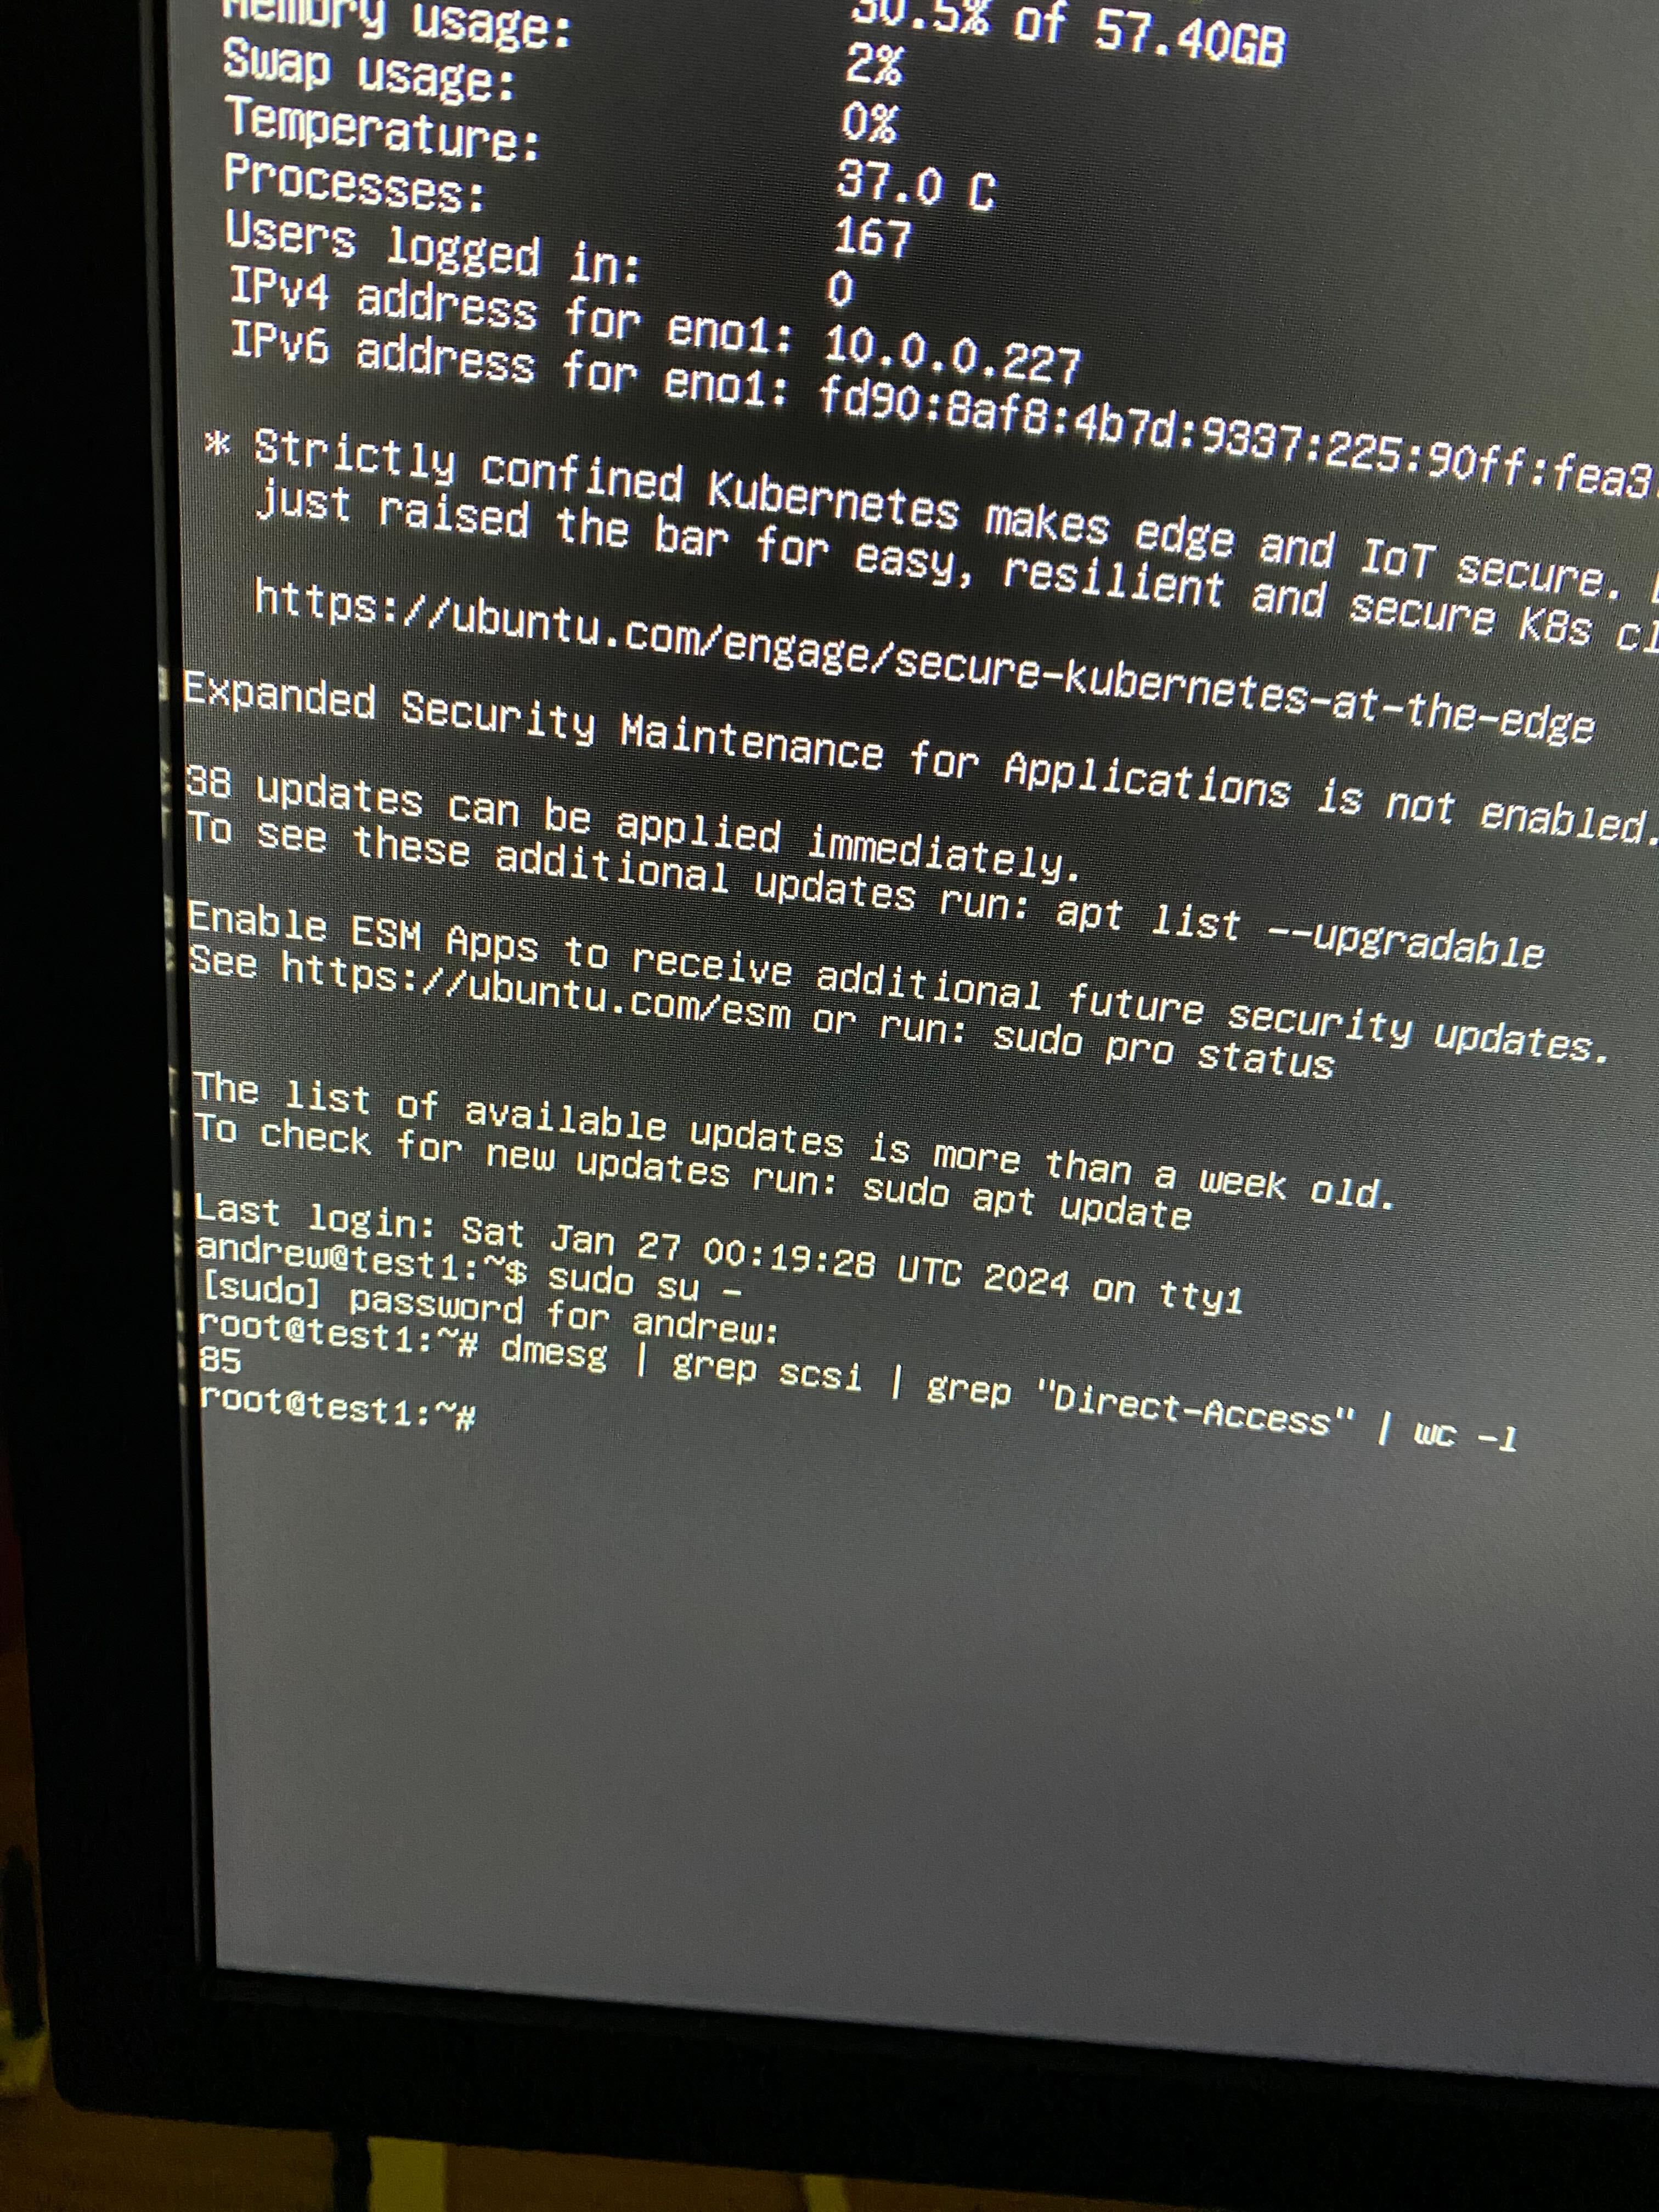
To show that it all works under Linux
It does take about 4 minutes to boot though!
- it boots - success
- you have loads of disks
- it is low power
- quite quiet
- how to use !!
Do not RAID 84 disks together, for the main reason, it you lose more than about 3 you lose the lot!
You could create 4 x 21 raid sets, some redundancy I am not going into the pros and cons of how you configure RAID
My testing
I did get 84 SSDs from Ebay, 120Gig, reasonably cheap at ~5ukp each - of which many did not work or last very long.
I raided 21 disks, using the following structure
There are 3 controller cards with 24 disks ( 1 x RES240 with 20 and 4 drives direct ) There are 3 controller cards with 4 disks each
Take 6 disks from the three controller cards with 24 disks and one each from the others = 21
Linux will tell you which disk is attached to which controller!!
I paritioned the drives and set a UUID on them, some already had one so I just reused that.
———– NEED ADD LINUX COMMANDS FOR THAT HERE THE OUTPUT IS MASSIVE, so PERHAPS A LINK to ANOTHER PAGE —————–
I set up a RAID5 set with the following command
		mdadm --create /dev/md1 --level=5 --raid-devices=21 \
		/dev/disk/by-partuuid/1ea8d03a-01 \
		/dev/disk/by-partuuid/4860020c-71cc-3042-95fc-5410011ce0b4 \
		/dev/disk/by-partuuid/104eb35f-b56a-cd44-a7c7-08c4a8d14b88 \
		/dev/disk/by-partuuid/dce51c65-31dd-304e-8181-d5f6a114a5d0 \
		/dev/disk/by-partuuid/e0598cbf-e288-c84c-b9c2-3bbcd375cc5d \
		/dev/disk/by-partuuid/63bfd06e-01 \
		/dev/disk/by-partuuid/318f464f-01 \
		/dev/disk/by-partuuid/ed30e572-01 \
		/dev/disk/by-partuuid/52dd6fef-01 \
		/dev/disk/by-partuuid/9902088f-7465-784b-8679-66fd69587999 \
		/dev/disk/by-partuuid/84aca13e-01 \
		/dev/disk/by-partuuid/ed61aa88-01 \
		/dev/disk/by-partuuid/71c2c981-01 \
		/dev/disk/by-partuuid/b1d7726c-01 \
		/dev/disk/by-partuuid/9ef9ee1c-01 \
		/dev/disk/by-partuuid/a0f92d92-01 \
		/dev/disk/by-partuuid/b4d2d687-0e82-584c-93c8-59fde62012a0 \
		/dev/disk/by-partuuid/eb95d63d-01 \
		/dev/disk/by-partuuid/465e0077-01 \
		/dev/disk/by-partuuid/abbcfdad-01 \
		/dev/disk/by-partuuid/d0131bfc-01
Then using this command
mdadm --detail /dev/md1
I checked the status until sync was completed
root@test1:~# mdadm --detail /dev/md1
/dev/md1:
           Version : 1.2
     Creation Time : Sat Jan 27 23:25:15 2024
        Raid Level : raid5
        Array Size : 2343055360 (2.18 TiB 2.40 TB)
     Used Dev Size : 117152768 (111.73 GiB 119.96 GB)
      Raid Devices : 21
     Total Devices : 21
       Persistence : Superblock is persistent

     Intent Bitmap : Internal

       Update Time : Sat Jan 27 23:26:00 2024
             State : clean, degraded, recovering
Finally, 23 minutes later - which is pretty fast.
/dev/md1:
           Version : 1.2
     Creation Time : Sat Jan 27 23:25:15 2024
        Raid Level : raid5
        Array Size : 2343055360 (2.18 TiB 2.40 TB)
     Used Dev Size : 117152768 (111.73 GiB 119.96 GB)
      Raid Devices : 21
     Total Devices : 21
       Persistence : Superblock is persistent

     Intent Bitmap : Internal

       Update Time : Sat Jan 27 23:49:04 2024
             State : clean
    Active Devices : 21
   Working Devices : 21
    Failed Devices : 0
     Spare Devices : 0

            Layout : left-symmetric
        Chunk Size : 512K

Consistency Policy : bitmap

              Name : test1:1  (local to host test1)
              UUID : 77a16172:a32f8d3b:a54cbaef:ae6062ac
            Events : 284

    Number   Major   Minor   RaidDevice State
       0      65      129        0      active sync   /dev/sdy1
       1      65      161        1      active sync   /dev/sdaa1
       2      65      177        2      active sync   /dev/sdab1
       3      65      193        3      active sync   /dev/sdac1
       4      65      209        4      active sync   /dev/sdad1
       5      65      225        5      active sync   /dev/sdae1
       6      67       17        6      active sync   /dev/sdax1
       7      67       33        7      active sync   /dev/sday1
       8      67       49        8      active sync   /dev/sdaz1
       9      67       65        9      active sync   /dev/sdba1
      10      67       81       10      active sync   /dev/sdbb1
      11      67       97       11      active sync   /dev/sdbc1
      12       8        1       12      active sync   /dev/sda1
      13       8       17       13      active sync   /dev/sdb1
      14       8       33       14      active sync   /dev/sdc1
      15       8       49       15      active sync   /dev/sdd1
      16       8       65       16      active sync   /dev/sde1
      17       8       81       17      active sync   /dev/sdf1
      18      68      145       18      active sync   /dev/sdbv1
      19      68      209       19      active sync   /dev/sdbz1
      21      69       17       20      active sync   /dev/sdcd1
I started with some simple tests, linear write, 20Gig write.
21 disk array write speed
root@test1:/mnt/test1# time dd if=/dev/zero of=test1.img bs=1G count=20
20+0 records in
20+0 records out
21474836480 bytes (21 GB, 20 GiB) copied, 39.6505 s, 542 MB/s

real    0m39.700s
user    0m0.000s
sys     0m25.679s
It is doing around 4.3gbp/s - which is not bad, give 3 of the controllers are limited to 3gbp/s.
Let’s do a read speed.
21 disk read speed
root@test1:/mnt/test1# time dd if=test1.img of=/dev/null
41943040+0 records in
41943040+0 records out
21474836480 bytes (21 GB, 20 GiB) copied, 49.0952 s, 437 MB/s

real    0m49.103s
user    0m20.529s
sys     0m28.248s
It is doing around 3.4gbp/s - which is not bad, give 3 of the controllers are limited to 3gbp/s.
These results suggests the 3gbp/s controllers are the bottle neck, but even so giving relatively good numbers, certainly saturating the dual GigE on the motherboard if the data was leaving the host.
Let’s try a few more tools, good old hdparm
root@test1:/mnt/test1# hdparm -tT /dev/md1

/dev/md1:
 Timing cached reads:   21896 MB in  1.99 seconds = 10996.23 MB/sec
 Timing buffered disk reads: 6050 MB in  3.00 seconds = 2013.94 MB/sec
These seem very very wrong, if this is to be believed, we are doing 16gbp/s, doubtful!
but for comparison a single HDD
/dev/sda:
 Timing cached reads:   13594 MB in  1.96 seconds = 6939.87 MB/sec
 Timing buffered disk reads: 308 MB in  3.01 seconds = 102.22 MB/sec
Running FIO
I have never used FIO before although I have seen some numbers. I am not sure what it means but finding answers on the forums suggests it performs very well.
I used this command and the output was
root@test1:/mnt/test1# fio --randrepeat=1 --ioengine=libaio --direct=1 -gtod_reduce=1 --name=test --filename=random_read_write.fio --bs=4k --iodepth=64 --size=105000M --readwrite=randrw --rwmixread=80
The resulting output
test: (g=0): rw=randrw, bs=(R) 4096B-4096B, (W) 4096B-4096B, (T) 4096B-4096B, ioengine=libaio, iodepth=64
fio-3.28
Starting 1 process
test: Laying out IO file (1 file / 105000MiB)

Jobs: 1 (f=1): [m(1)][100.0%][r=107MiB/s,w=26.3MiB/s][r=27.3k,w=6743 IOPS][eta 00m:00s]
test: (groupid=0, jobs=1): err= 0: pid=5841: Sun Jan 28 00:26:31 2024
  read: IOPS=21400, BW=83.7MiB/s (87.8MB/s)(82.0GiB/1003444msec)
   bw (  KiB/s): min=   16, max=222240, per=100.00%, avg=86497.62, stdev=65547.58, samples=1990
   iops        : min=    4, max=55560, avg=21624.22, stdev=16386.89, samples=1990
  write: IOPS=5358, BW=20.9MiB/s (21.9MB/s)(20.5GiB/1003444msec); 0 zone resets
   bw (  KiB/s): min=    7, max=54776, per=100.00%, avg=22629.65, stdev=16075.92, samples=1902
   iops        : min=    1, max=13694, avg=5657.23, stdev=4018.95, samples=1902
  cpu          : usr=8.15%, sys=30.35%, ctx=6181617, majf=0, minf=9
  IO depths    : 1=0.1%, 2=0.1%, 4=0.1%, 8=0.1%, 16=0.1%, 32=0.1%, >=64=100.0%
     submit    : 0=0.0%, 4=100.0%, 8=0.0%, 16=0.0%, 32=0.0%, 64=0.0%, >=64=0.0%
     complete  : 0=0.0%, 4=100.0%, 8=0.0%, 16=0.0%, 32=0.0%, 64=0.1%, >=64=0.0%
     issued rwts: total=21503052,5376948,0,0 short=0,0,0,0 dropped=0,0,0,0
     latency   : target=0, window=0, percentile=100.00%, depth=64

Run status group 0 (all jobs):
   READ: bw=83.7MiB/s (87.8MB/s), 83.7MiB/s-83.7MiB/s (87.8MB/s-87.8MB/s), io=82.0GiB (88.1GB), run=1003444-1003444msec
  WRITE: bw=20.9MiB/s (21.9MB/s), 20.9MiB/s-20.9MiB/s (21.9MB/s-21.9MB/s), io=20.5GiB (22.0GB), run=1003444-1003444msec

Disk stats (read/write):
    md1: ios=21495384/5378585, merge=0/0, ticks=31171400/31594164, in_queue=62765564, util=98.75%, aggrios=1535273/512707, aggrmerge=19497/20772, aggrticks=2230727/289715, aggrin_queue=2522157, aggrutil=67.55%
  sdcd: ios=1535876/513140, merge=21689/23237, ticks=2654830/534888, in_queue=3190903, util=61.87%
  sdbz: ios=1538111/515020, merge=20991/21733, ticks=2125317/432538, in_queue=2558543, util=59.88%
  sdbv: ios=1537666/514959, merge=18396/18476, ticks=464324/124285, in_queue=589472, util=58.81%
  sdbc: ios=1532266/510557, merge=19268/20329, ticks=3051970/591808, in_queue=3646077, util=63.18%
  sdy: ios=1533226/509737, merge=20233/21591, ticks=2234145/408149, in_queue=2643231, util=60.97%
  sdbb: ios=1533713/511182, merge=21722/23302, ticks=4517761/823997, in_queue=5354193, util=67.55%
  sdba: ios=1535677/513601, merge=22025/23731, ticks=341058/37258, in_queue=378959, util=58.52%
  sdf: ios=1536464/513569, merge=16959/17704, ticks=2528700/421838, in_queue=2954362, util=61.62%
  sdaz: ios=1536534/513980, merge=19586/20512, ticks=370571/36670, in_queue=407738, util=58.58%
  sde: ios=1533479/510022, merge=18606/20941, ticks=280942/40412, in_queue=323263, util=58.49%
  sday: ios=1534307/512167, merge=17272/17549, ticks=270661/38194, in_queue=310634, util=58.45%
  sdd: ios=1535438/512562, merge=20708/23502, ticks=363458/39116, in_queue=402964, util=58.52%
  sdax: ios=1532955/511012, merge=18014/19189, ticks=410740/34215, in_queue=445357, util=58.49%
  sdc: ios=1537377/515147, merge=20142/22924, ticks=409537/121937, in_queue=531866, util=58.89%
  sdb: ios=1538098/515180, merge=18736/19803, ticks=368787/35413, in_queue=404619, util=58.49%
  sda: ios=1535075/512676, merge=16968/17633, ticks=370662/34674, in_queue=405753, util=58.52%
  sdae: ios=1532895/510419, merge=21198/22907, ticks=1018891/54725, in_queue=1074198, util=58.79%
  sdad: ios=1534688/512528, merge=22364/23787, ticks=13922220/1049834, in_queue=14974170, util=64.80%
  sdac: ios=1536754/514816, merge=19230/21200, ticks=6133168/506412, in_queue=6640614, util=58.98%
  sdab: ios=1536332/513772, merge=17682/17898, ticks=2471157/365254, in_queue=2838303, util=62.80%
  sdaa: ios=1533806/510807, merge=17657/18275, ticks=2536377/352416, in_queue=2890093, util=62.51%
Interesting things to note - the read IOPS was 21k and the write IOPS was 5k, these are huge.
Cheap and fast storage servers are relatively straight forward to build
Physical Space regardless of how much you have should be valued
For drives > 10 use a SAS controller and a SAS expander card
For the best performance spread your drives across your controllers, it’s a little work, but worth it!
SSD are low power, noise and heat - they are ££££s but certainly worth it
Do not RAID 84 drives into one array, at most do 21 into one array ,use different controllers!!!
Capacity at current rate 8TB @ £500 each , approx £42000 for 672TB raw storage which is 6.7pence per Gigabyte fixed cost - not monthly, quarterly etc.
Cost to build - time is the biggest factor but hardware wise if all priced
PSU - £120 - never be cheap with a PSU
M/B - £350 - never be cheap with a M/B
LSI cards - 3x - £100
RES240 cards - 3X - £100
Additional controllers - no cost - but £20 each - £60 ( if anyone wants one I have about 100 )
Cables - too much - £300
Chassis - you can get them built by Protocase - the specs can be downloaded £600
Custom PCBs - £600 - it’s the connectors - the PCBs are about £30, but each one has 30 connectors, Digikey about 1.50 average.
For £1500 you too could build one!
I need to add in the power pictures and some other things etc
Leigh Hackspace is open to all.
Being a member gives you access to our space, tools, and community.